%20(1).png)

Ever stumbled upon one of your all-time favorite images and wanted to post it so hard but realized it was a low-resolution image? You try to enlarge it, but it becomes blurry, pixelated, and just plain unusable. It frustrates, right, and we've all been there.
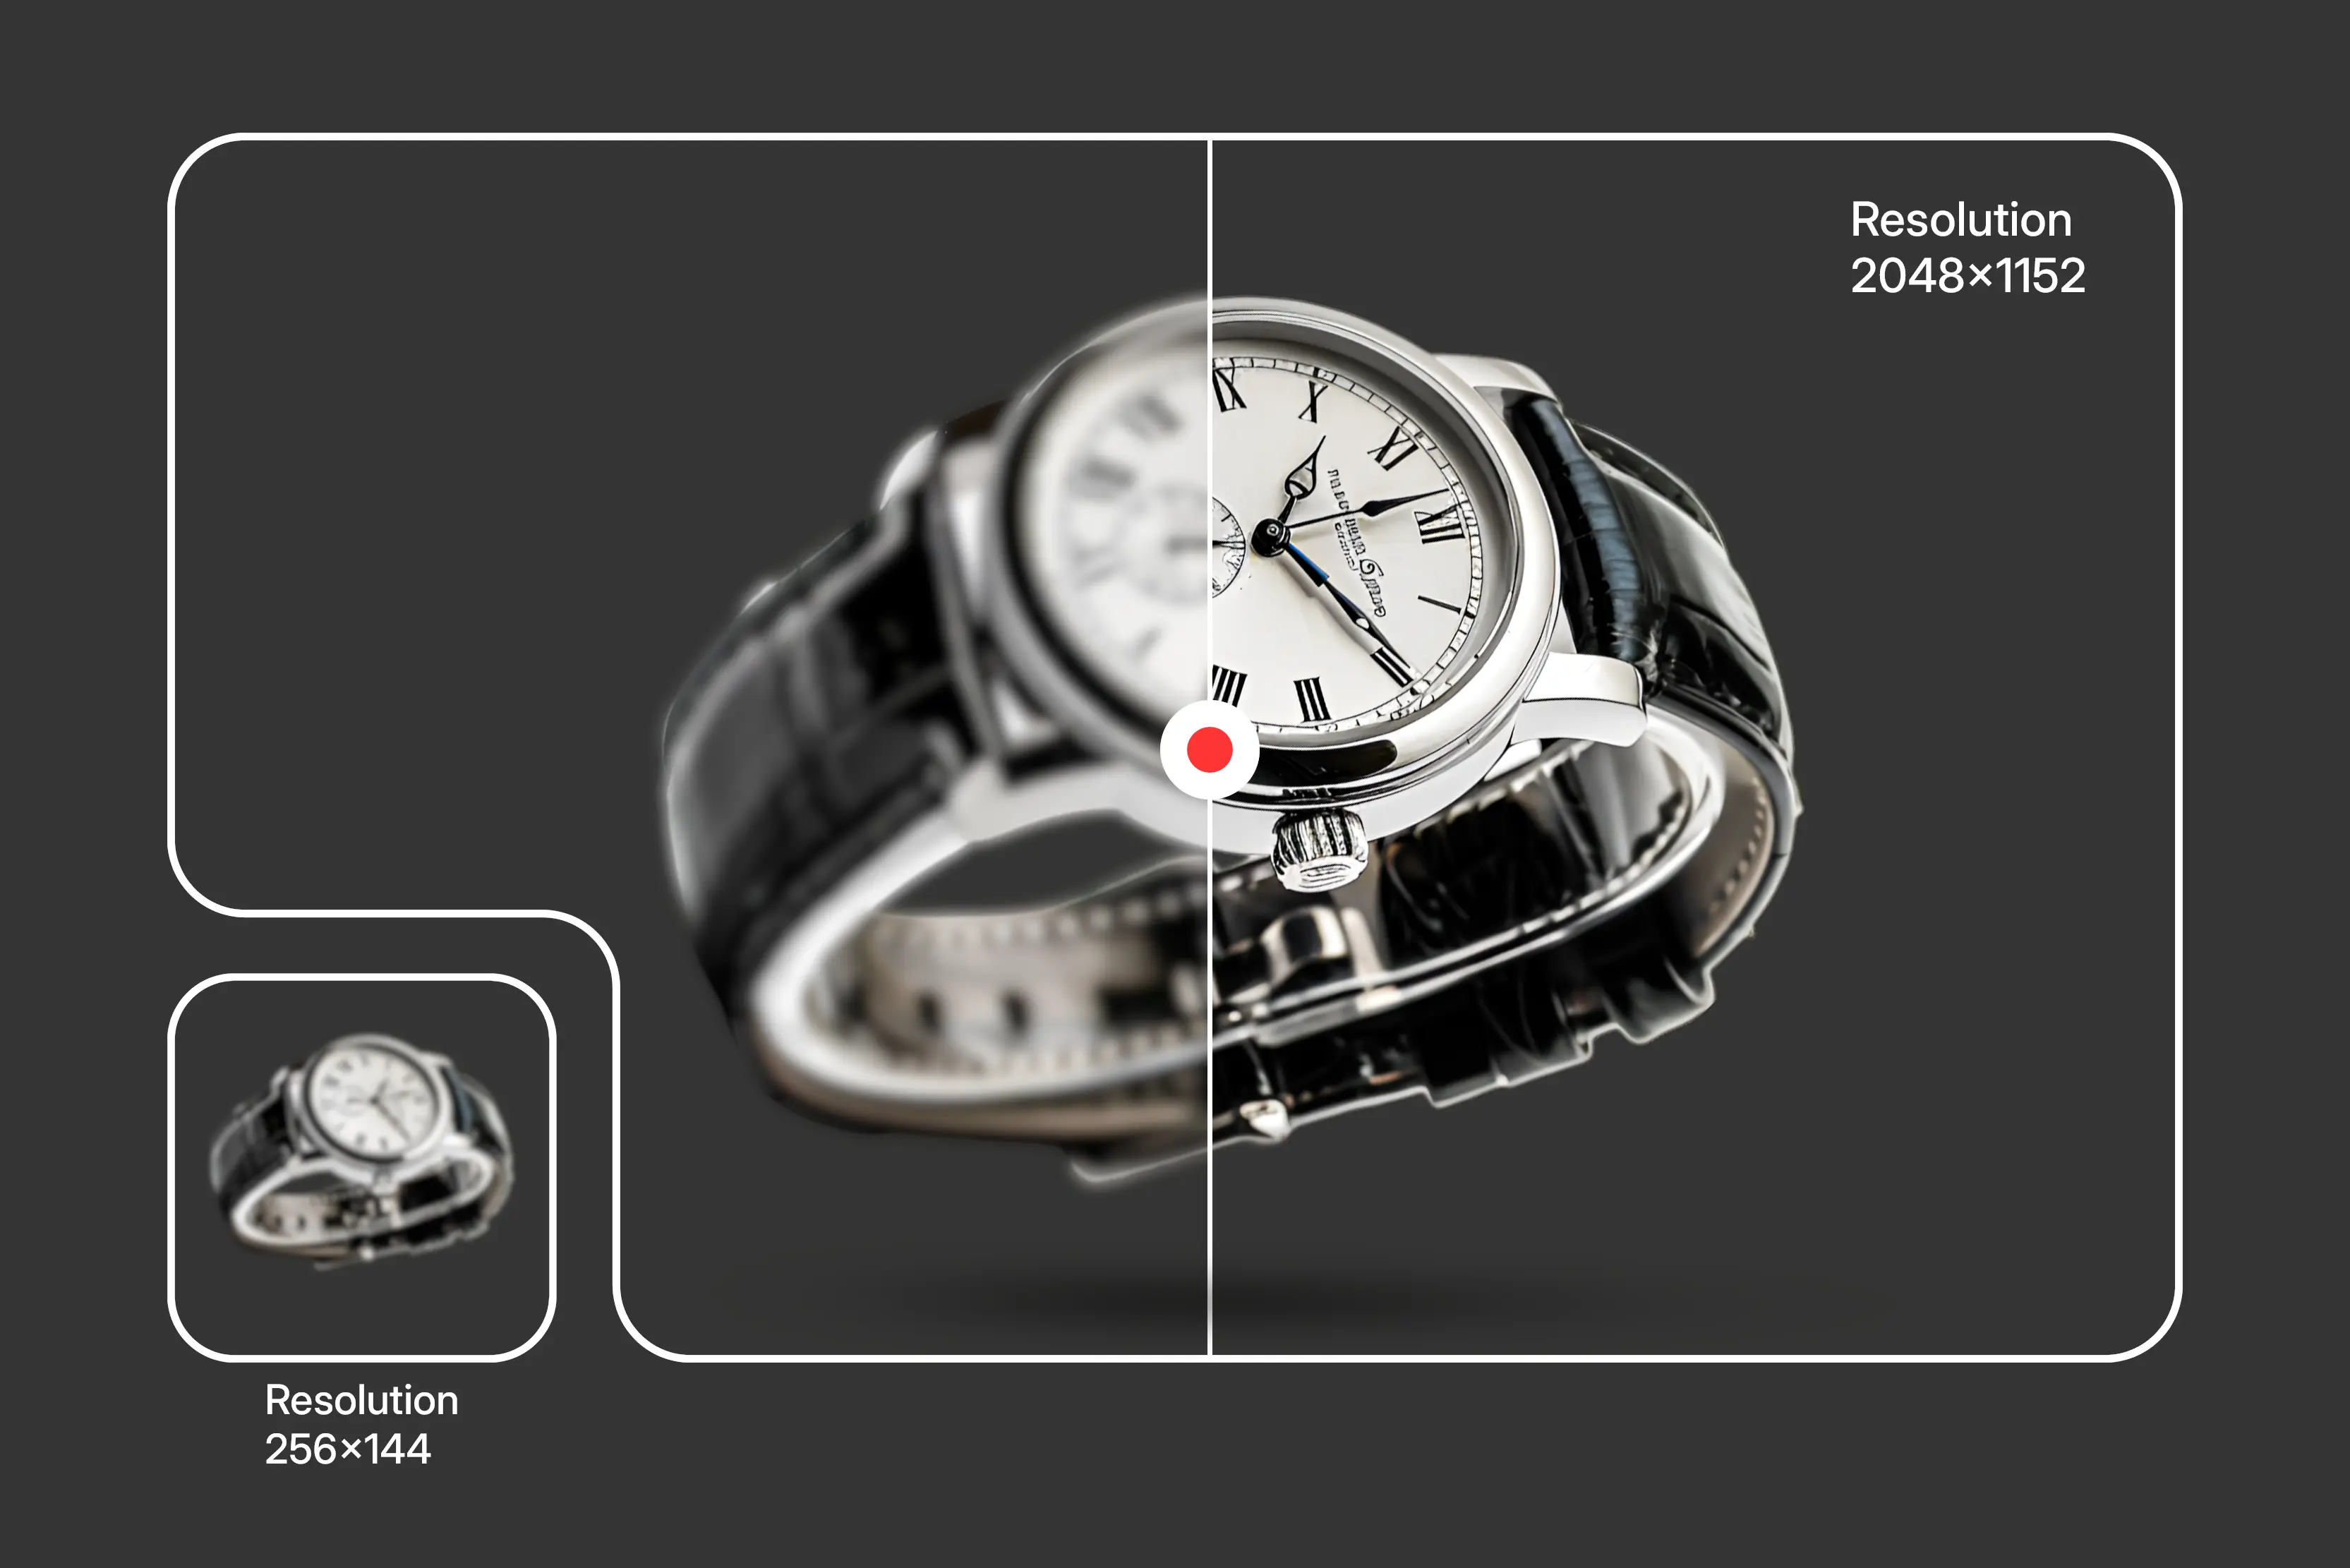
Resizing a low-resolution image increases its dimensions but doesn't add new pixels; this results in a loss of quality.
The good news is you don’t have to give up on those images anymore. In this guide, we’ll cover traditional tools like Photoshop, as well as popular AI-powered upscalers such as Pixelbin, Picsart, and Clipdrop. Let’s dive in and make your images sharp, clean, and ready for anything.
What is image resolution?
Image resolution refers to the amount of detail an image holds, which is measured in pixels, dots per inch (DPI), or pixels per inch (PPI). The higher the resolution, the sharper and clearer the image appears. Know the features of image resolution in detail.
- Pixels: The smallest units of an image. More pixels = more details.
- DPI/PPI: Dots per inch is used in printing; Pixels per inch refers to screen resolution.
- High-resolution: It is suitable for advertisement, printing, and professional images for websites or social media posts.
- Low-resolution: This is best for quick sharing of images through transferring apps or messaging apps, but it is poor for enlargement.
Why do you need to upscale image resolution?
Resolution isn't just about how big an image looks—it determines how clear it looks, especially when enlarged. Here's what you need to know:
- Image size vs. resolution:
- Image size is the physical dimensions, like how big the image is in terms of width and height (like: 1600 × 1780 pixels) / (width × height).
- Resolution is the pixel density in easy language; it's about how tightly packed the pixels are.
- Why image resolution matters:
- For printing an image- A high number of dots per inch makes your prints come out clearer and sharper.
- For viewing on screens- Higher resolution images look better on retina displays.
- For editing an image- high pixel count makes you crop, zoom, or tweak the image without losing quality.
How to upscale image resolution using traditional methods
Traditional tools can offer manual control, especially for people who know photo editing. Let’s look at three popular options.
1. Adobe Photoshop
What I liked: Photoshop gives you manual control in a professional way that’s hard to beat. You can manually sharpen images, reduce noise, and even upscale them. I tried it on a low-quality photo first, cleaned up the noise, and then used the Preserve Details 2.0 feature (thanks to the AI plugin I have) to upscale it. The image looked much clearer, and all those blurry areas were gone.
Steps to upscale image resolution in Photoshop:
Step 1: Open your image in Adobe Photoshop, then select File> Open.

Step 2: After adding the image, go to Image and then Image Size.

Step 3: Add the width and height proportions, and then tick the Resample checkbox.

Step 4: Preview the upscaling of the image.

Step 5: Export the image in PNG format.

2. Microsoft Paint
What I liked: It’s free and extremely easy for quick edits. It was not so ideal for enhancing image quality, but it can be used to resize without much effort.
Steps to upscale image resolution in Paint:
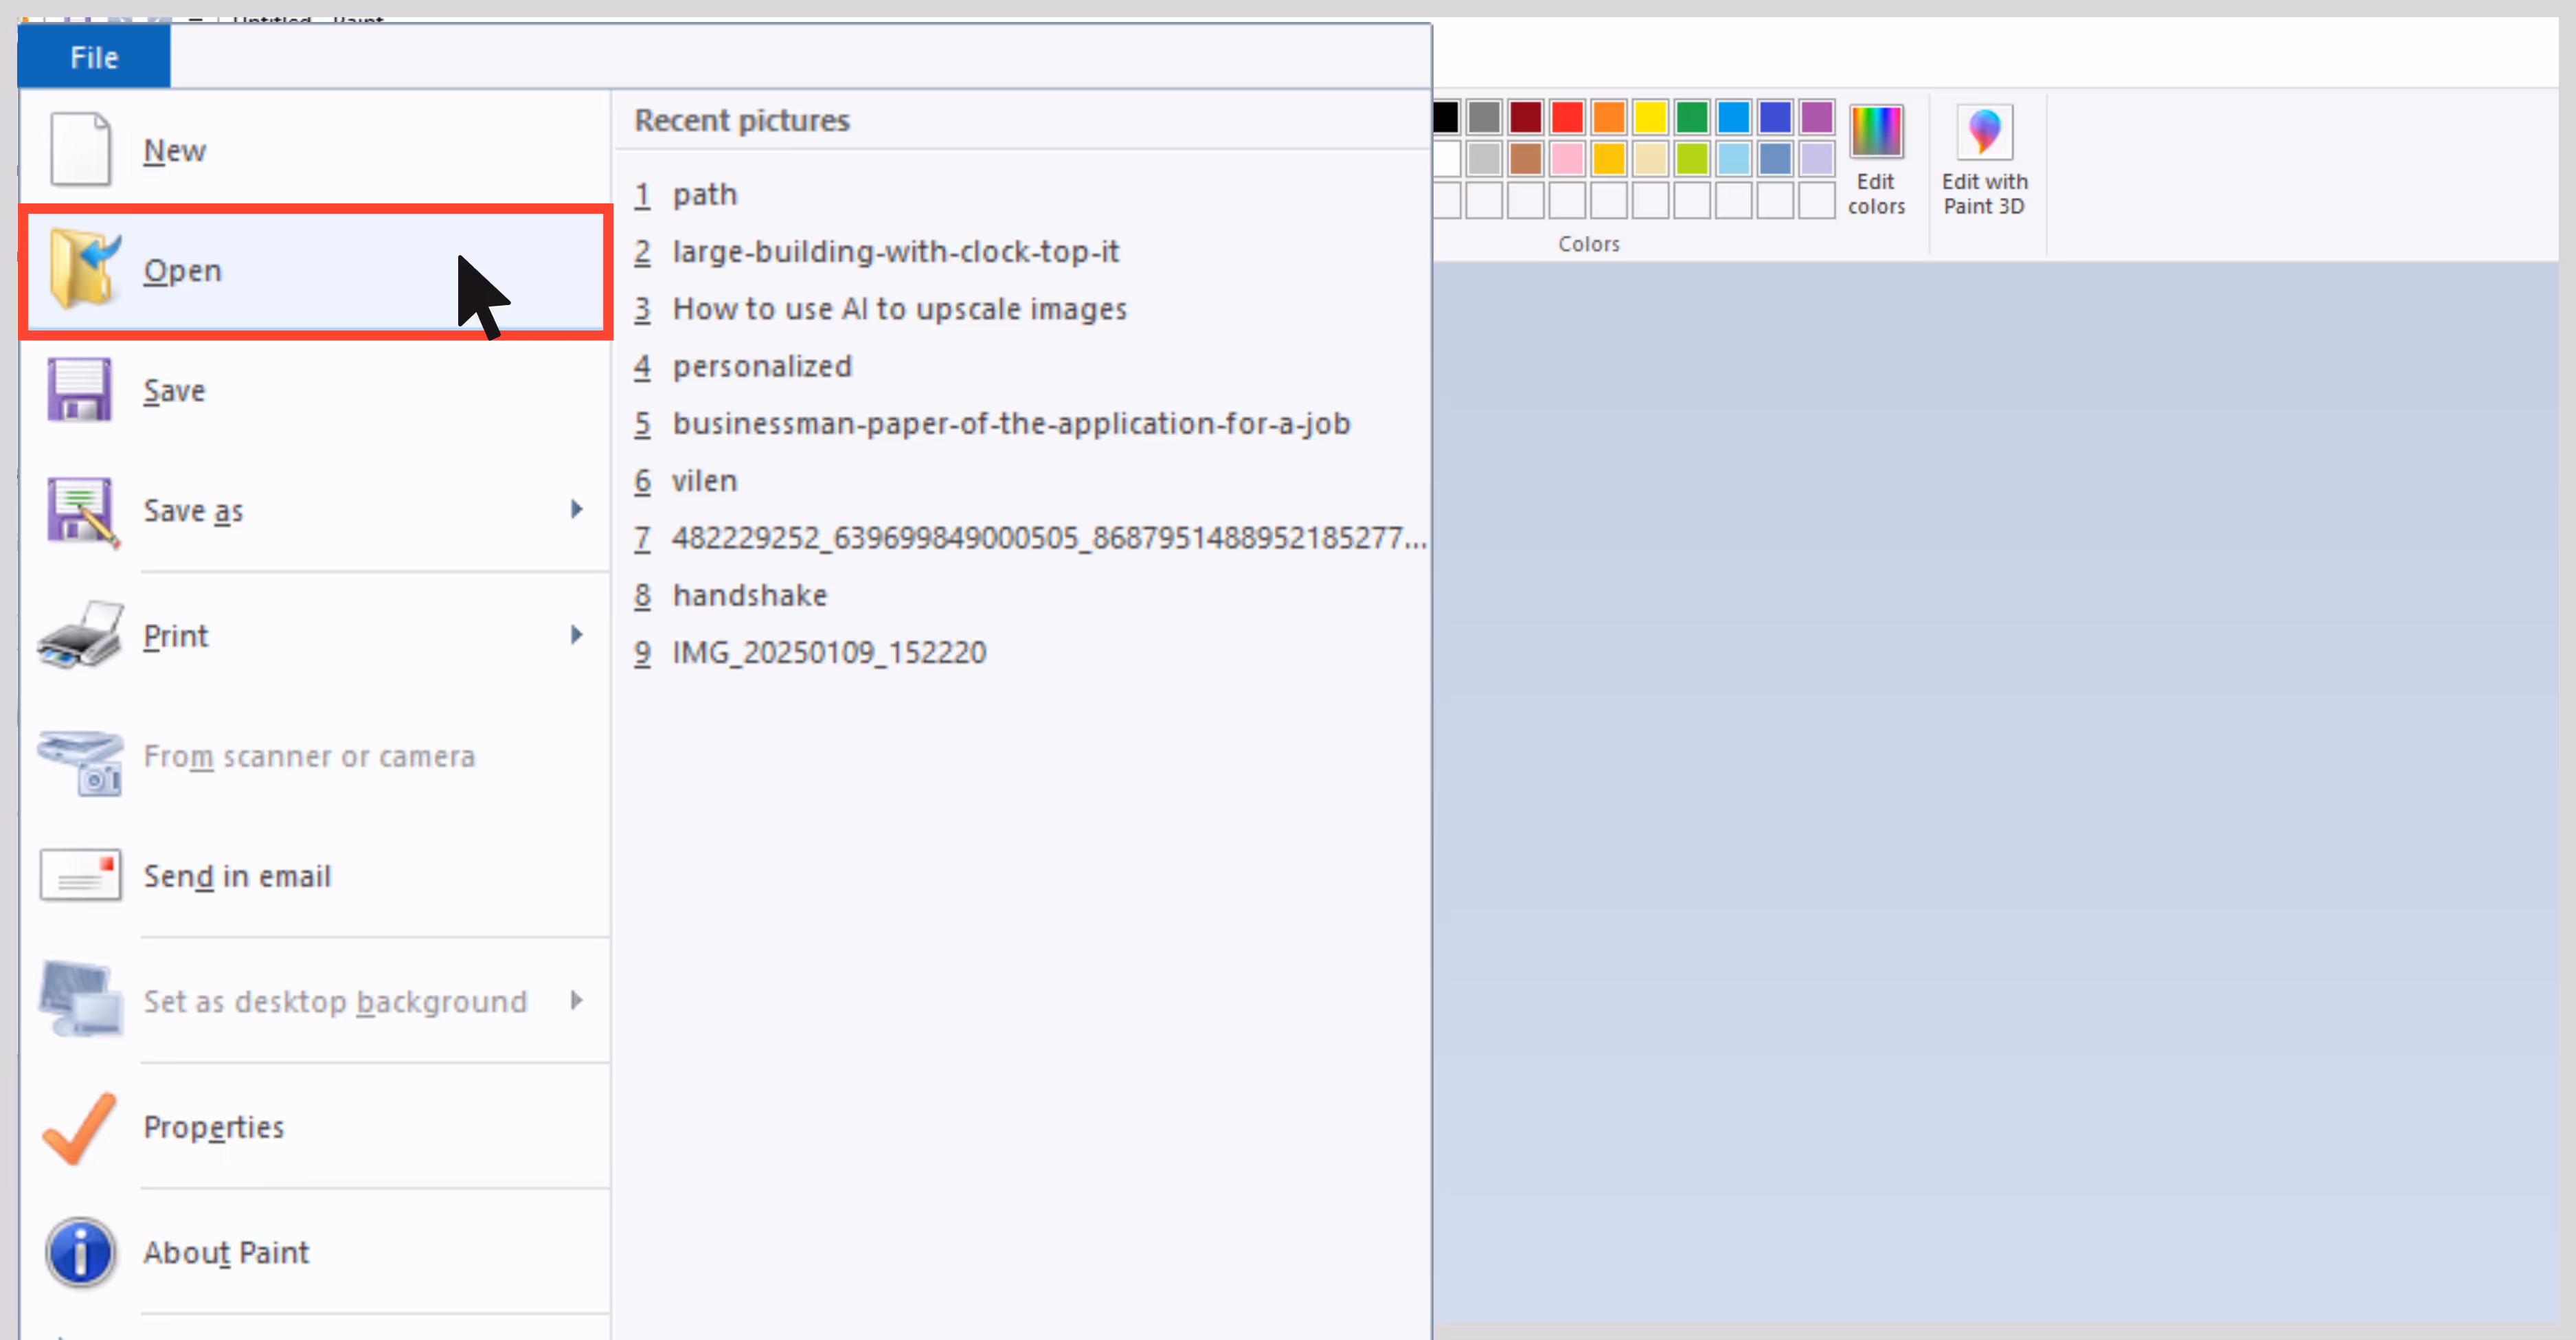
Step 1: Open the image in Paint.
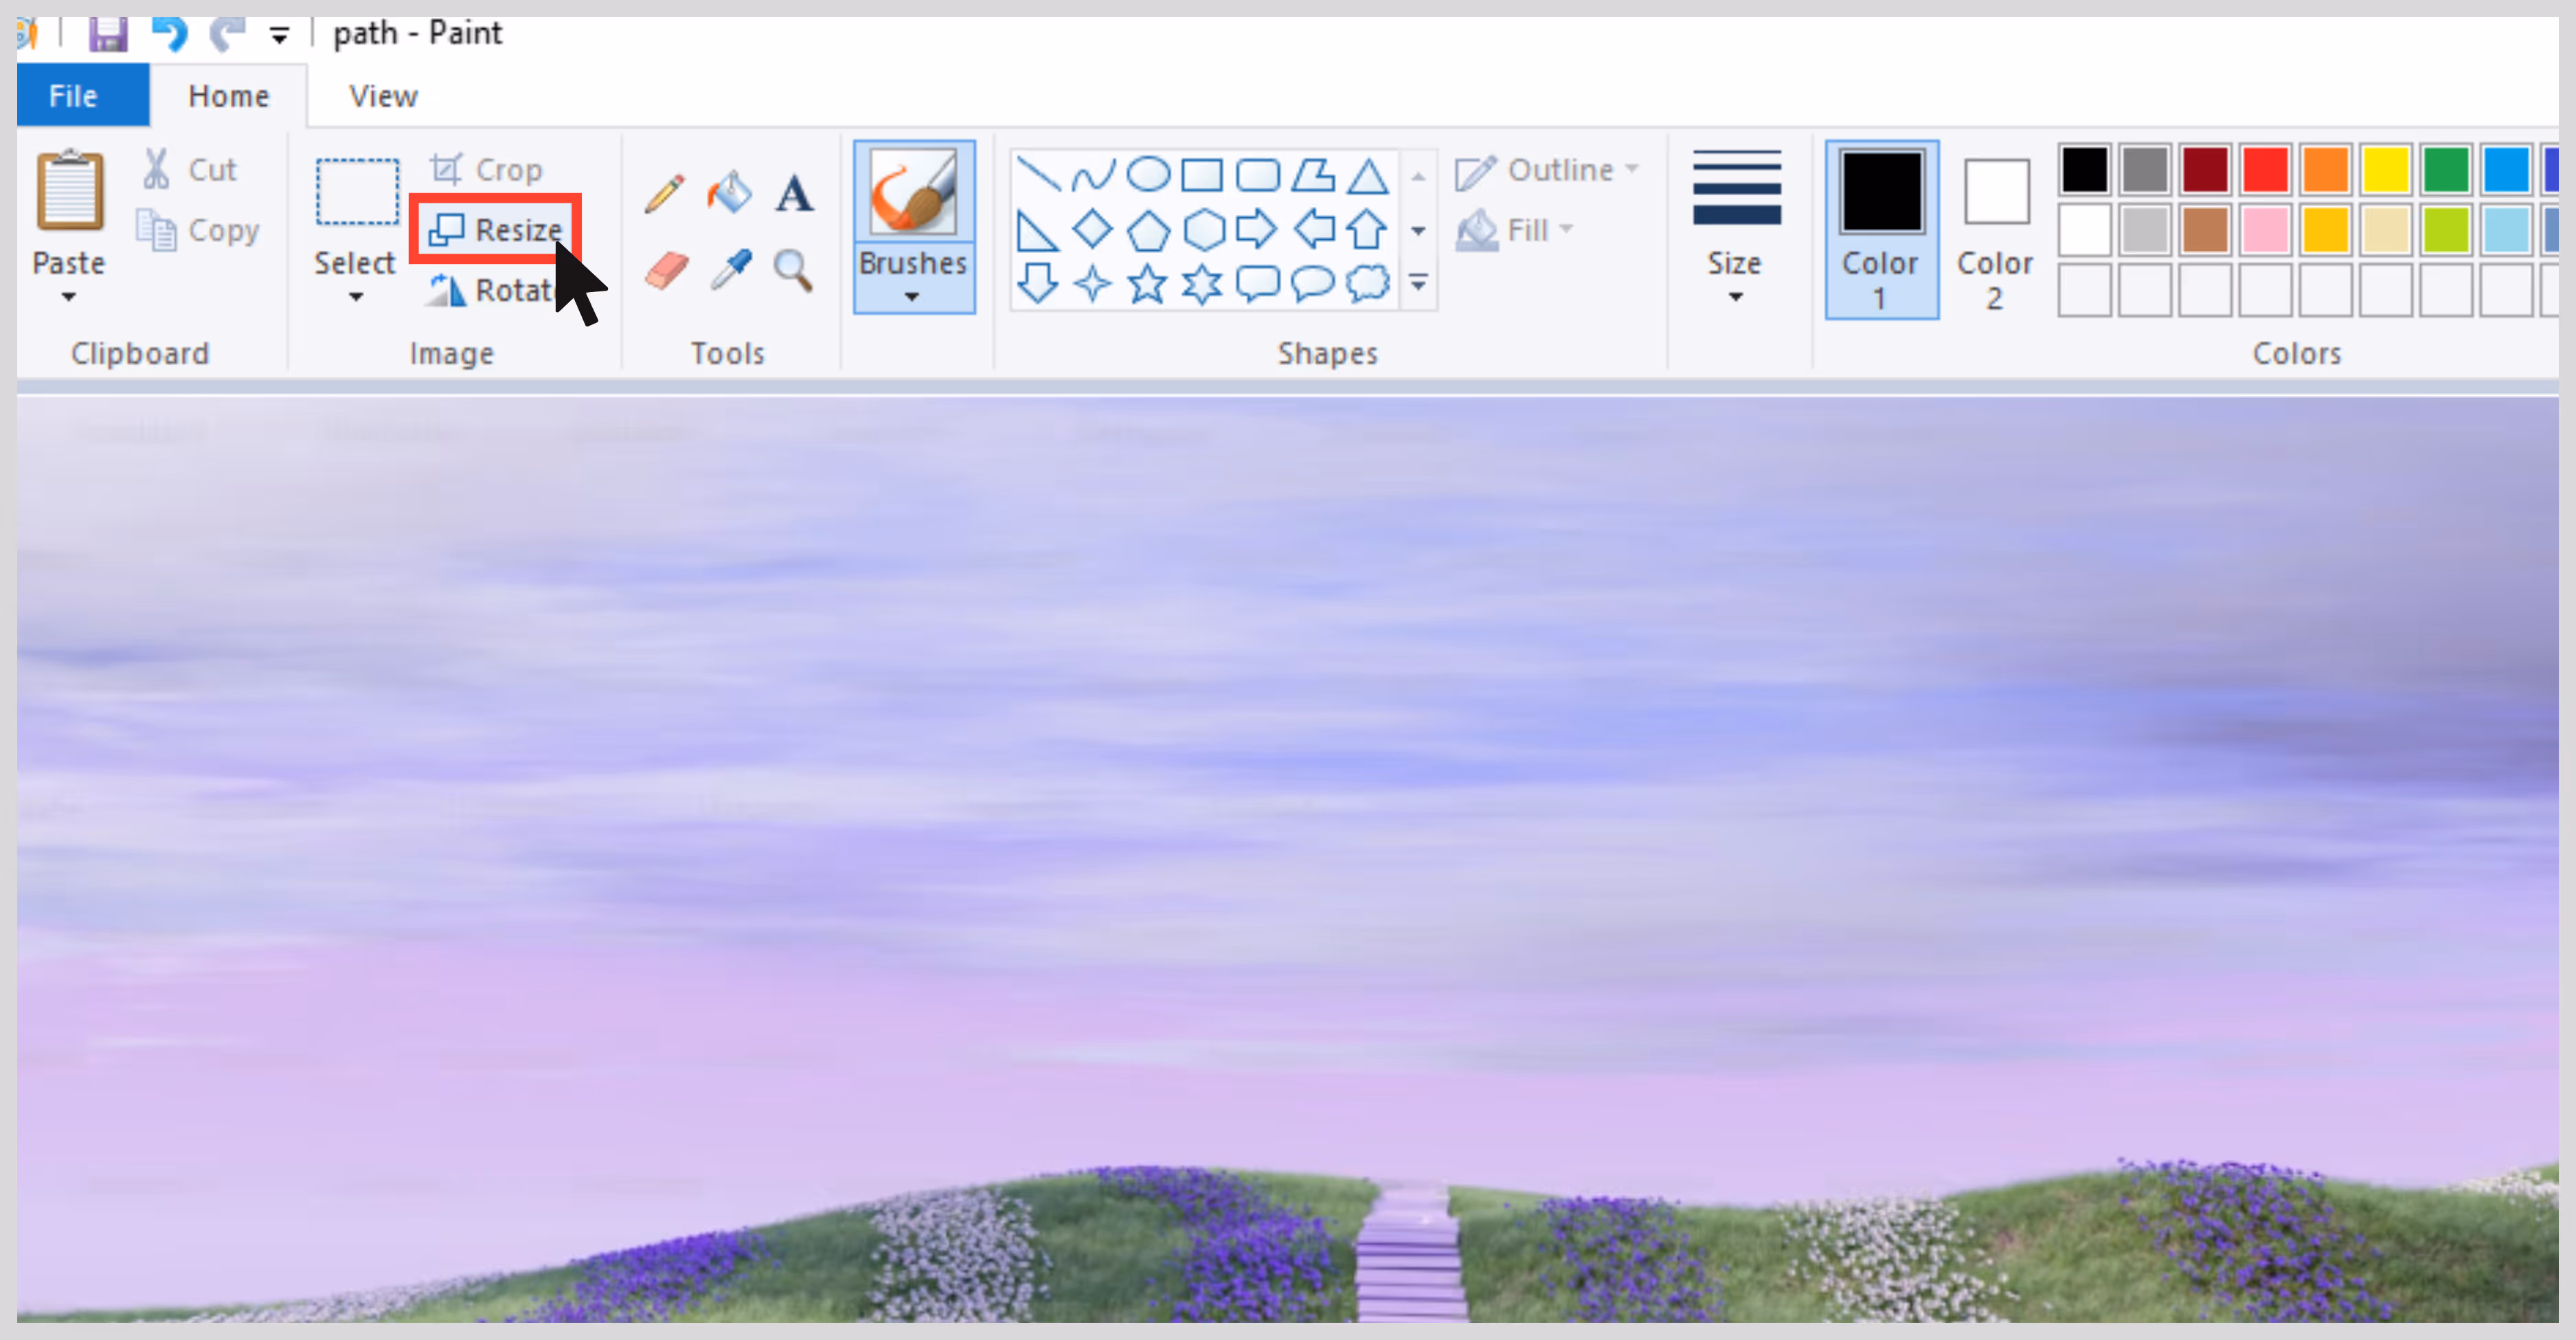
Step 2: Click on Resize.
Step 3: Choose Pixels and uncheck “Maintain aspect ratio” if needed.
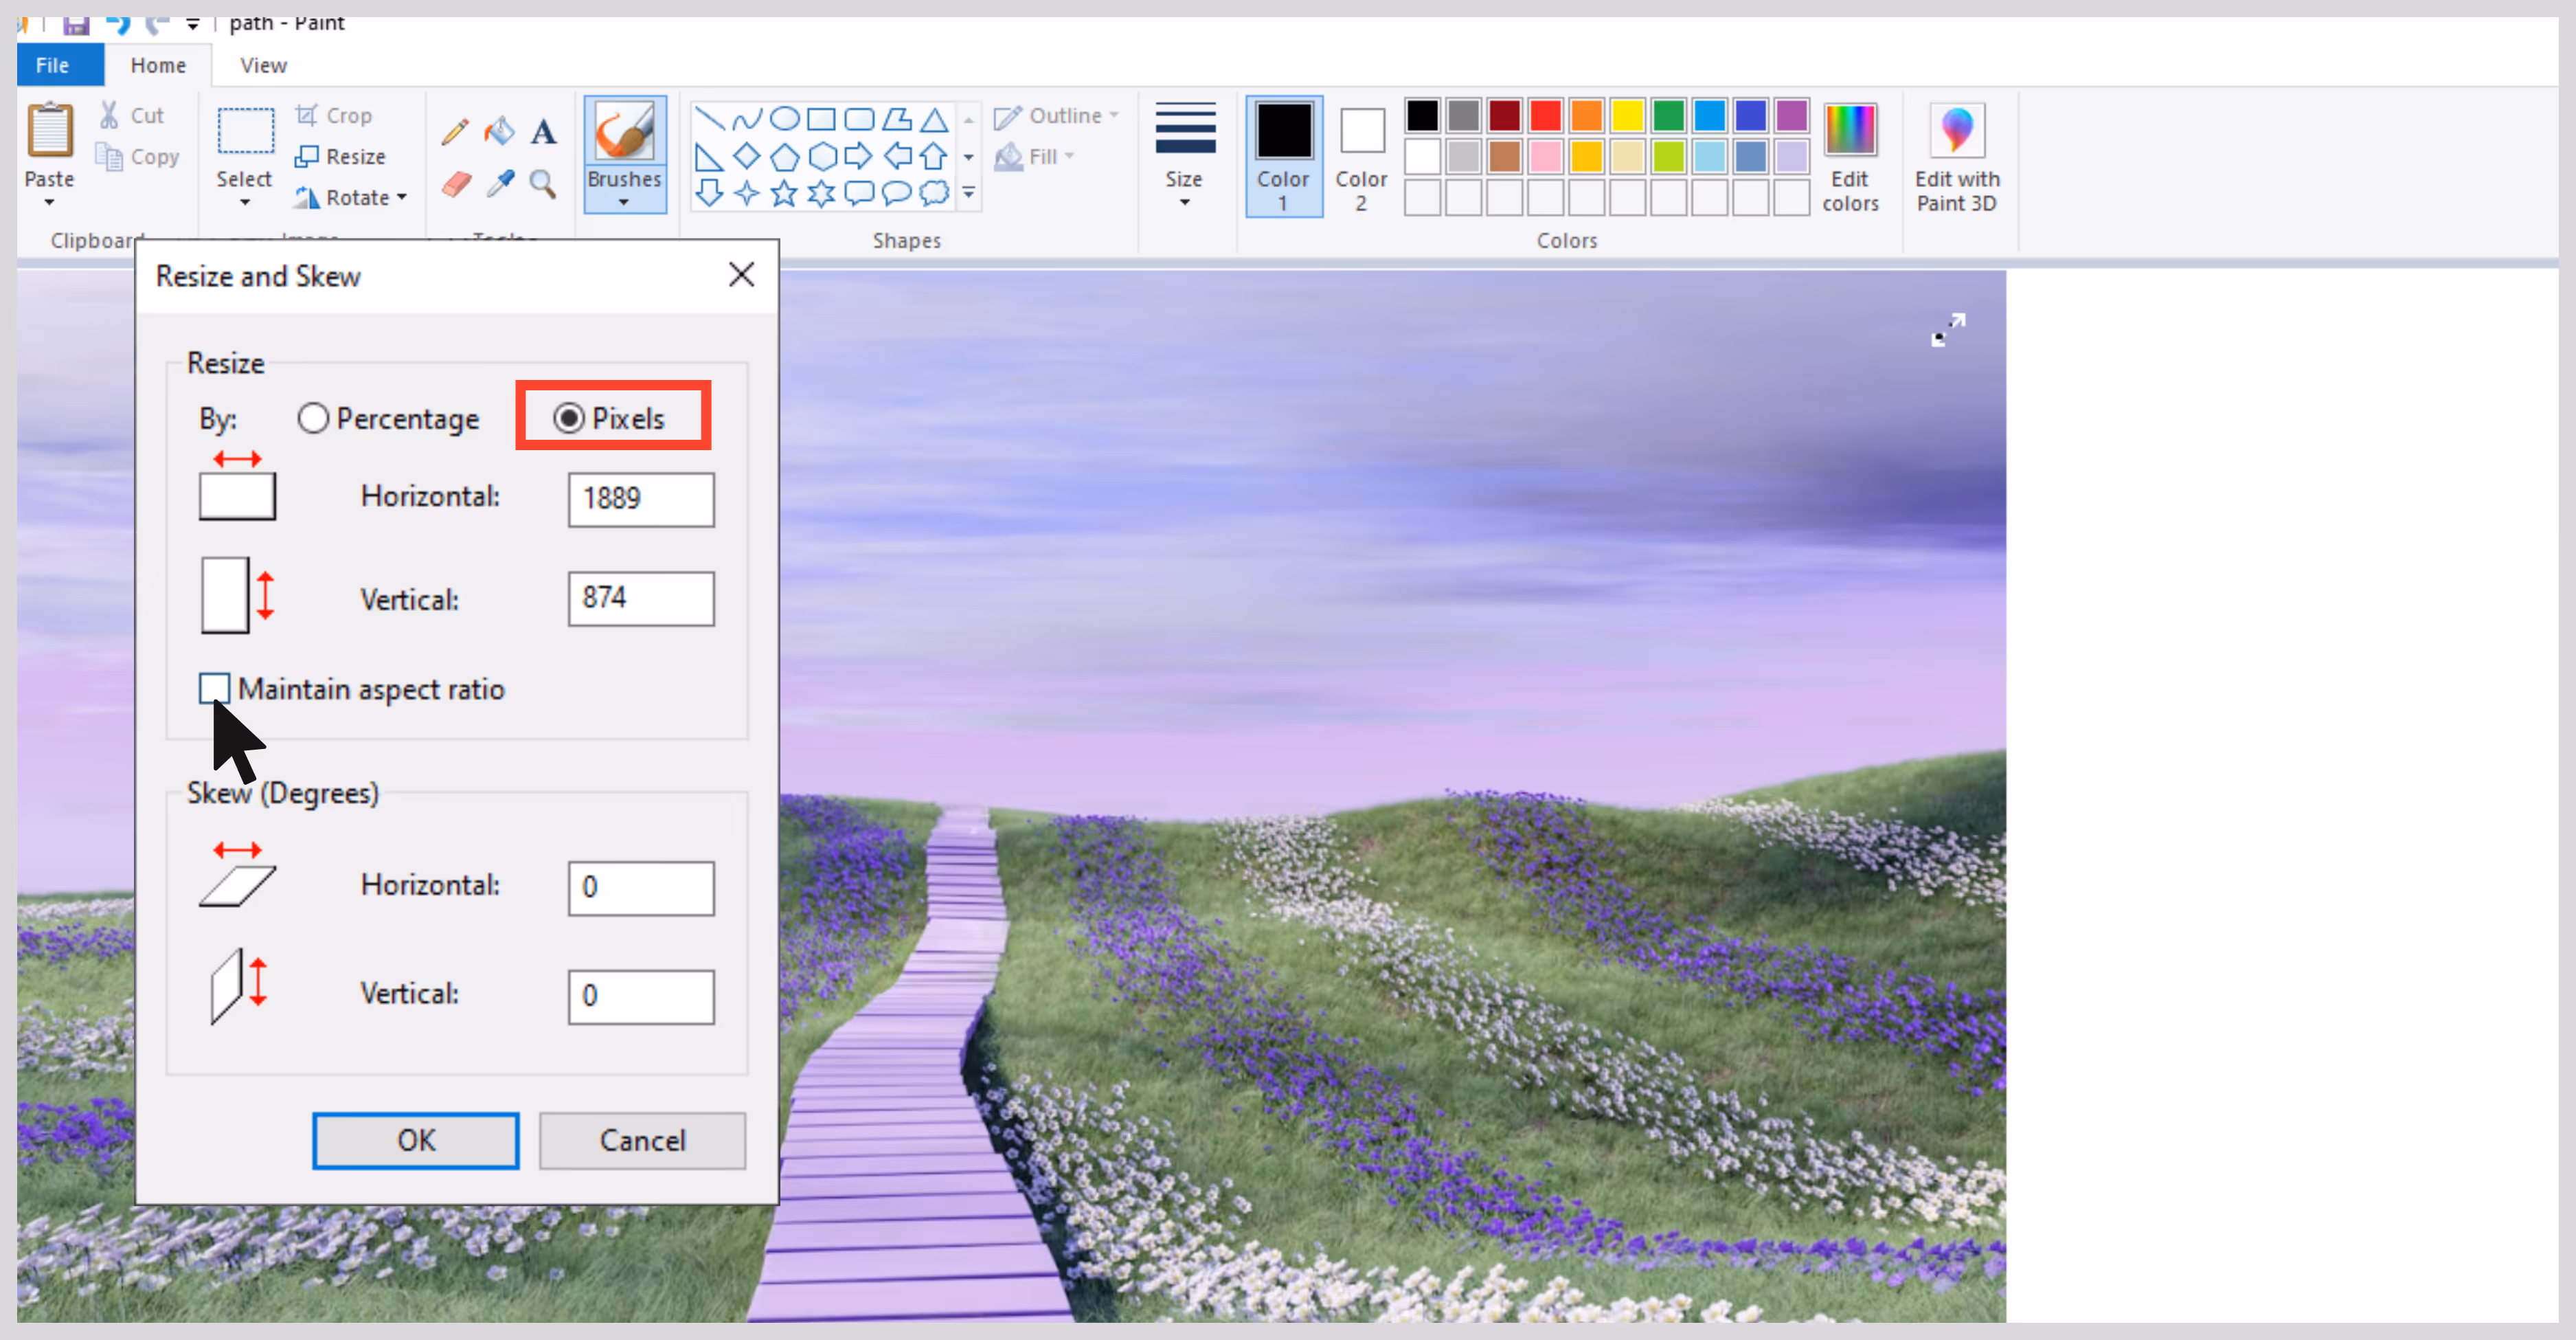
Step 4: Enter desired dimensions.
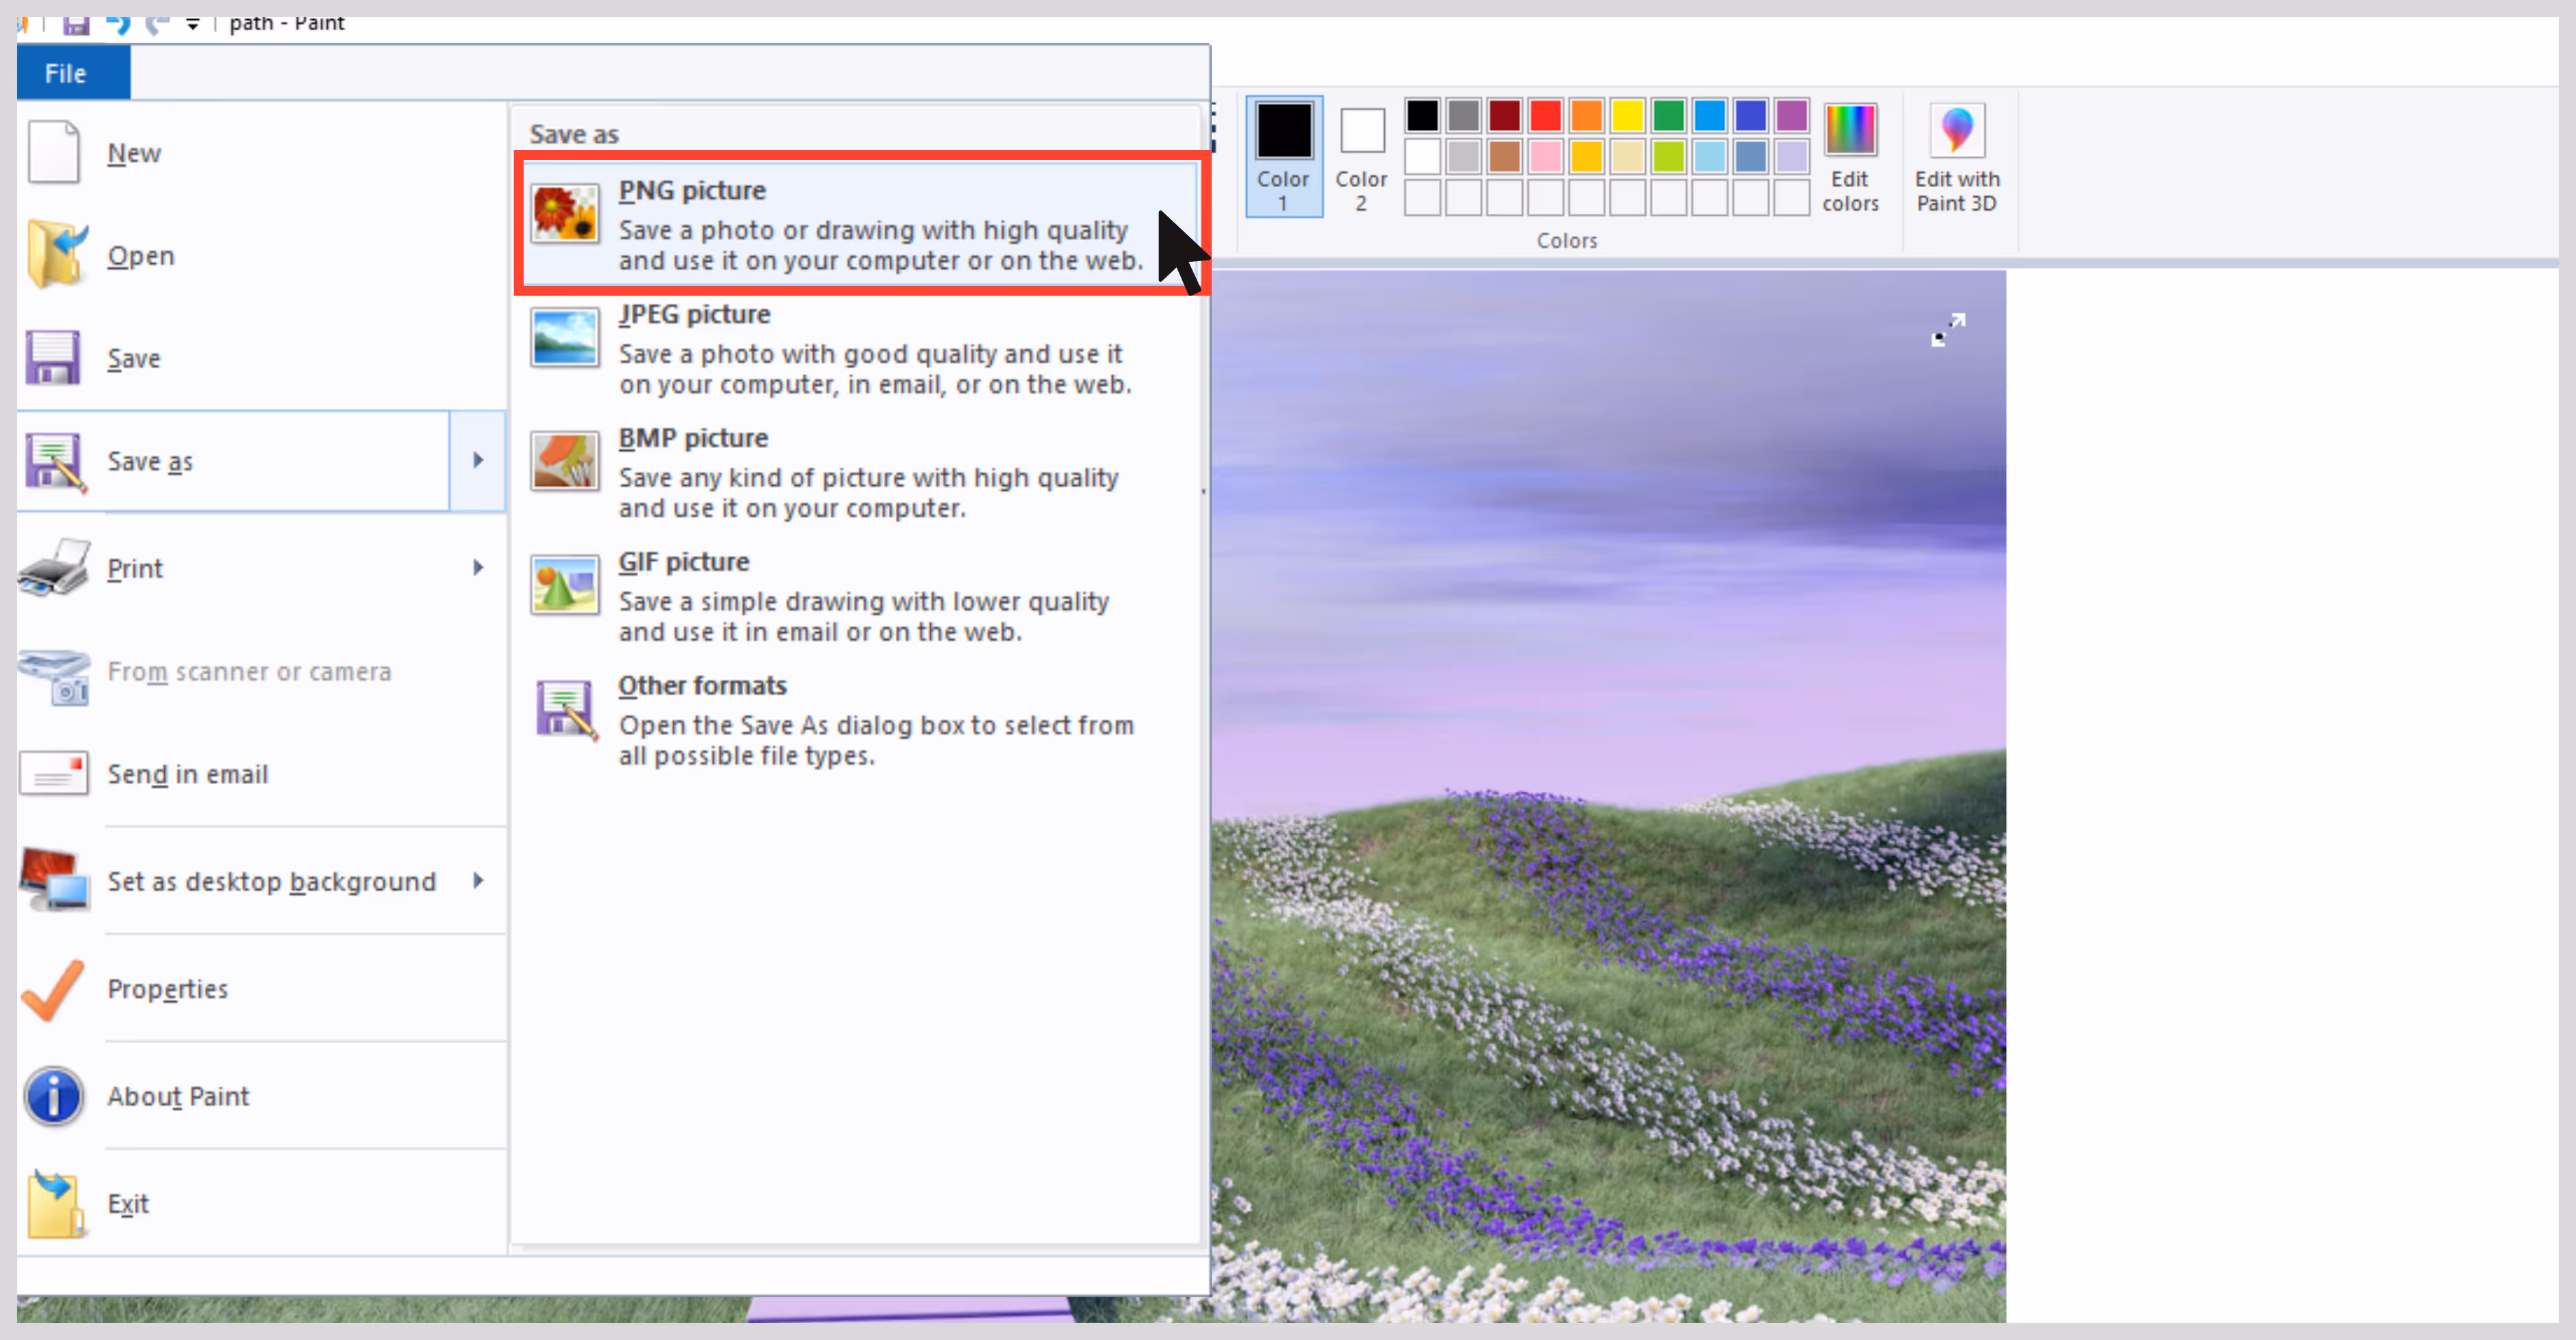
Step 5: Save as PNG for better output.
3. GIMP (GNU Image Manipulation Program)
What I liked: GIMP is totally free yet packed with powerful features. Its interface is a bit like Photoshop and a bit complex for beginners. Once you get used to the interface, it's super handy for editing, retouching, and even upscaling images.
Steps to upscale image resolution in GIMP:
Step 1: Launch GIMP and open the image you want to upscale by going t File and then Open.

Step 2: Go to Image and then select the Scale Image dialog.

Step 3: In the scale image, you can modify the width and height to any desired size by choosing the ratios.

Step 4: Choose the cubic interpolation method.

Step 5: Click on the scale button to apply the changes.

Step 6: After the final results, go to file and export as, choose a file name, and click on export, and your upscaled image will get saved.

How to upscale image resolution using AI image upscalers
Traditional methods work, but they’re time-consuming, and results may vary. That’s where professional AI image upscaling tools are the best. They use deep learning to intelligently add missing details while keeping edges sharp. Let’s review the top tools;
- Pixelbin
- Upscale.media
- PIxelcut
- Picsart
- Canva
- ILoveIMG
- Clipdrop
- PhotoGrid
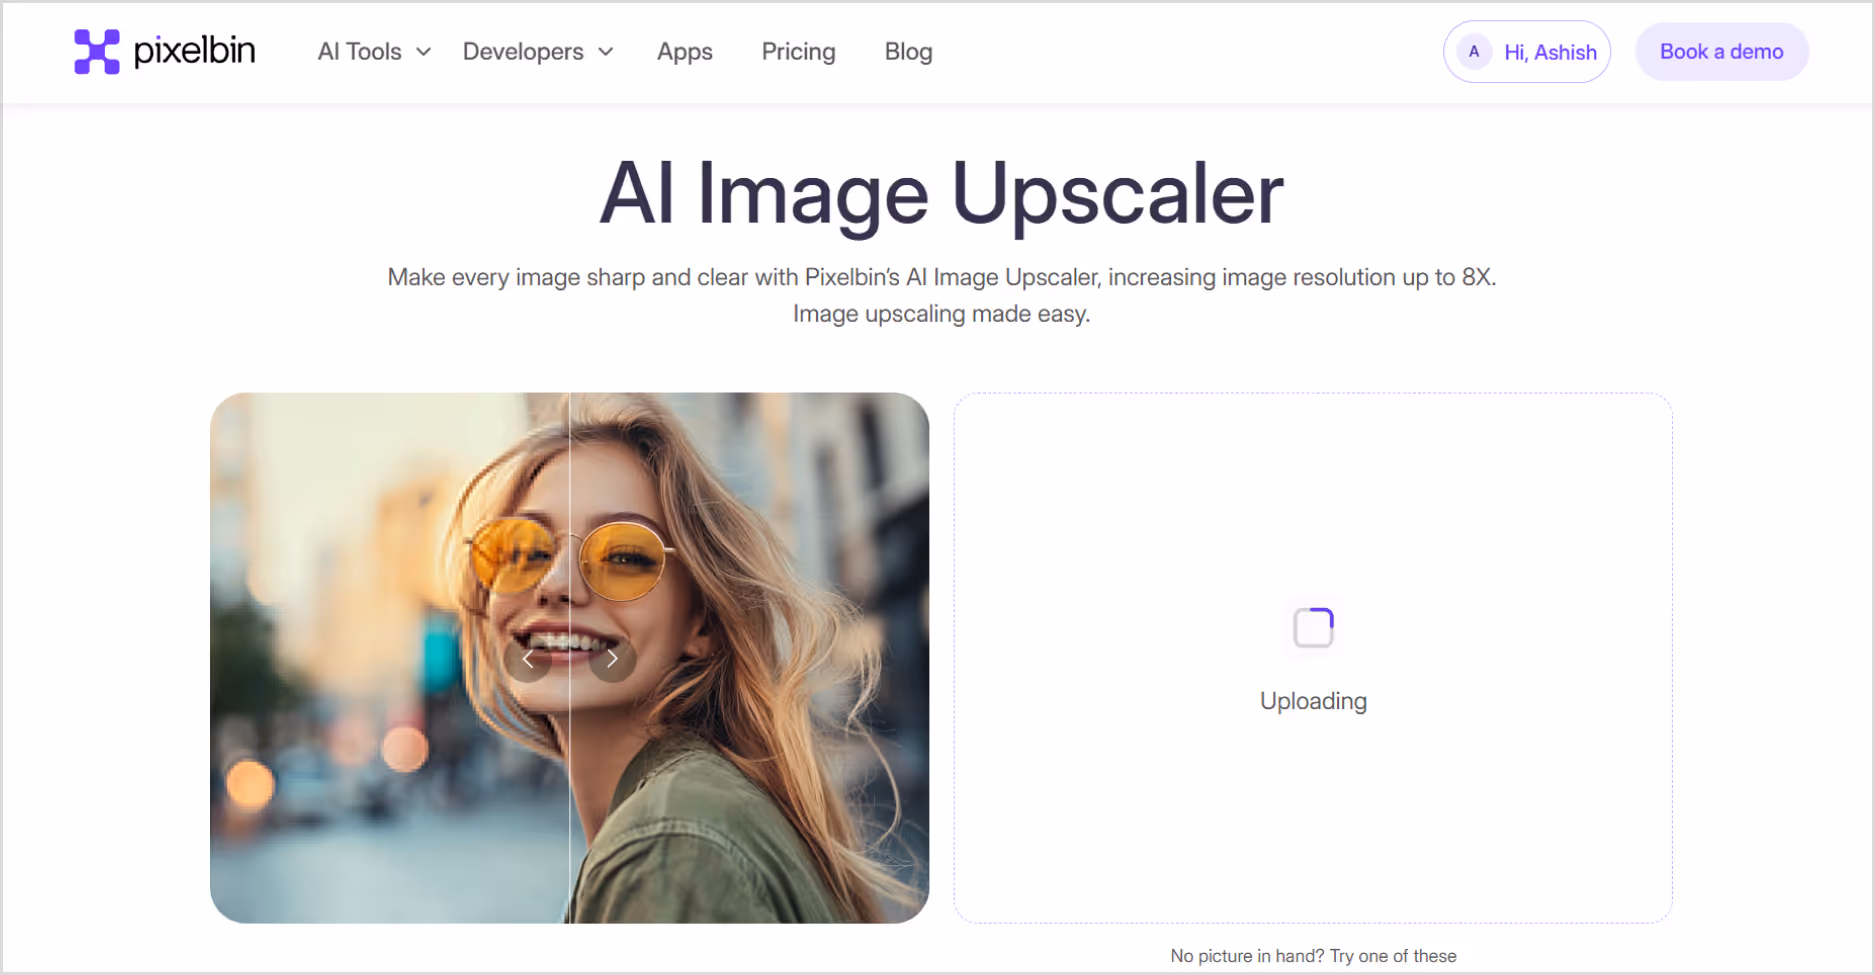
1. Pixelbin Image Upscaler
When I came across Pixelbin, I found out how effortless it makes the whole upscaling process. The interface is clean and easy to understand, even if you’re new to this tool, it won't be a complex thing to upscale images. Also, the batch processing option is a great feature for users having heavy workloads.
After trying it out with a low-quality image, I was genuinely impressed. The final result had noticeably sharper edges and much better detail in the textures—it felt like the photo got a professional touch without me doing much at all. What I loved about the tool;
- Sign up and get free 4x and 8x upscaling credits.
- Quick processing speed, results delivered under 10 seconds.
- Maintains a clear and sharp image, with a feature named as texture-preserving image details.
- Clean and easy-to-understand interface, just upload the image and the algorithms will upscale them automatically.
- It's one of the best for website images, product photos, and social media graphics.
How to upscale the image resolution in Pixelbin
Step 1: Go to https://www.pixelbin.io/ai-tools/image-upscaler.
Step 2: Upload your image by selecting it from your device or simply pasting the image URL.
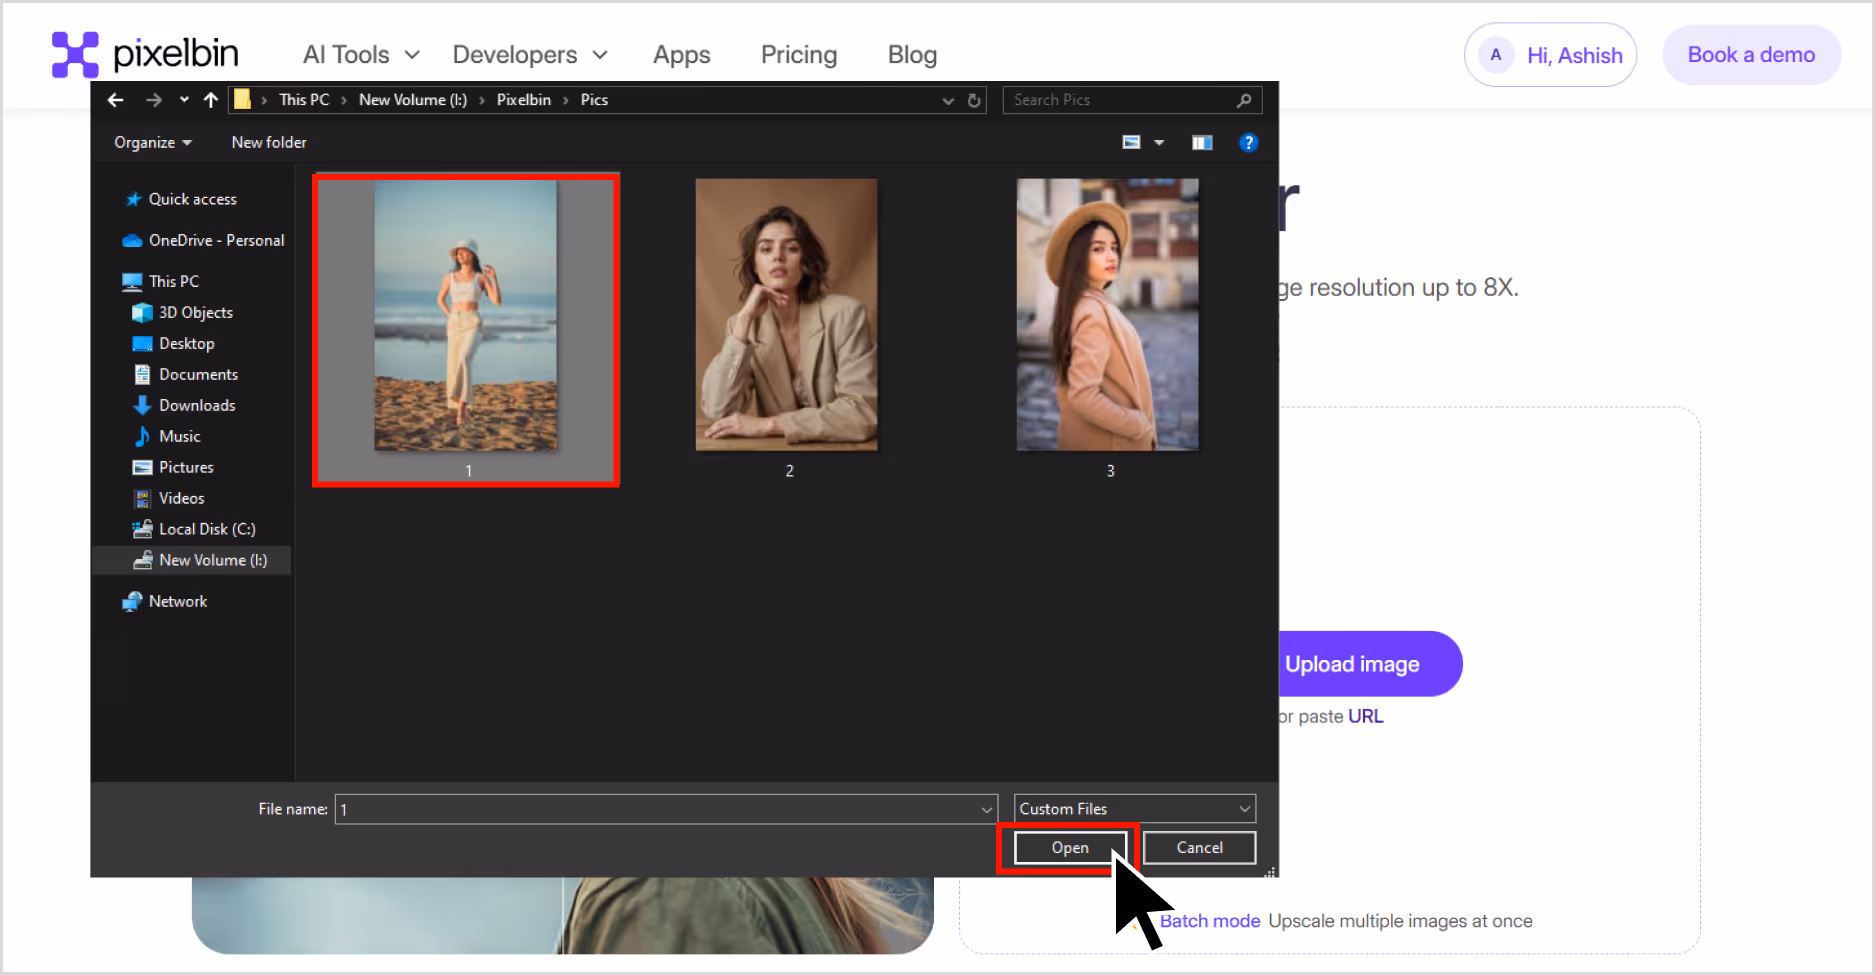
Step 3: As batch processing is a feature, you can add up to 10 images in one go.
Step 4: Choose your image upscale size—2x, 4x, or 8x.
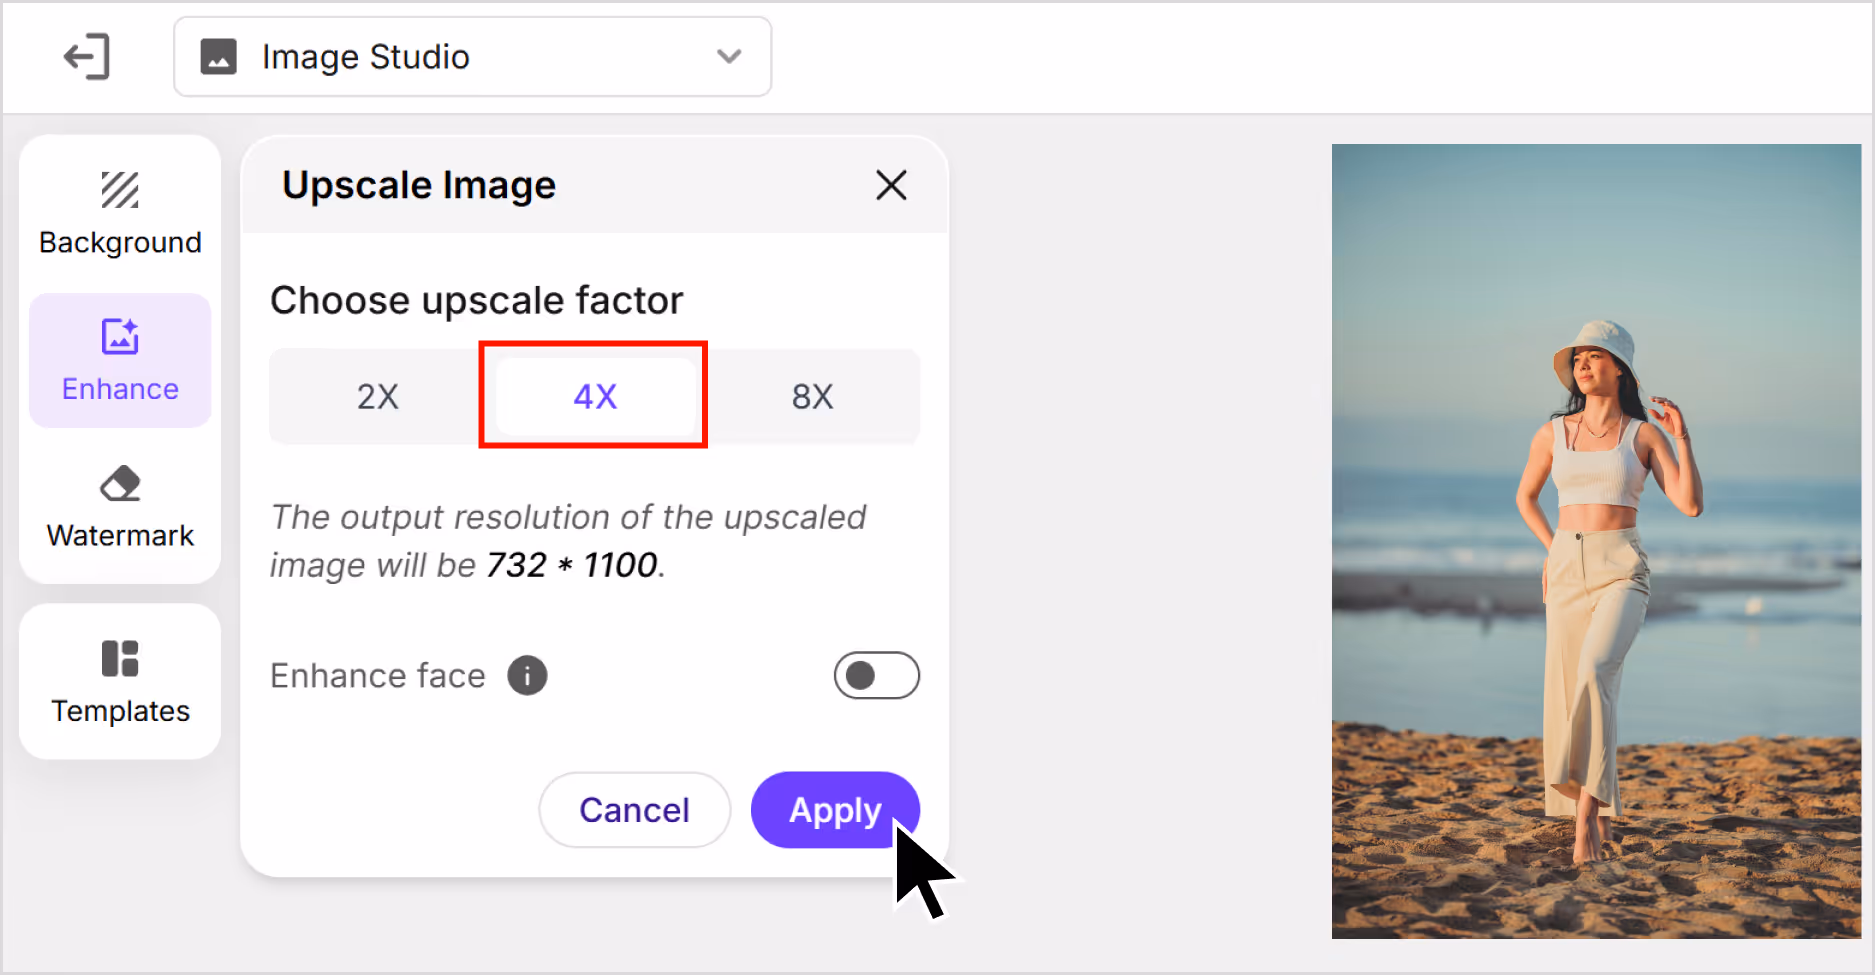
Step 5: You can adjust saturation, brightness, and hue under the “Adjust” tab. You can also remove or change the background, add new templates, and remove the watermark after you sign up.
.avif)
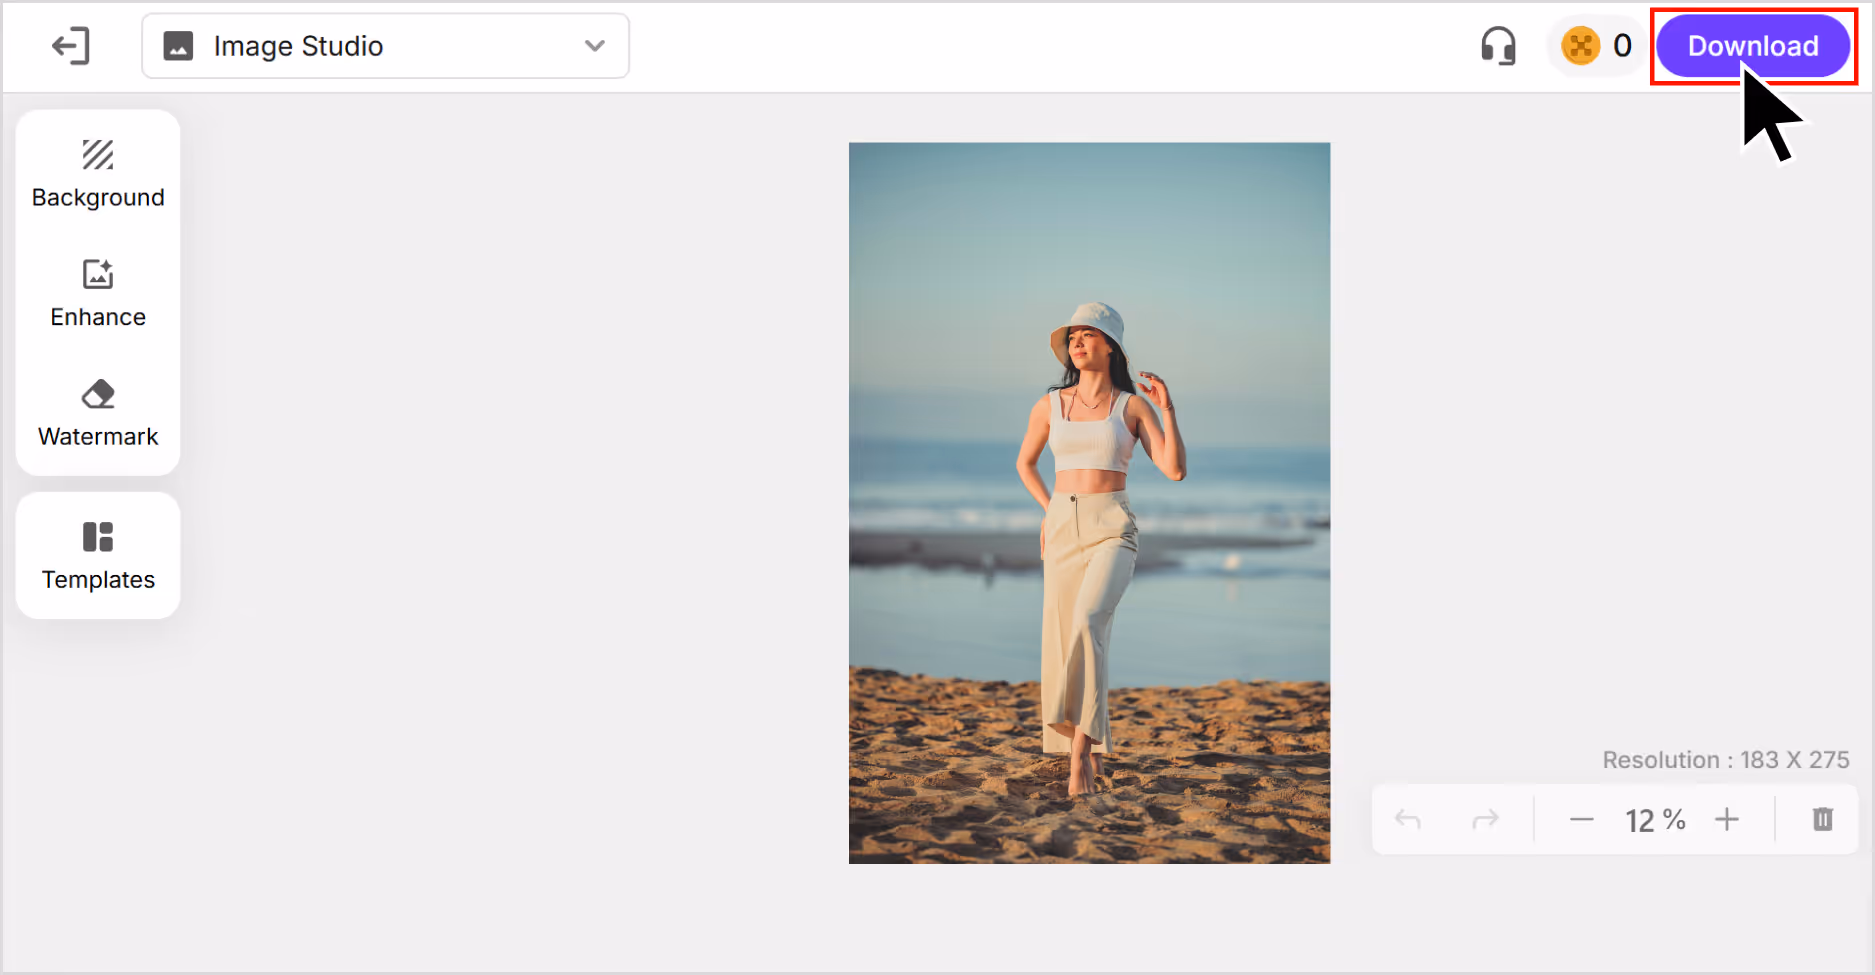
Step 6: Preview the image and select 'Download' to save it in SD or HD resolution.
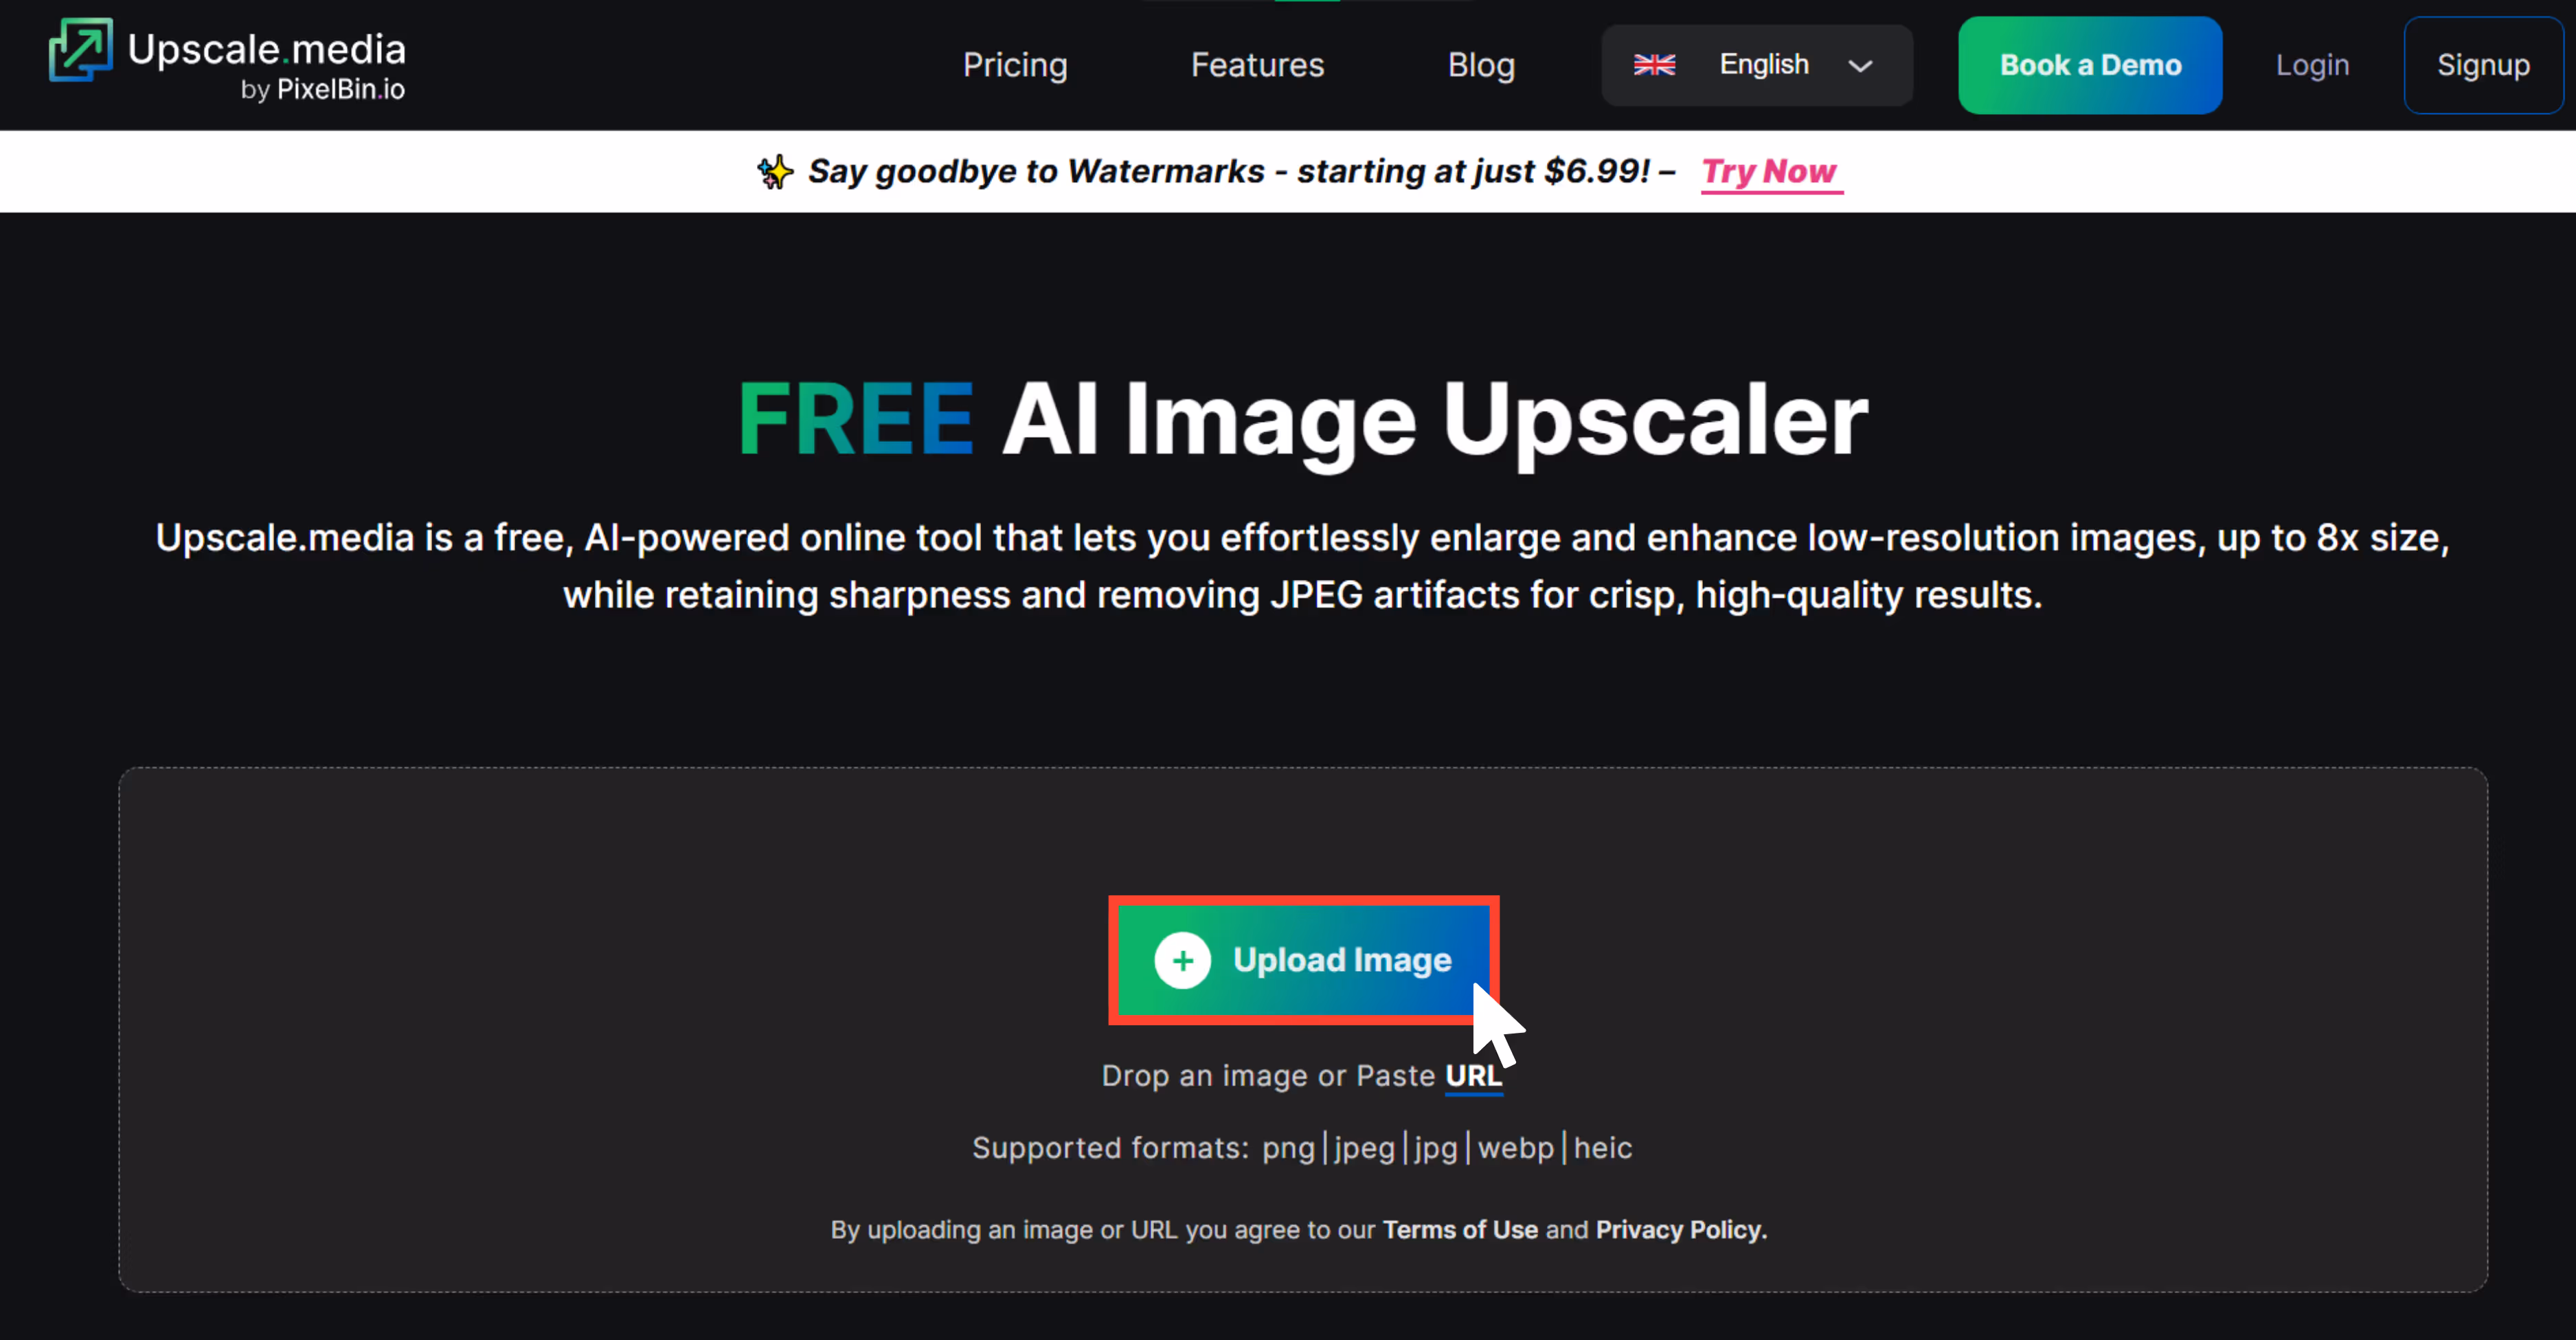
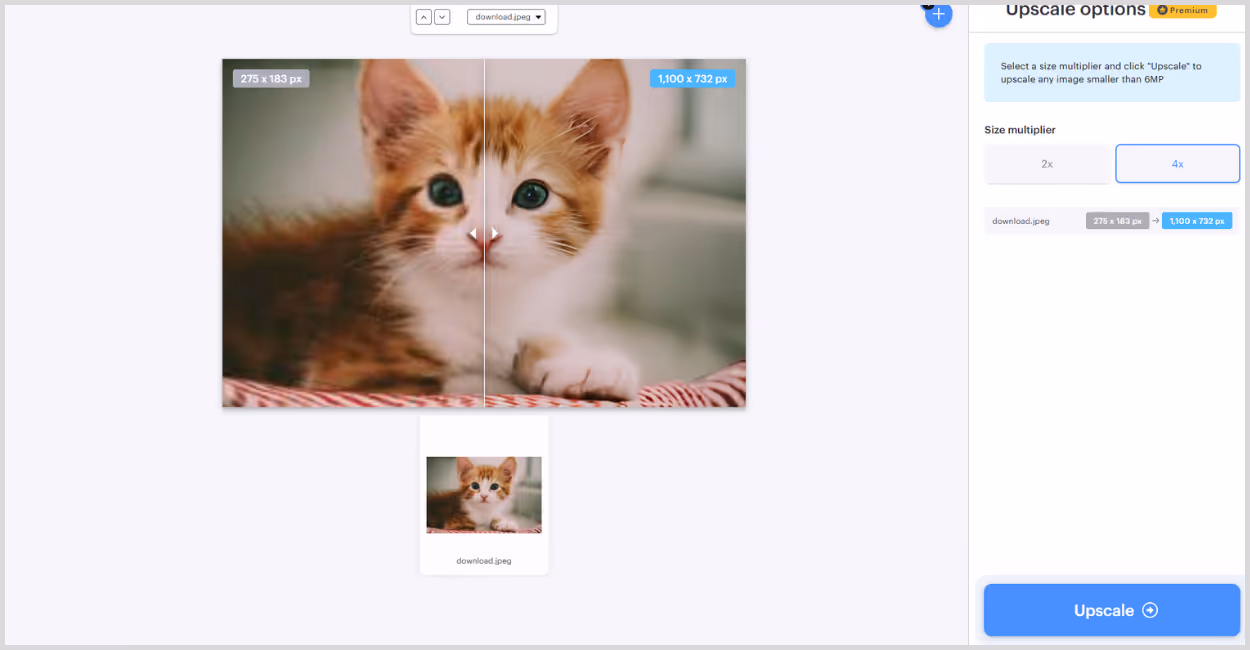
2. Upscale. media
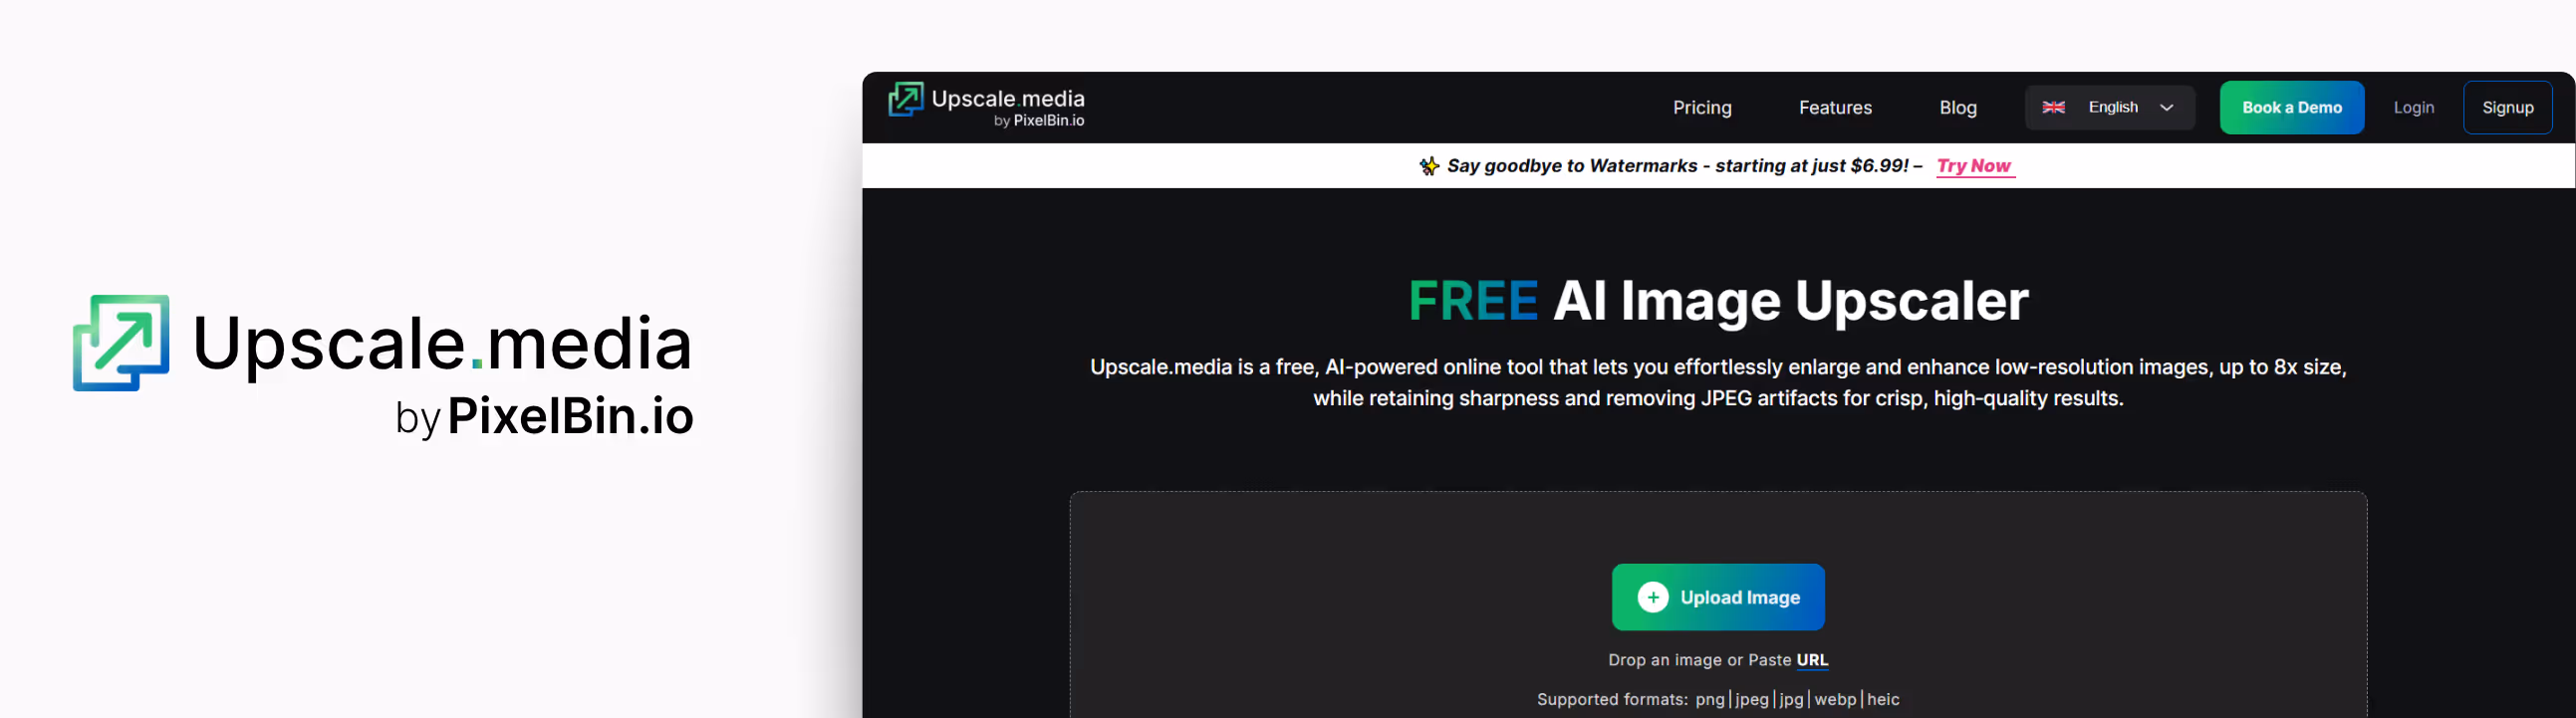
After I opened the tool and tested it with an image, I was impressed by seeing how fast Upscale.media works. And the best part? You can upscale images up to 8x without even signing up. It’s super convenient when you just need a quick quality boost.
When I ran a slightly blurry image through it, the clarity and colors were definitely enhanced. It removed all the blurry spots. There was a tiny bit of texture softness in some spots, but for a free tool, the results were honestly pretty impressive. What features made me love the tool?
- No need to sign up or install anything—just drag and drop the image.
- It’s quick; my result came through in seconds.
- AI noise reduction works automatically, which cleans up the grains.
- The interface is clean and beginner-friendly.
How to upscale the image resolution in Upscale.media
Step 1: Go to https://www.upscale.media.
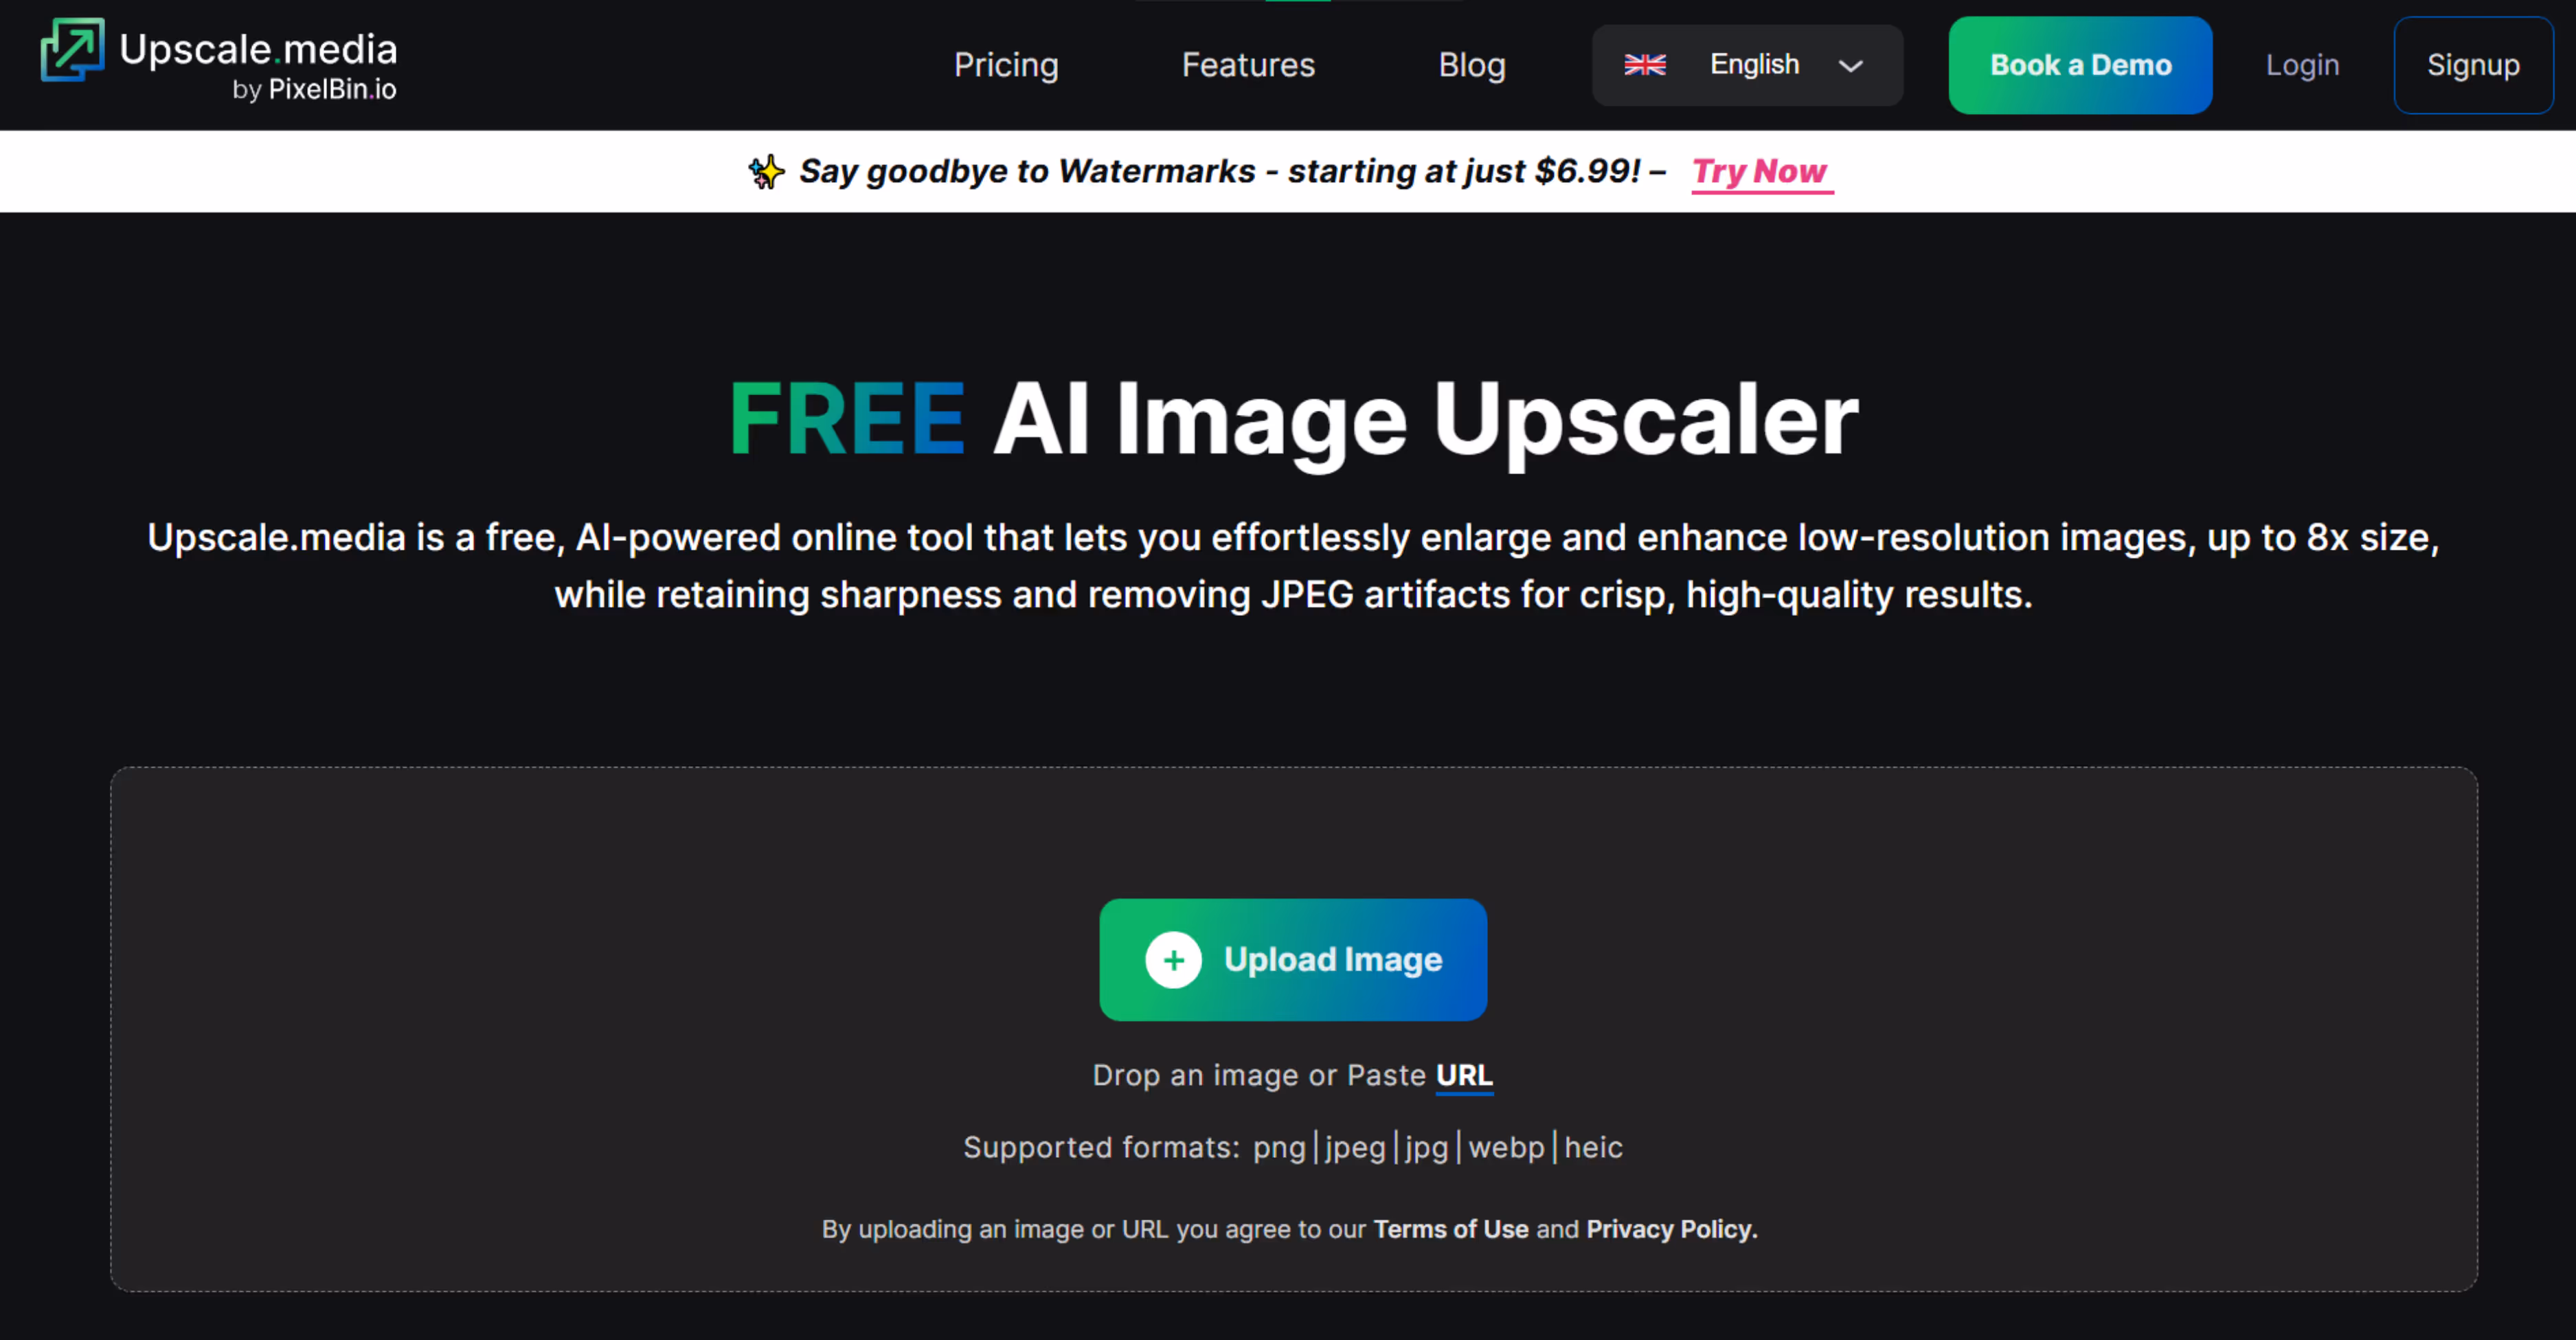
Step 2: Upload your image in PNG, JPG, or JPEG formats.
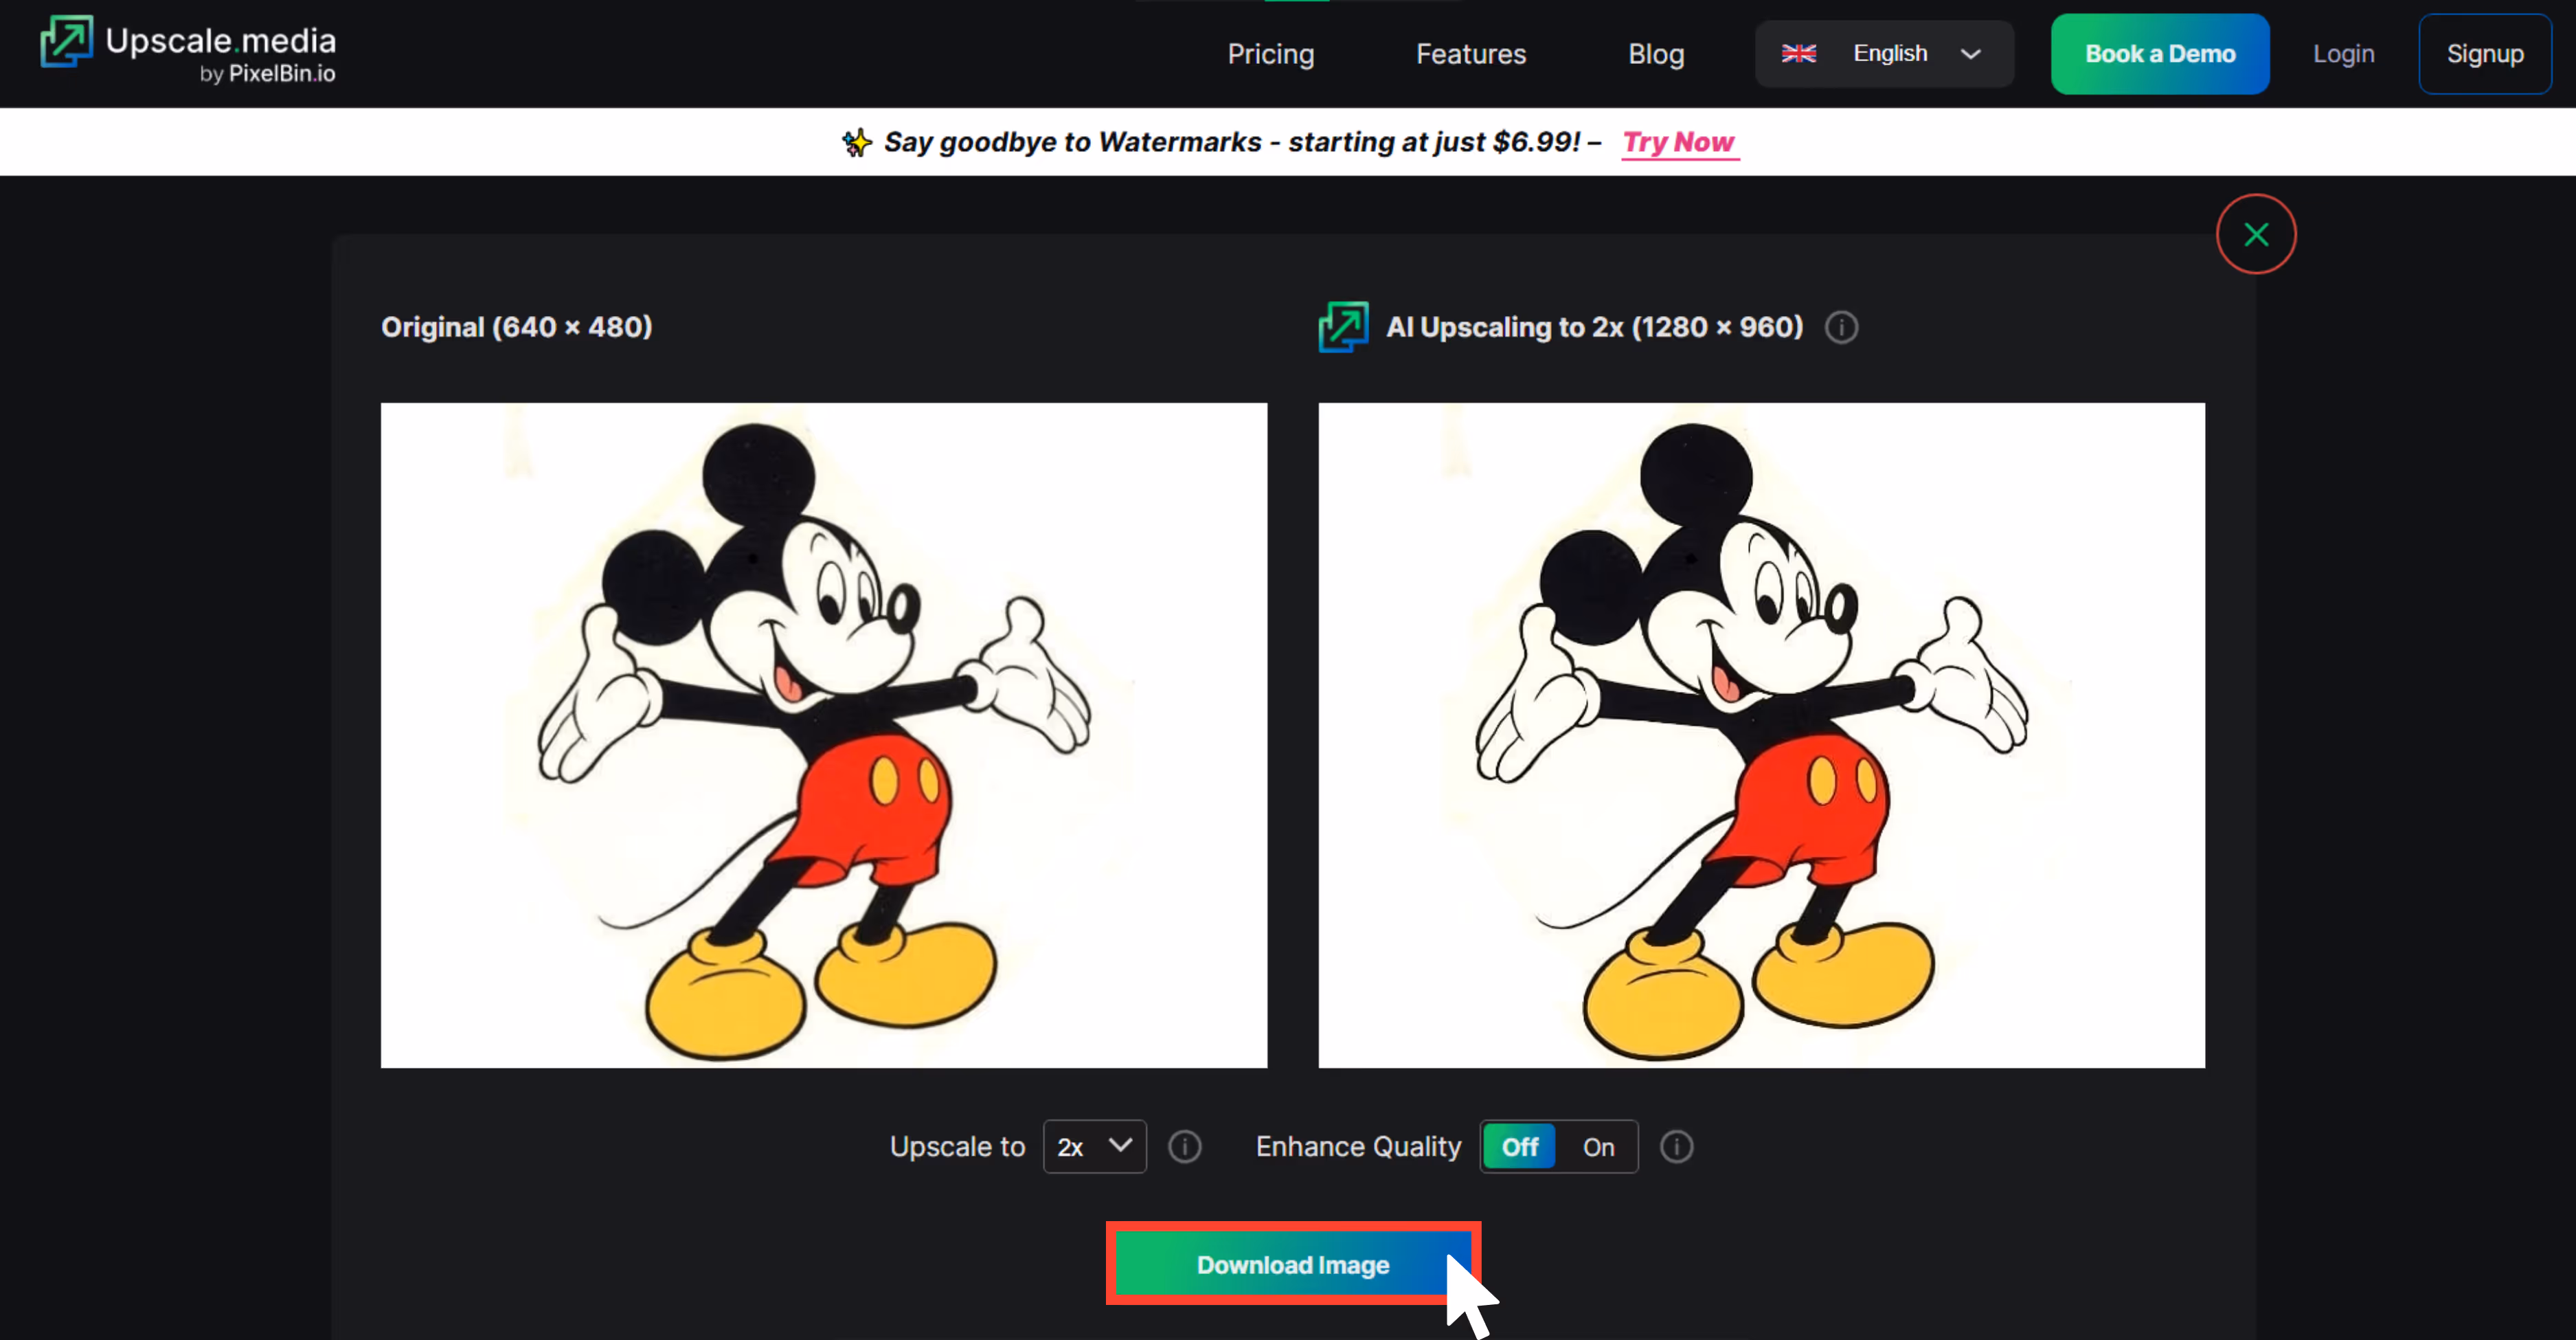
Step 3: The AI algorithms automatically upscale the image in 2x, 4x, or 8x scale size.
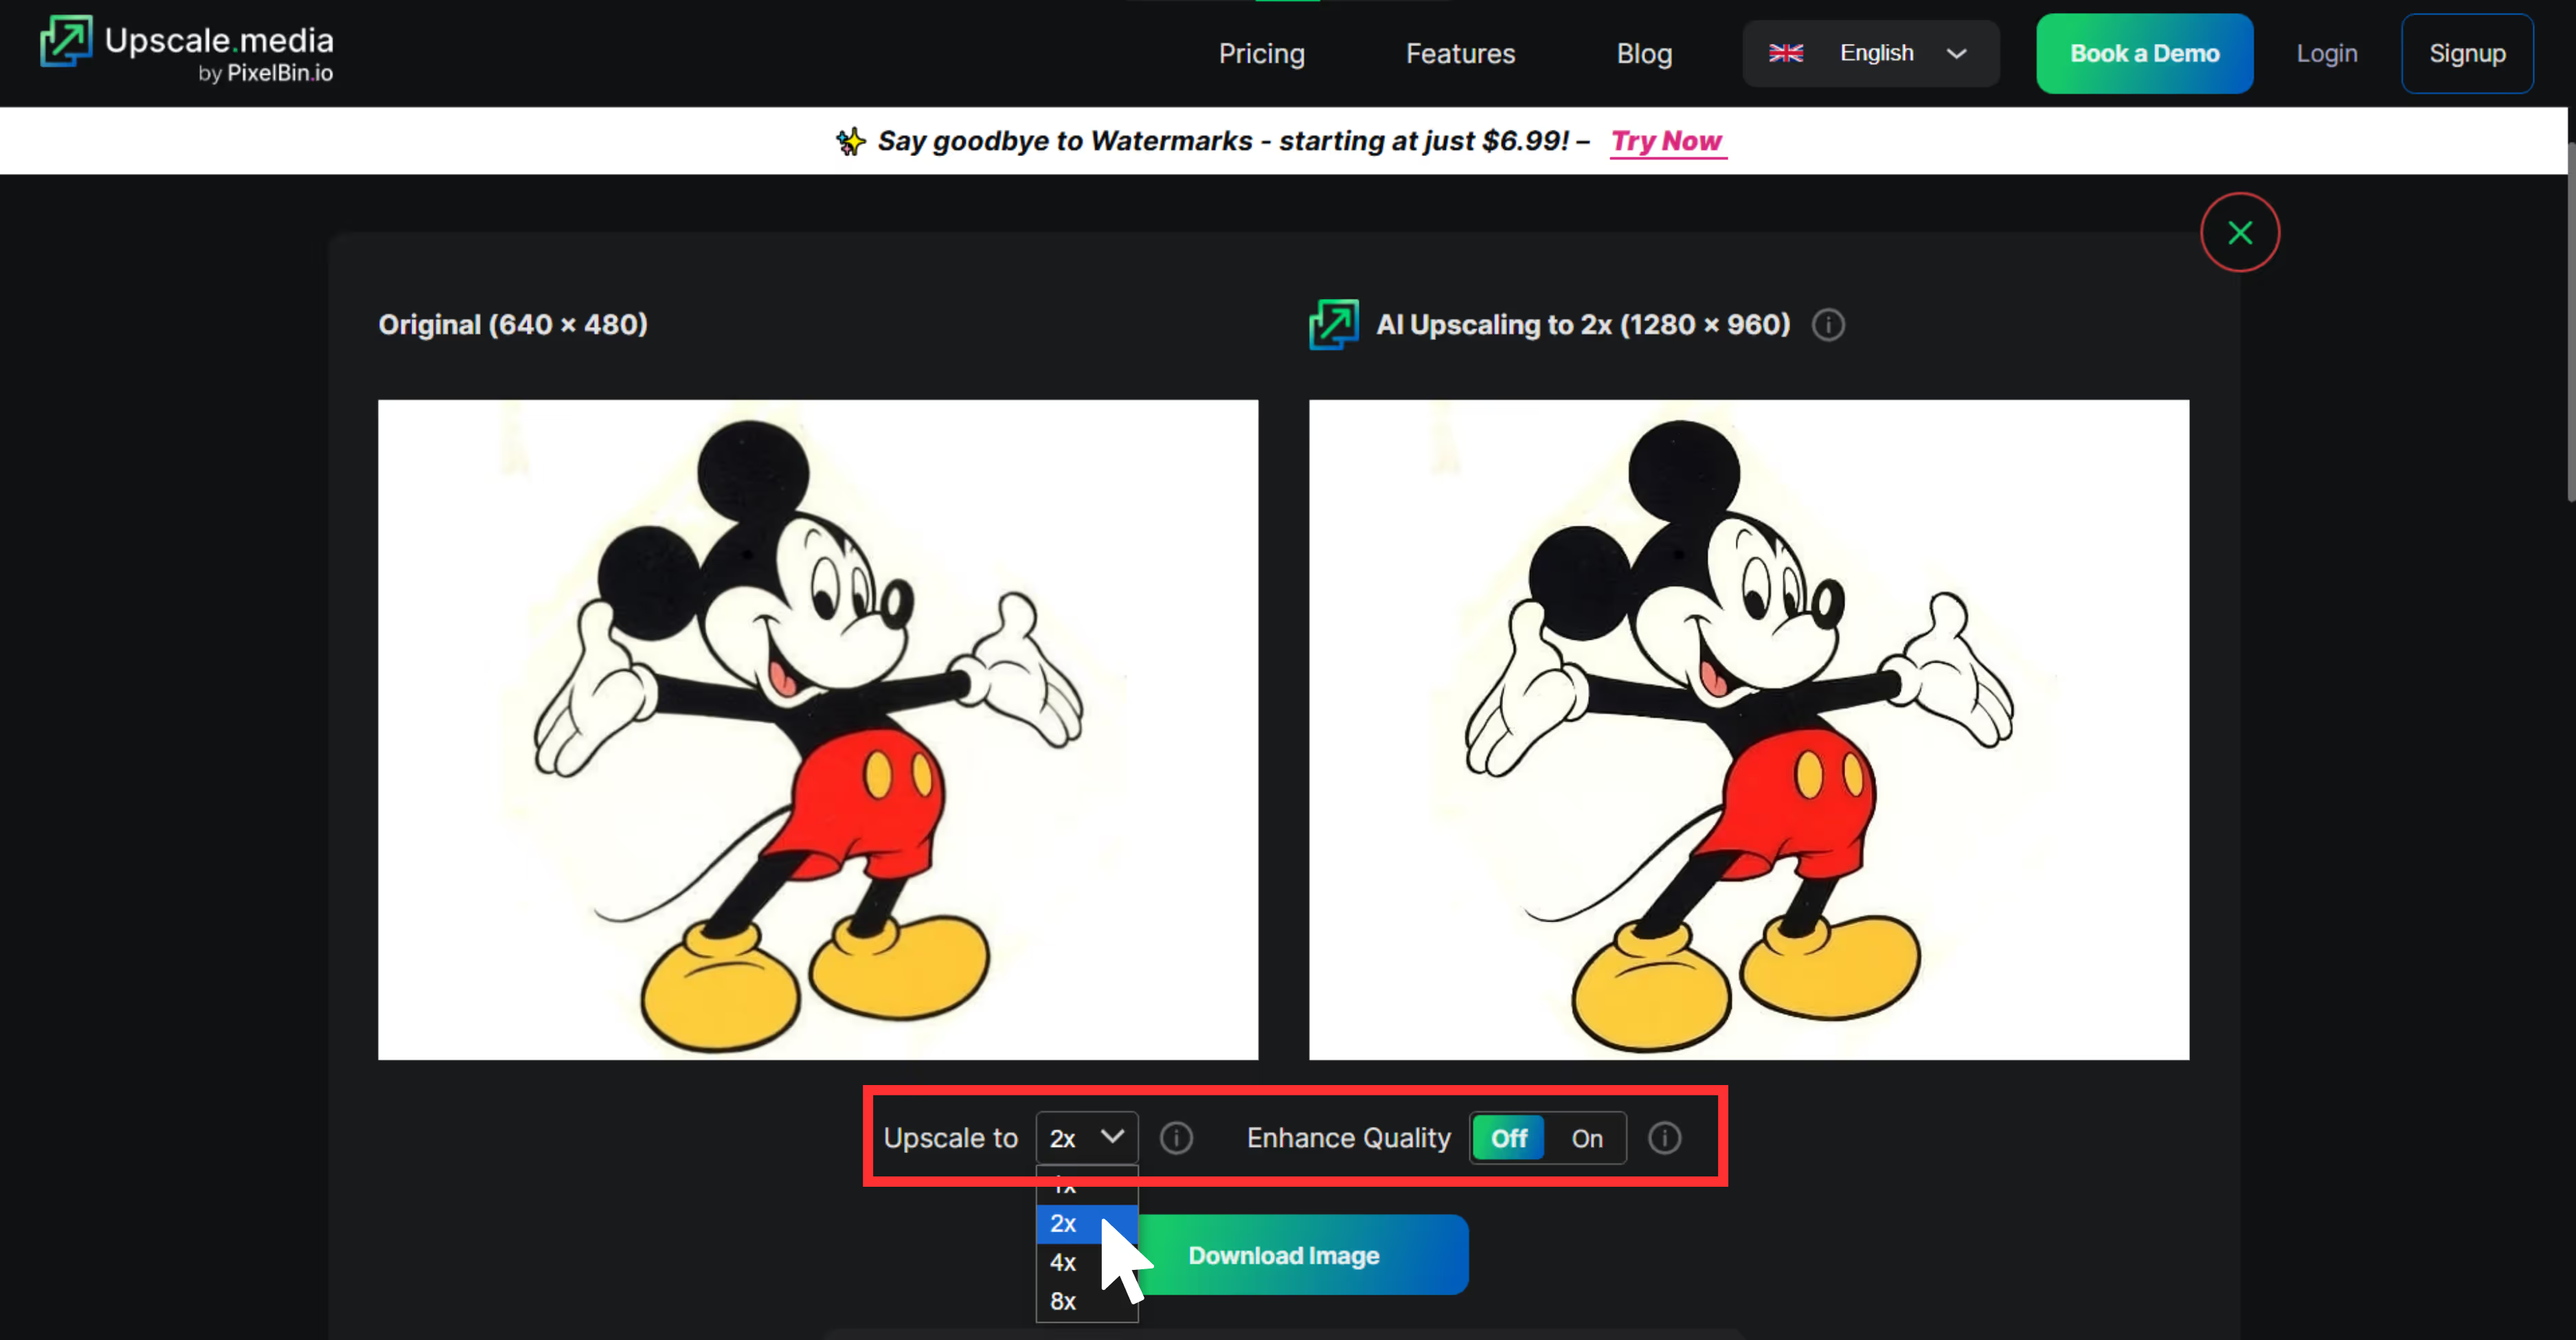
Step 4: Download your upscaled image instantly.
3. Pixelcut
After testing others my hands came on this great option for professionals and casual users. It’s not just an upscaler, but also comes with extra features like a background remover and filters.
When I tested Pixelcut, the upscale quality stood out. The image came out sharper without looking over-edited, and the colors had a nice pop to them—just the right amount of saturation to make it feel polished. What I liked the most about this tool;
- No sign-up is needed to try it.
- Works great for product photography, posters, and clean visual assets.
- One-click, easy-to-understand interface.
- Mobile-friendly and fast.
- The output image doesn’t feel overly processed.
How to upscale the image resolution in Pixelcut
Step 1: Go to Pixelcut Image Upscaler.
Step 2: Click “Upload Image” or drag-and-drop your file.
Step 3: Wait a few seconds — it auto-upscales at 4x.
Step 4: Preview the result, then download the upscaled image.
4. Picsart
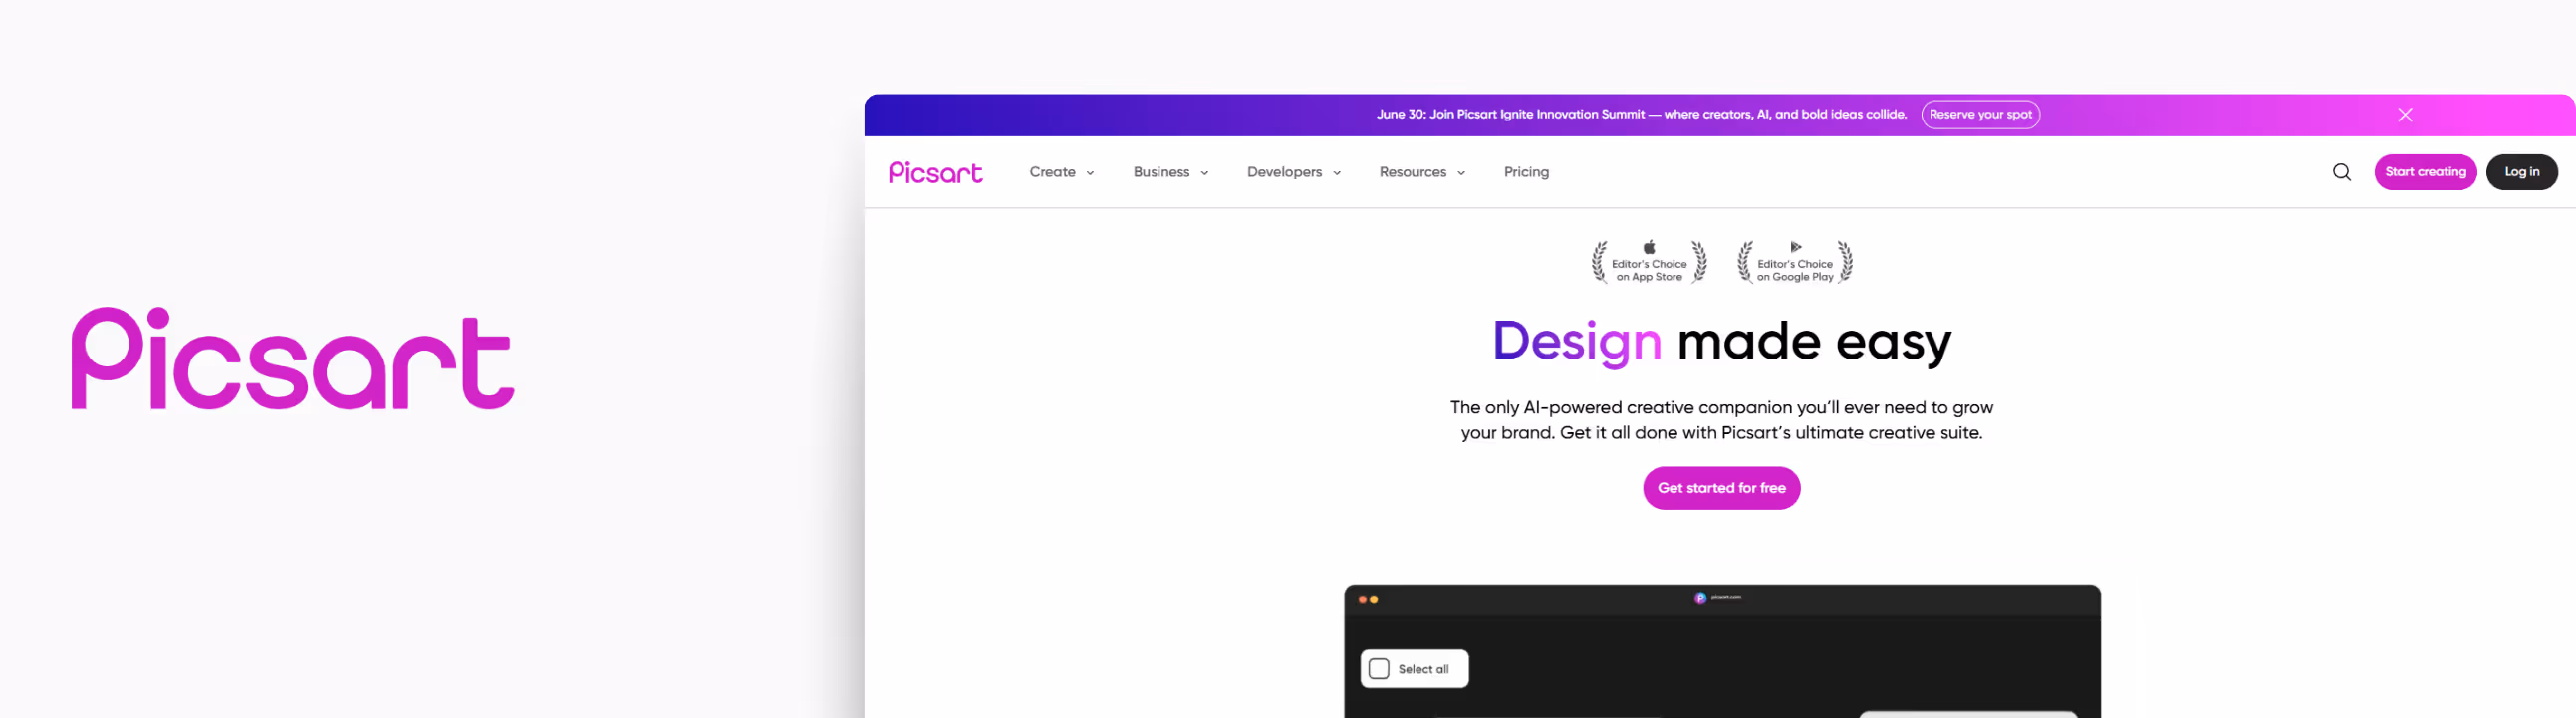
I tried Picsart’s AI Image Upscaler with a selfie, which looked nice back then, but now, when I viewed it on a high-resolution screen today, it felt blurry and grainy.
After upscaling my image through a 4x image scale, the result made me awestruck; edges looked cleaner, the texture was sharper, and the colors looked vibrant. This tool can upscale images to look crisp, which is perfect for content creators, marketers, and designers. What I liked about the tool;
- Supports JPG and PNG image formats.
- Free use is available.
- Web-based, no software installation needed.
- Free upscaling is available for up to 4x.
- Easy and simple interface.
How to upscale the image resolution in Picsart
Step 1: Go to the Picsart Image Upscaler page https://picsart.com/image-upscale.
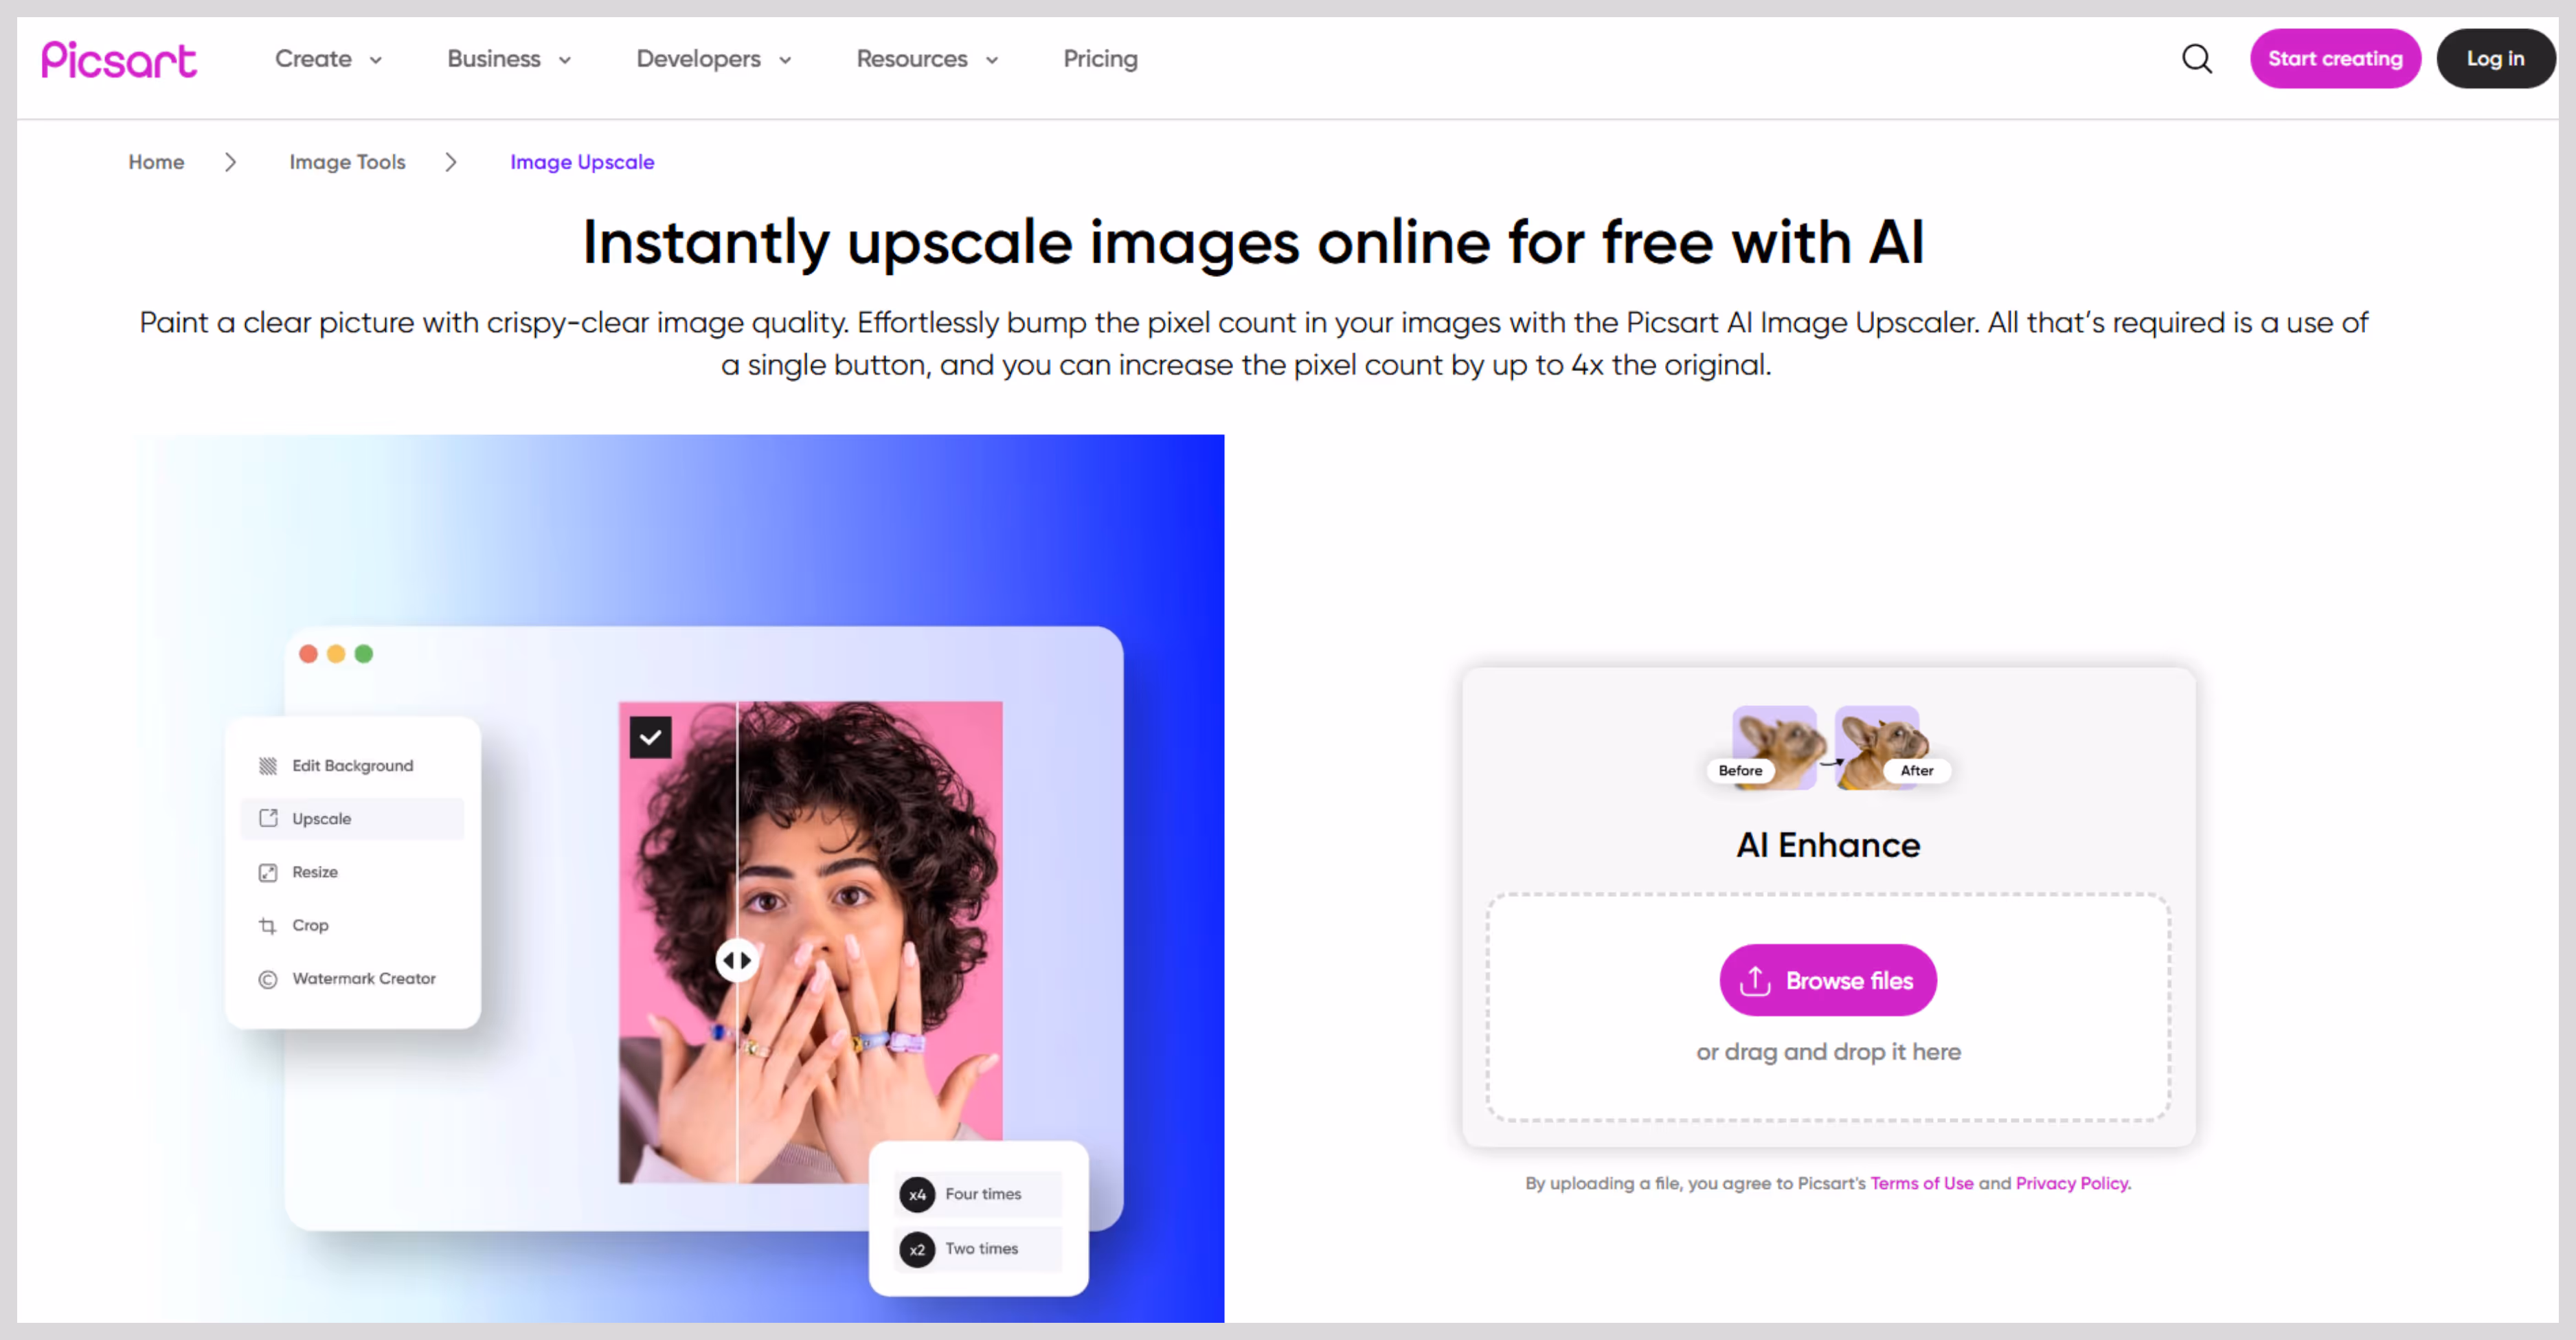
Step 2: Upload your image by clicking on the “Upload an image” button.
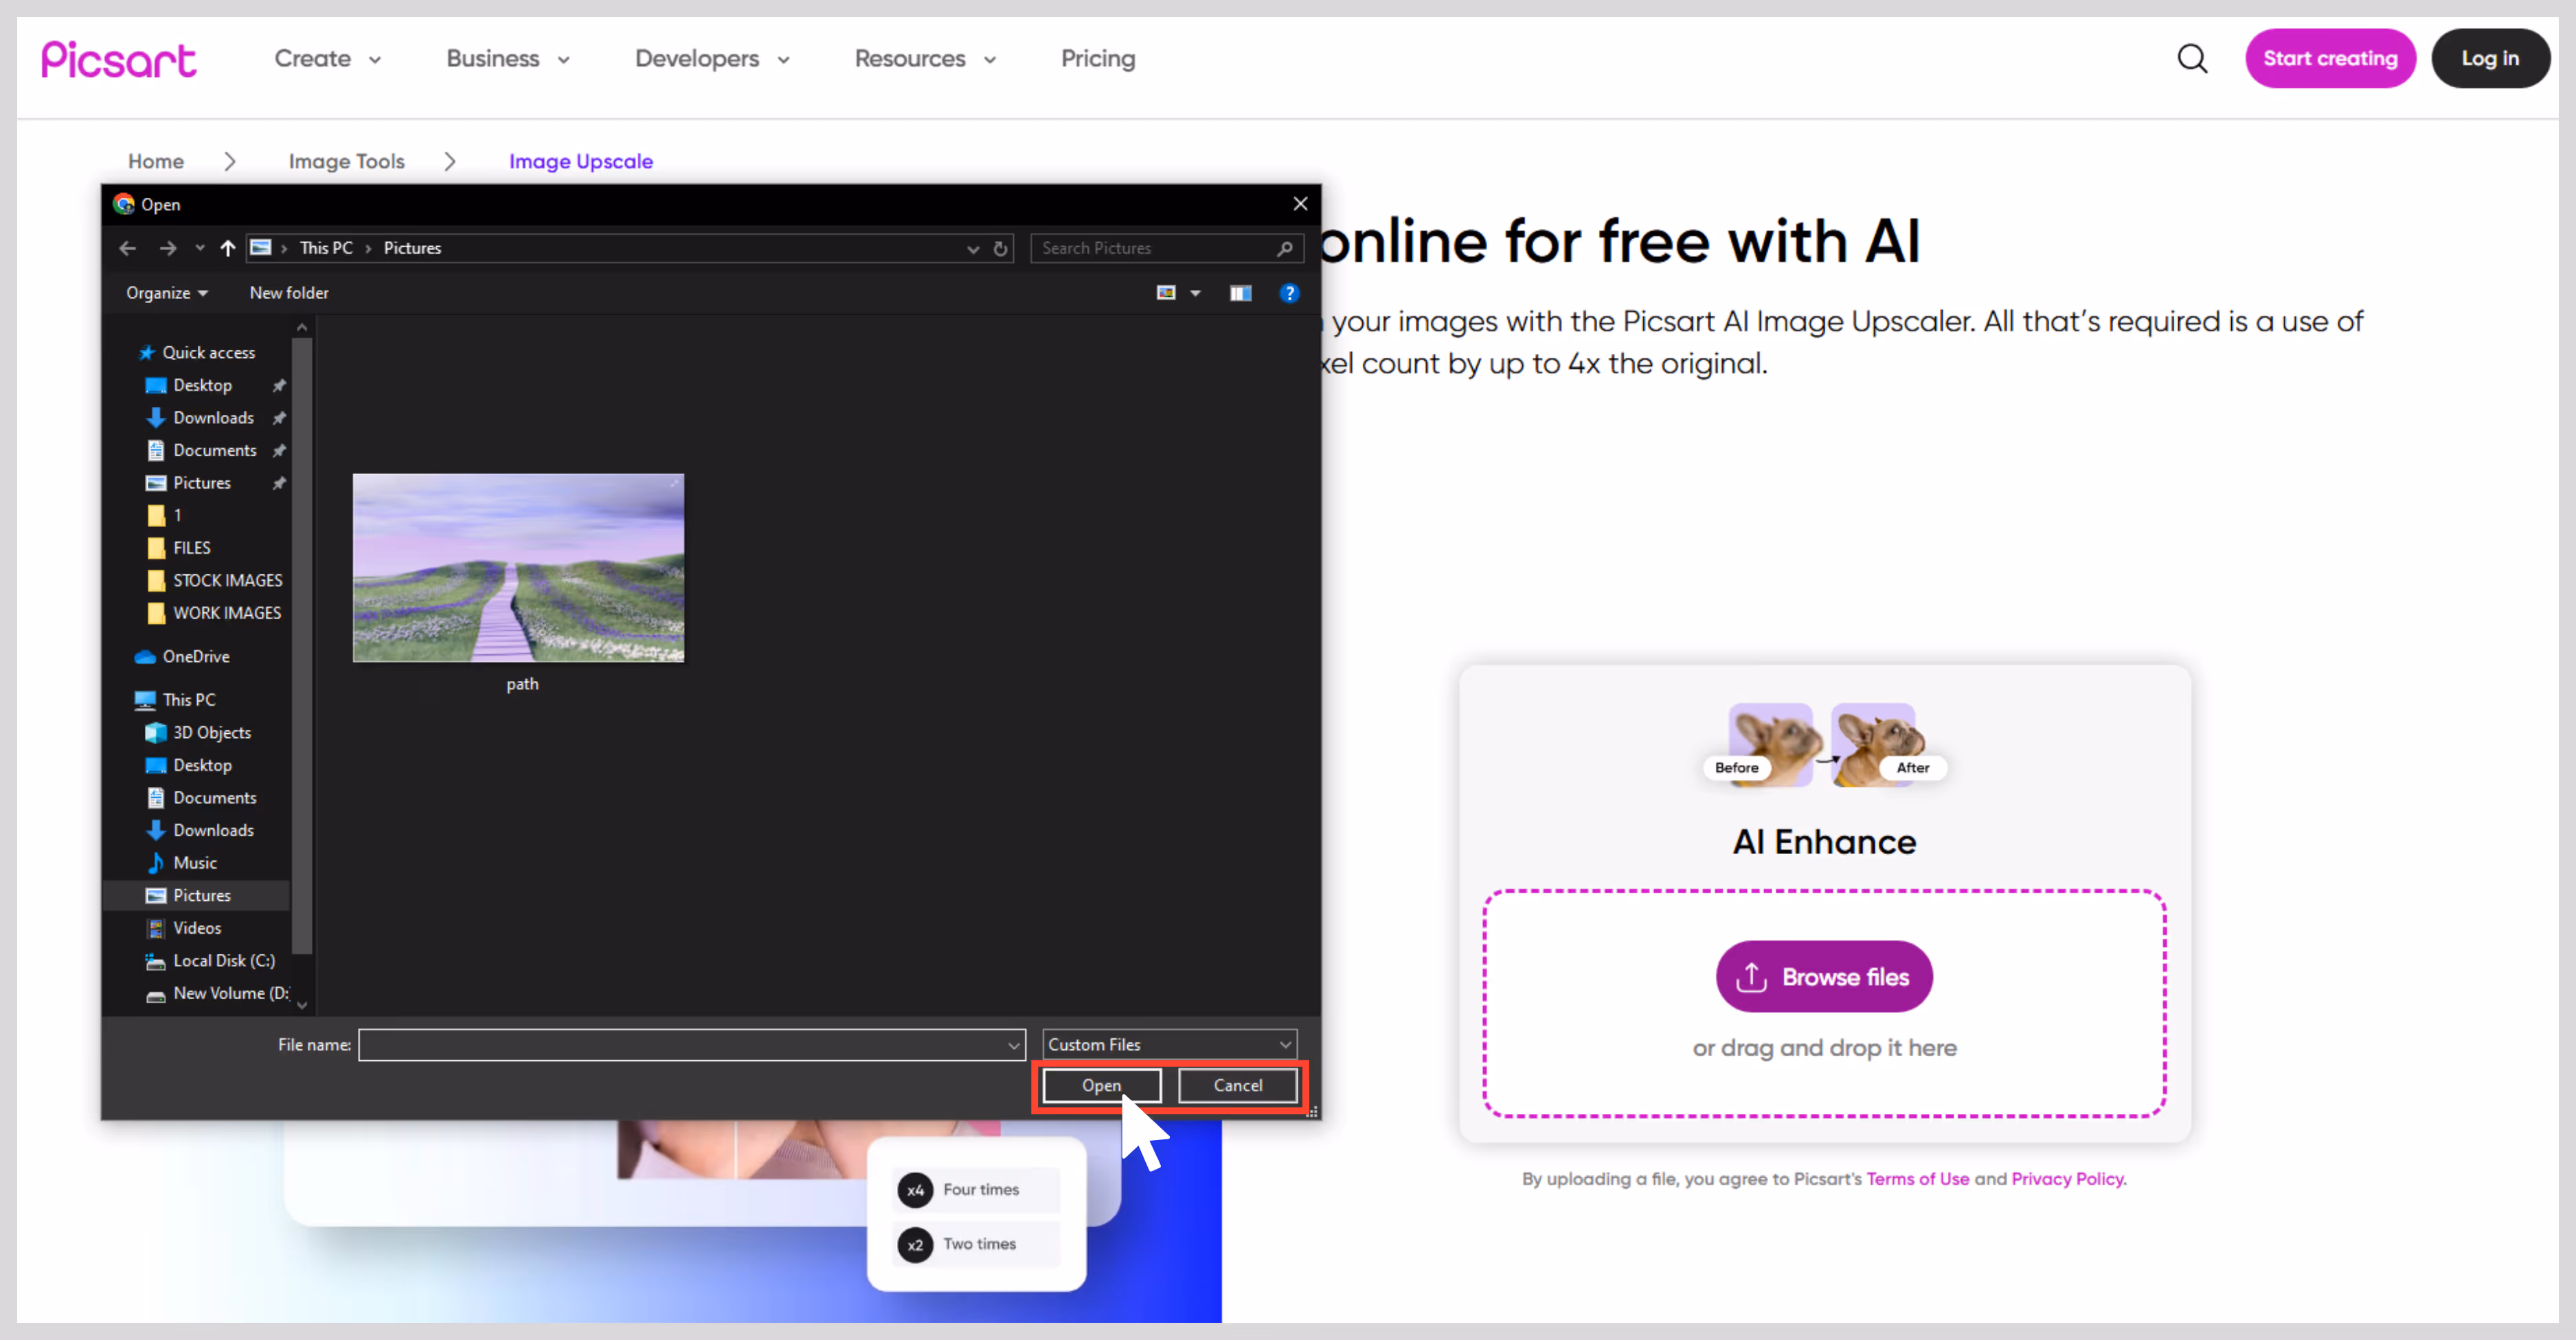
Step 3: After uploading, AI starts enhancing automatically and removes blur, sharpens the edges, and adds pixel count.
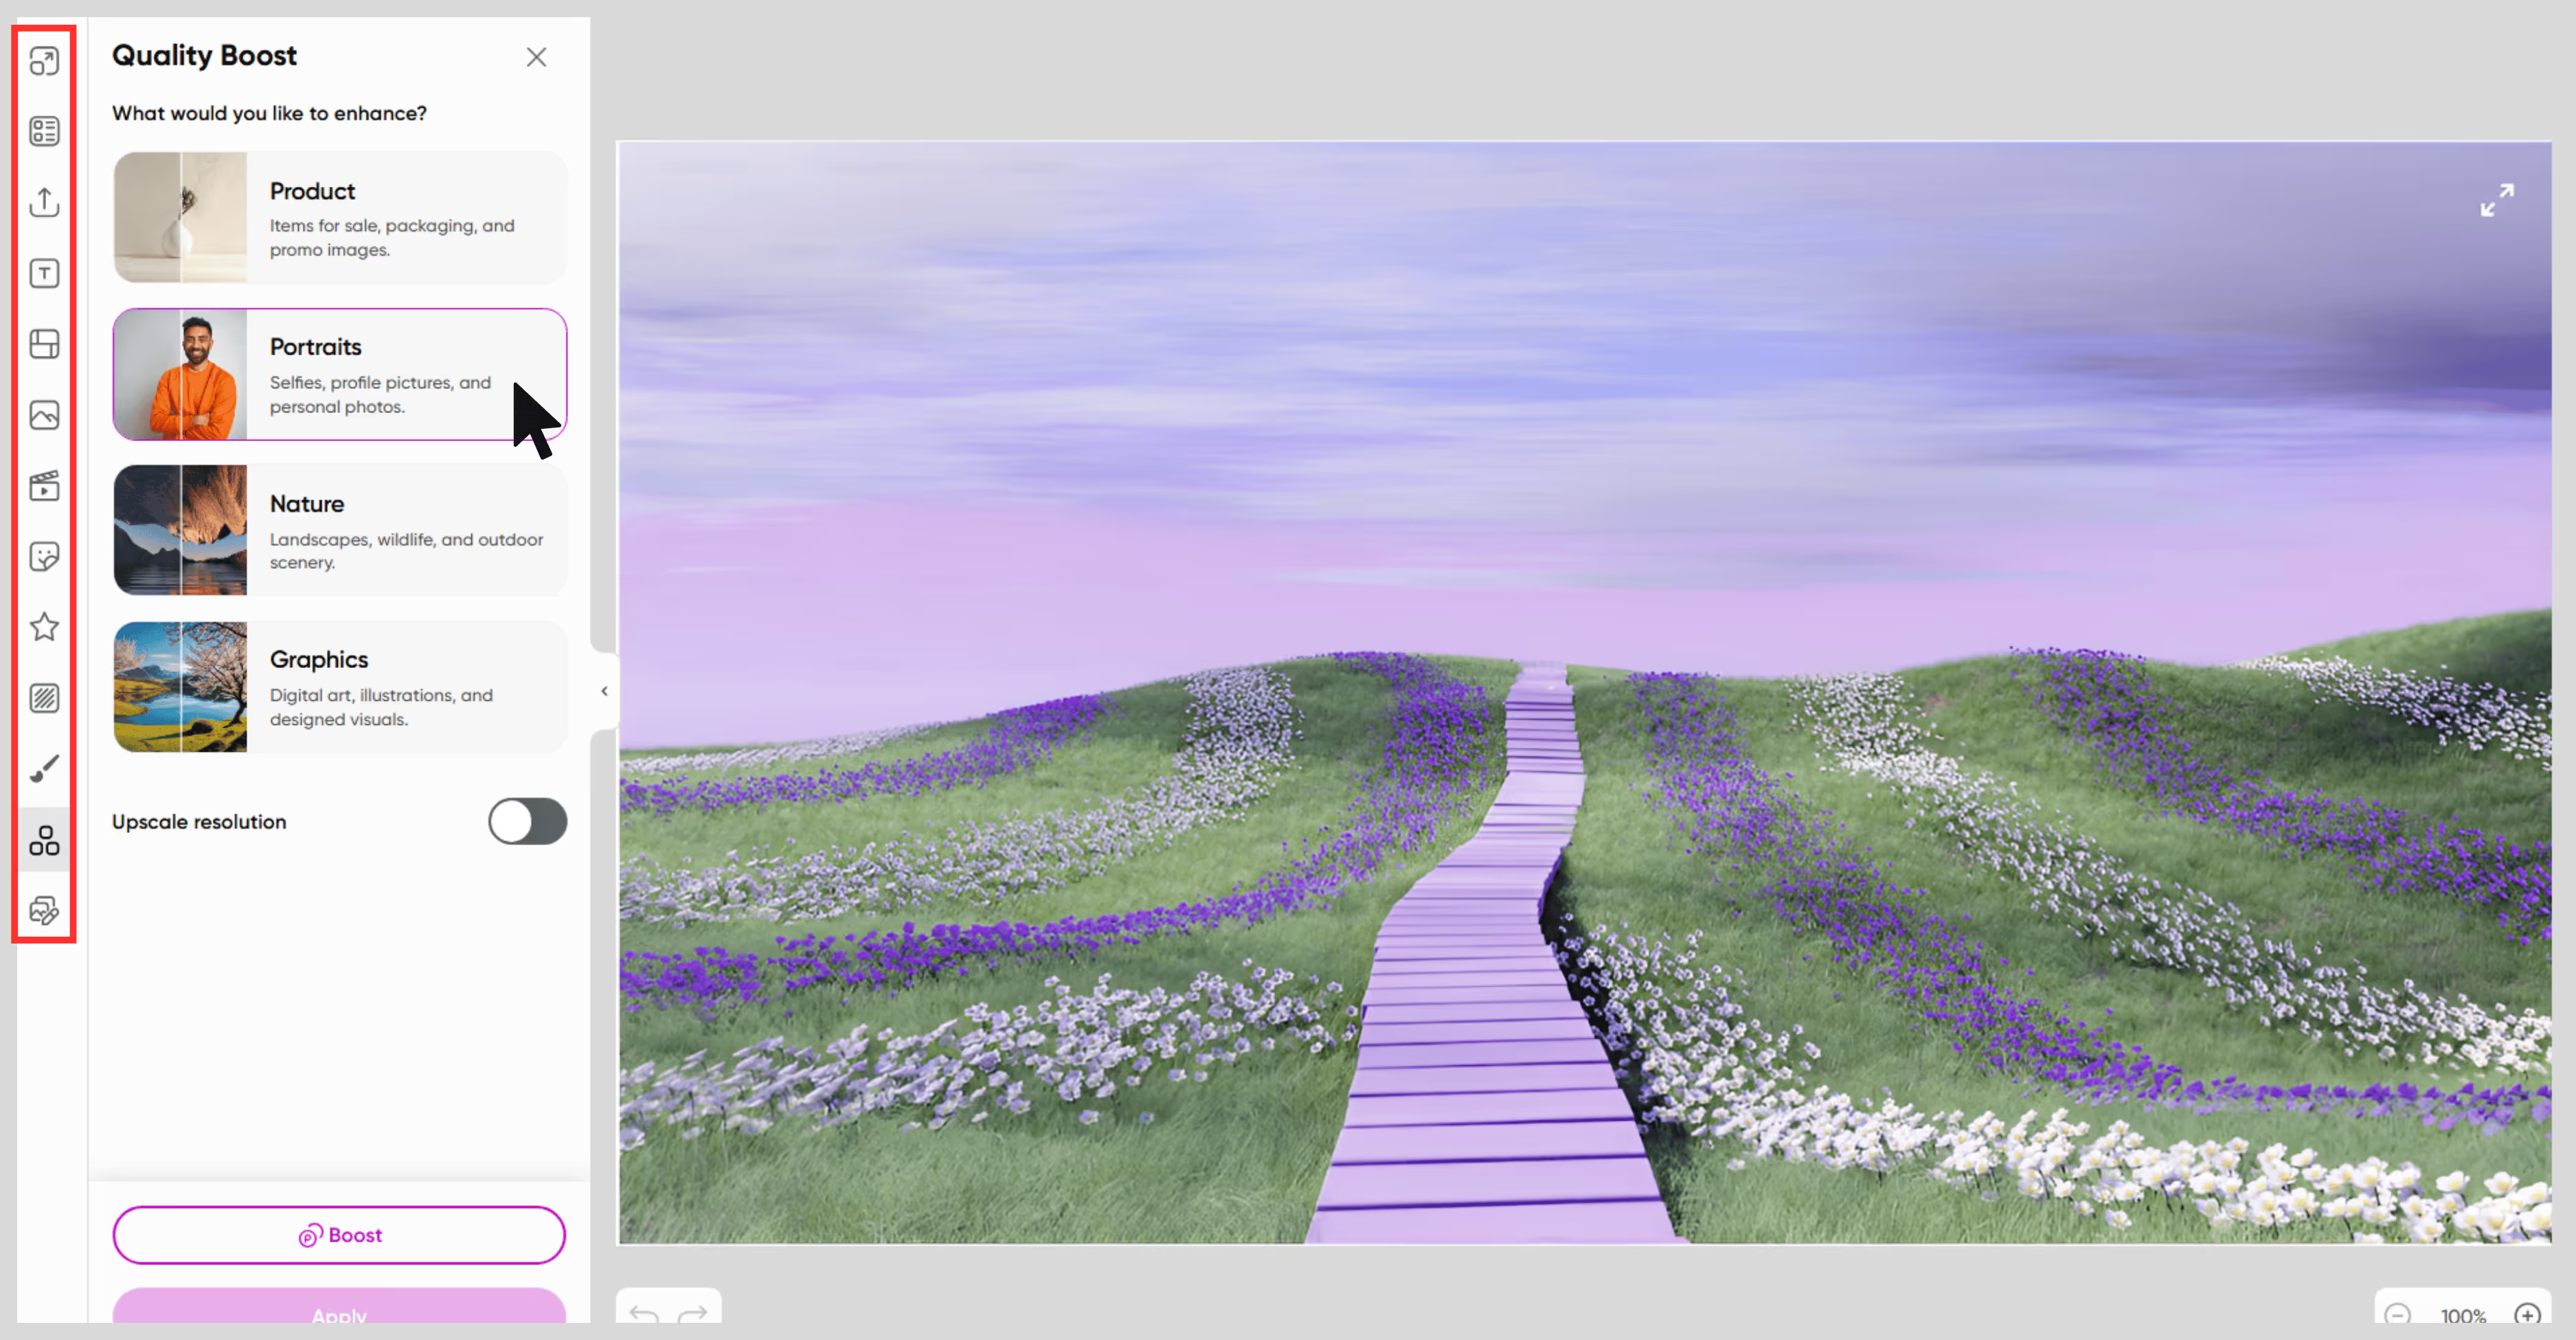
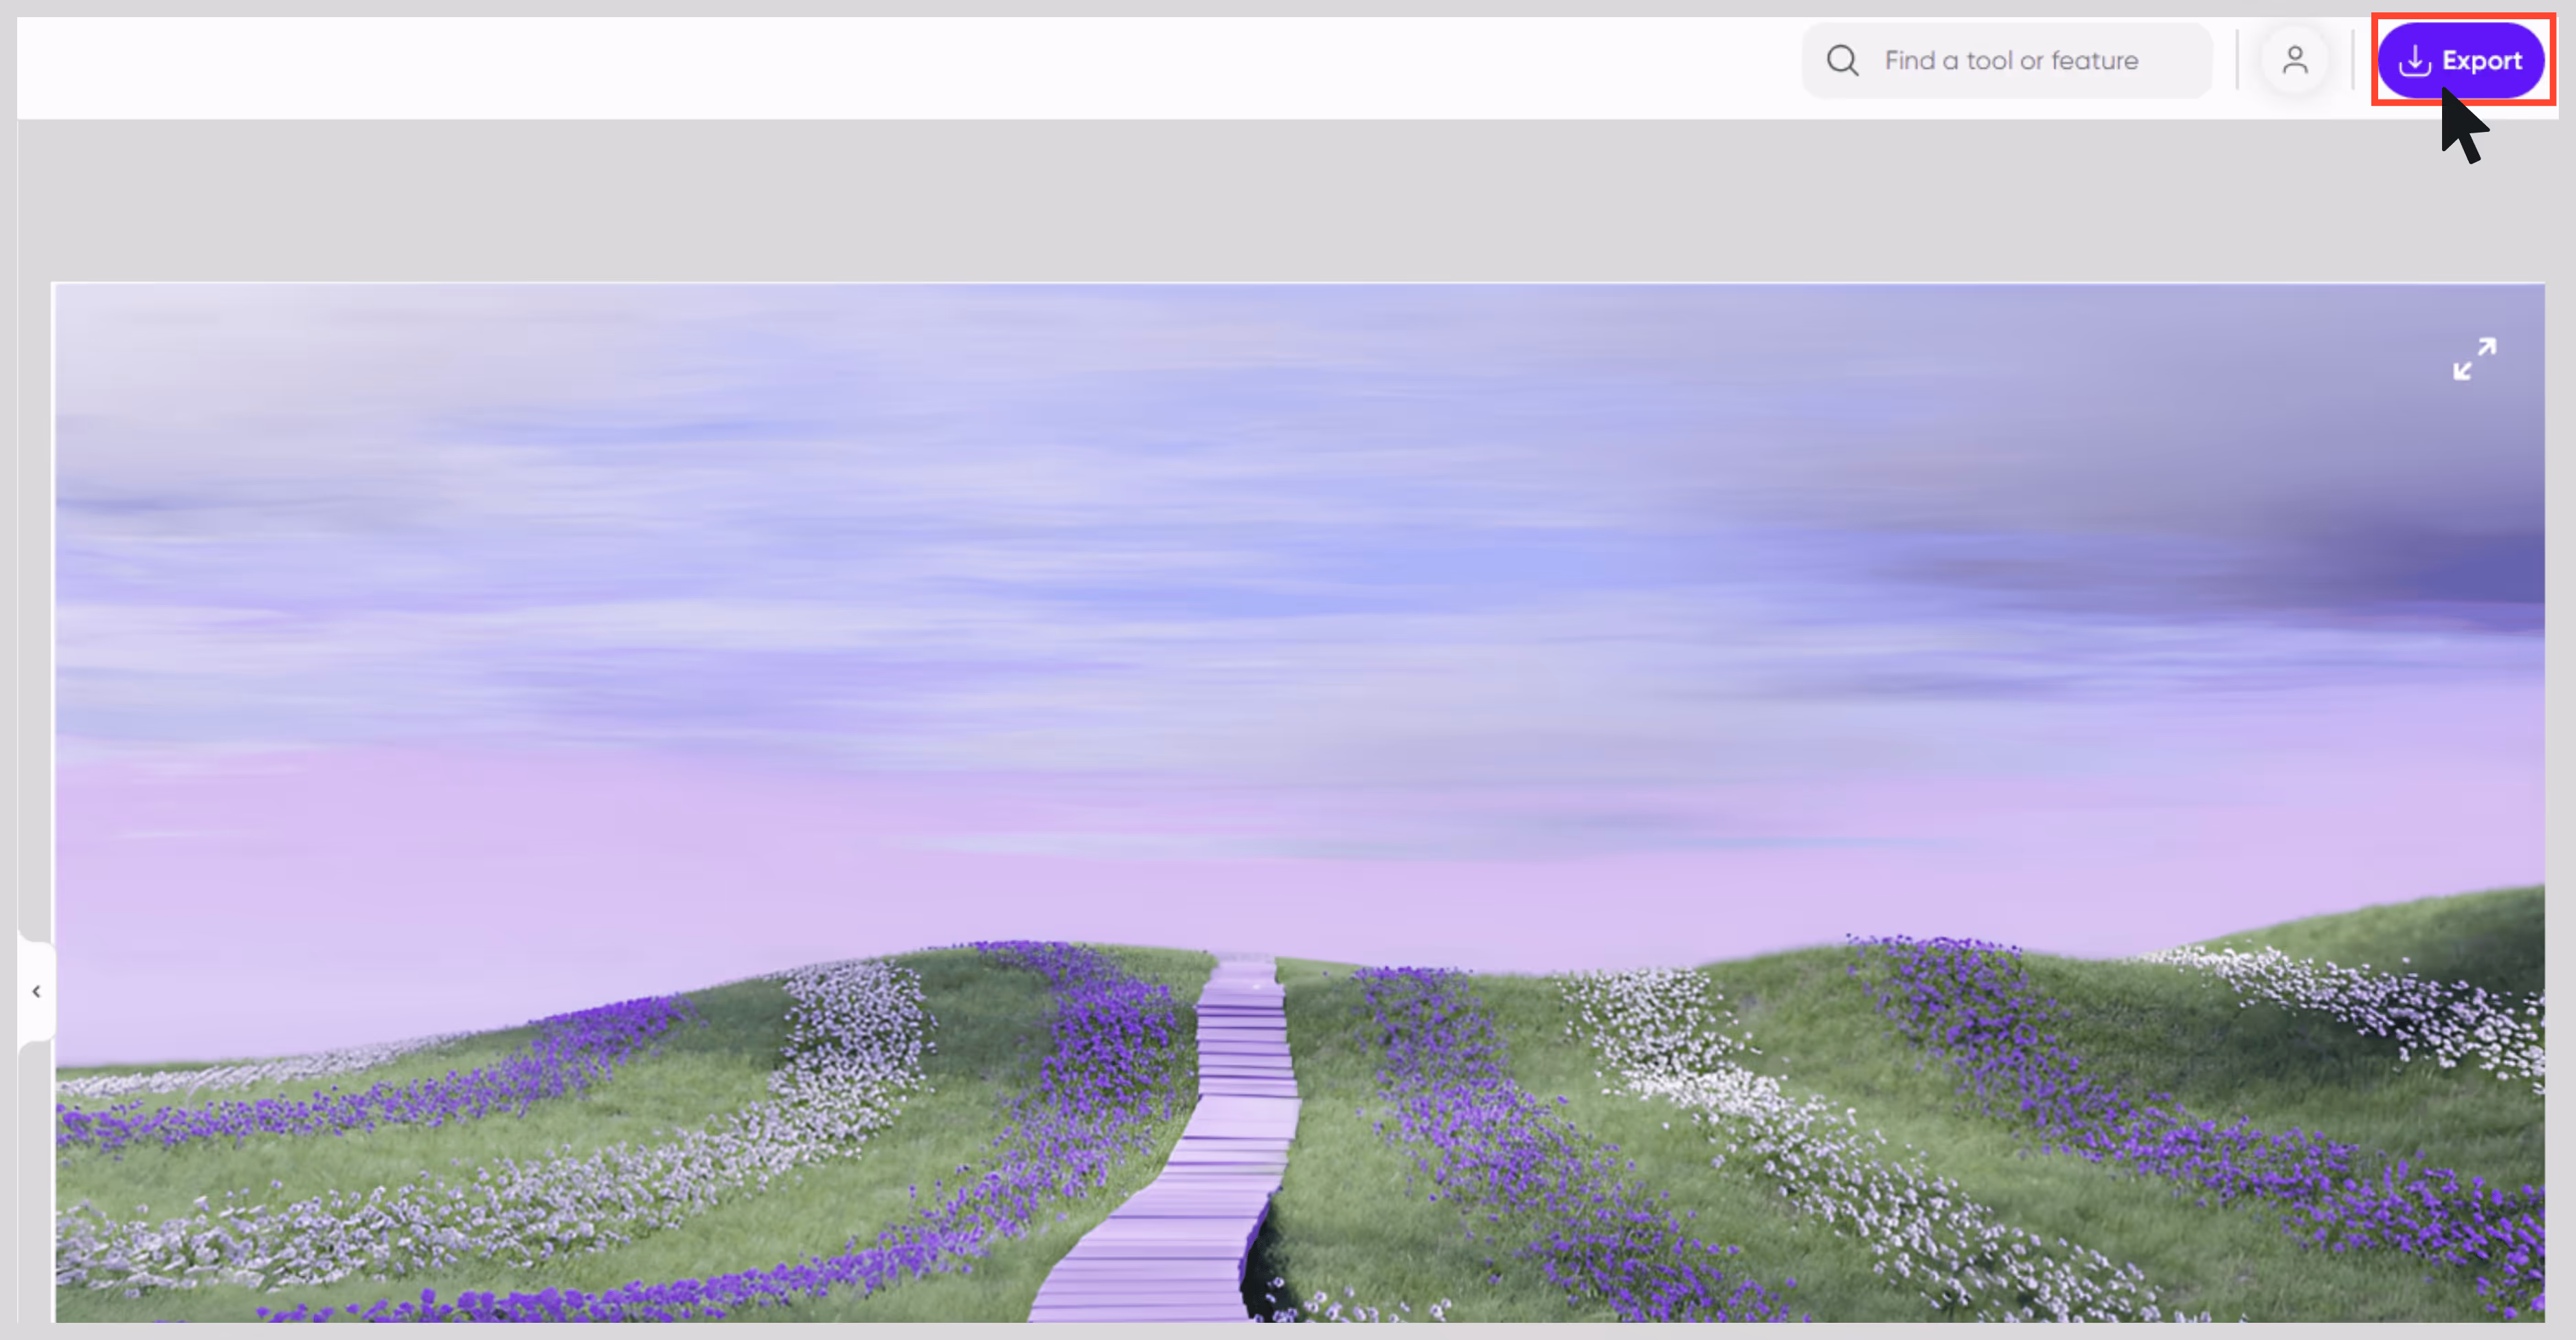
Step 4: Once done, just download it.
5. Canva

What I love about Canva is how simple and beginner-friendly it is. The built-in upscaler works right inside the editor just upload your image and relax. It’s easy when you’re already designing and just want to boost image quality on the spot.
I gave it a try with a blurry image I was planning to use in a social media post. The result was surprisingly clean, perfect for quick resizing in presentations, posts, or even lightweight print use. It won’t do heavy-duty magic, but it sharpens things up enough to look polished.
How to upscale the image resolution in Canva
Step 1: Go to https://www.canva.com/features/image-upscaler.

Step 2: Sign up with your details.

Step 3: Choose the photo you want to improve.

Step 4: Let Canvas AI upscale and clean it up for you.

Step 5: Refine it if needed, then download and share it right away.

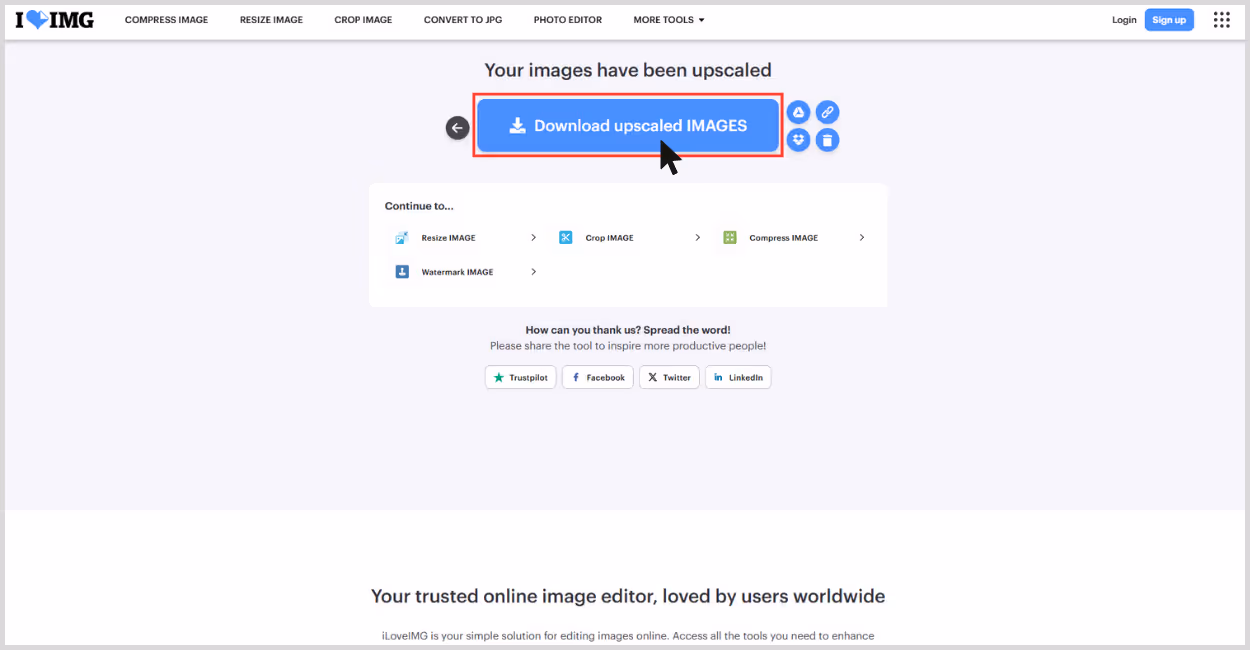
6. ILoveIMG
After going through a few tools, this tool is one of the most straightforward. Over here, you don’t need to sign up; simply upload your image, and the tool will do the rest. It’s perfect for those quick fixes when you’re short on time or just need something simple.
I tried it with a low-resolution and small image that needed a slight boost, and it did exactly that. I chose the 4x upscale, the clarity improved a lot—edges were cleaner, the image looked less pixelated, and some finer details stood out better. What I liked about the tool;
- No sign-up or account is needed—you can get started instantly.
- Super clean interface, with just the basics.
- Decent quality boost, especially for compressed or pixelated images.
- Free to use, with no watermark on the download.
How to upscale the image resolution in ILoveIMG
Step 1: Go to https://www.iloveimg.com.
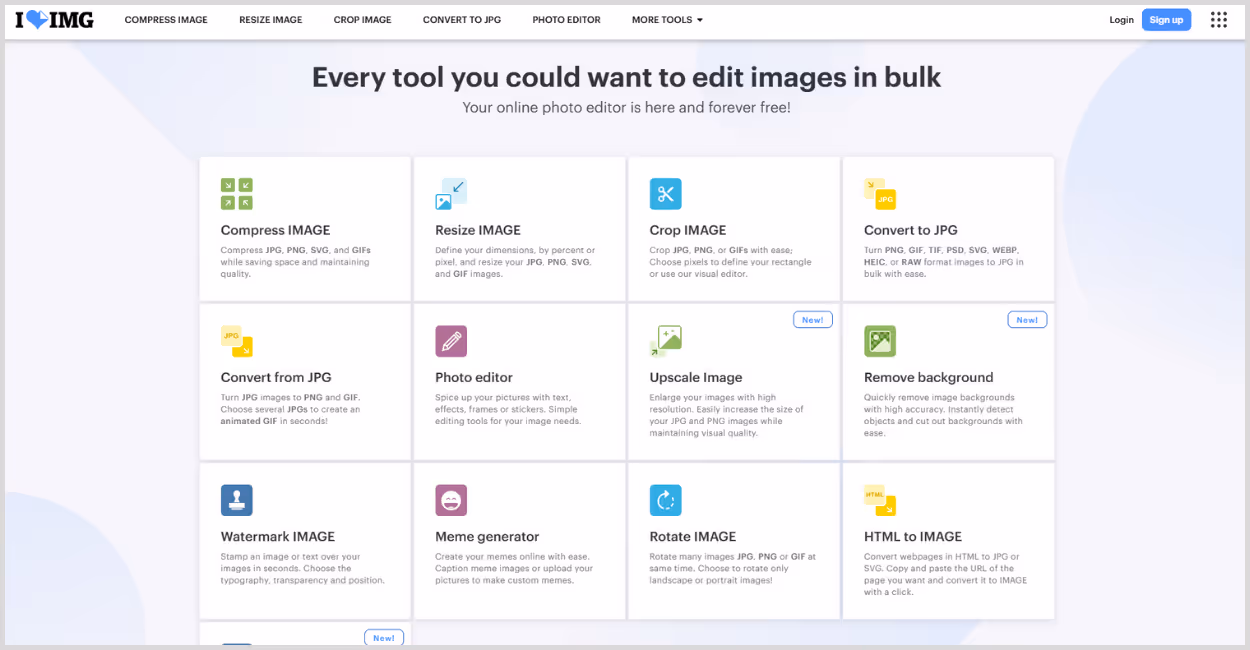
Step 2: Select the “Upscale image option.”
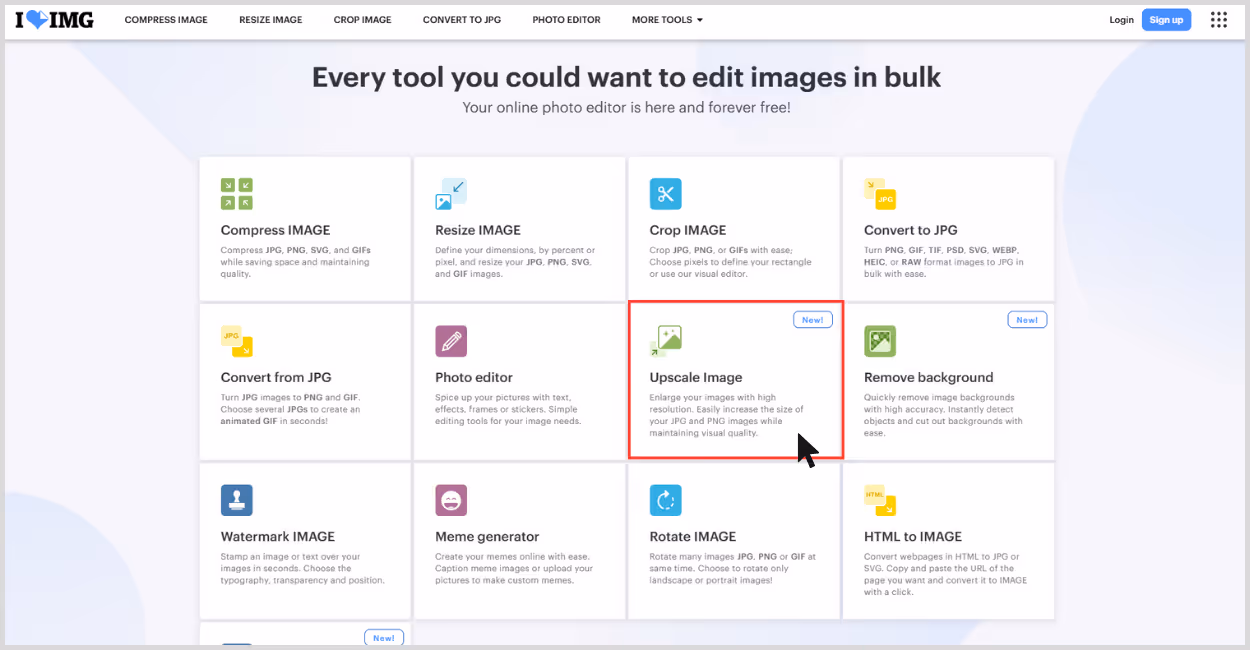
Step 3: Click “Select Image”– or drag and drop your image into the box.
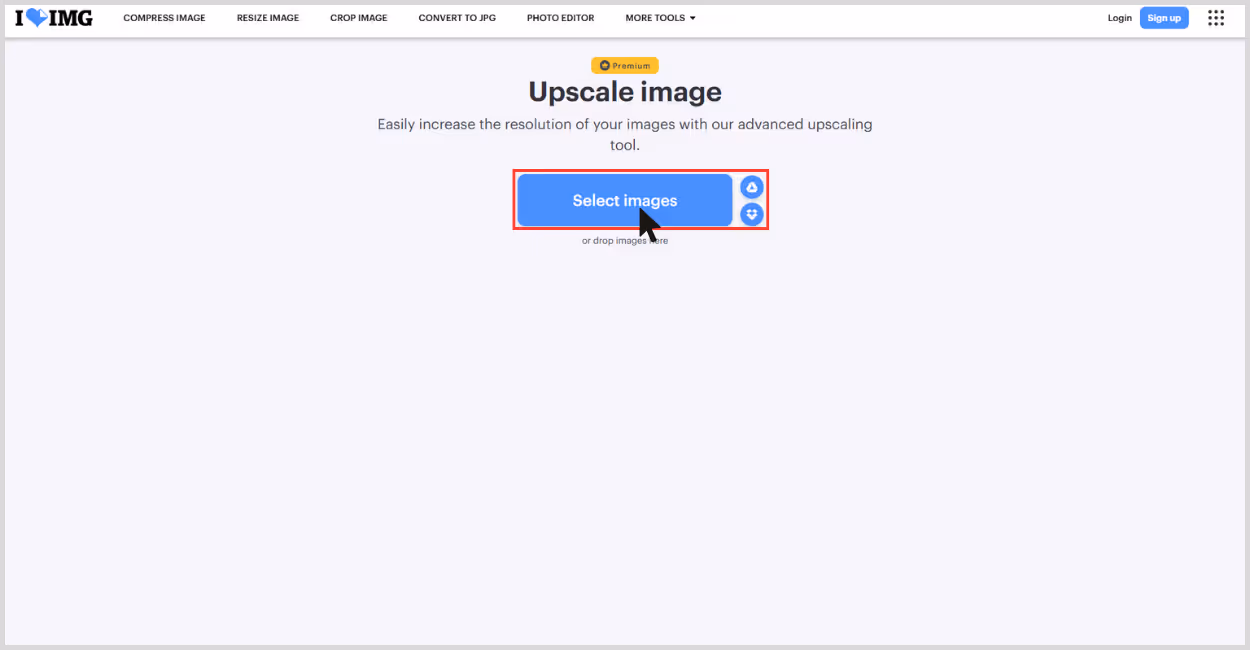
Step 4: Choose the Upscale Factor Options: 2x or 4x. I have used 4x to upscale the image to high resolution.
Step 5: Click on “Upscale”. Once the image is ready, you can preview the results by moving the before and after sliders.

Step 6: Download the result. It auto-generates a download link, no login is required.
7. Clipdrop

When I tested Clipdrop’s Image Upscaler by Jasper, I used a slightly faded image. But after processing it through Clipdrop, the image came back looking noticeably sharper, the text was clearer, and even the subtle textures on the cover popped back to life.
What stood out immediately was the clean handling of the subject and the background textures. It didn’t overdo the enhancements, which is rare with AI tools that often go too far. What I liked about the tool;
- AI-powered algorithms not only enlarge but also add pixels.
- Upscales for free up to 2x.
- Supports JPG and PNG formats.
- A free tier is available with a watermark.
- Beginner-friendly interface.
- Mobile friendly.
How to upscale the image resolution in Clipdrop
Step 1: Go to the Clipdrop image upscaler by Jasper https://clipdrop.co/image-upscaler.
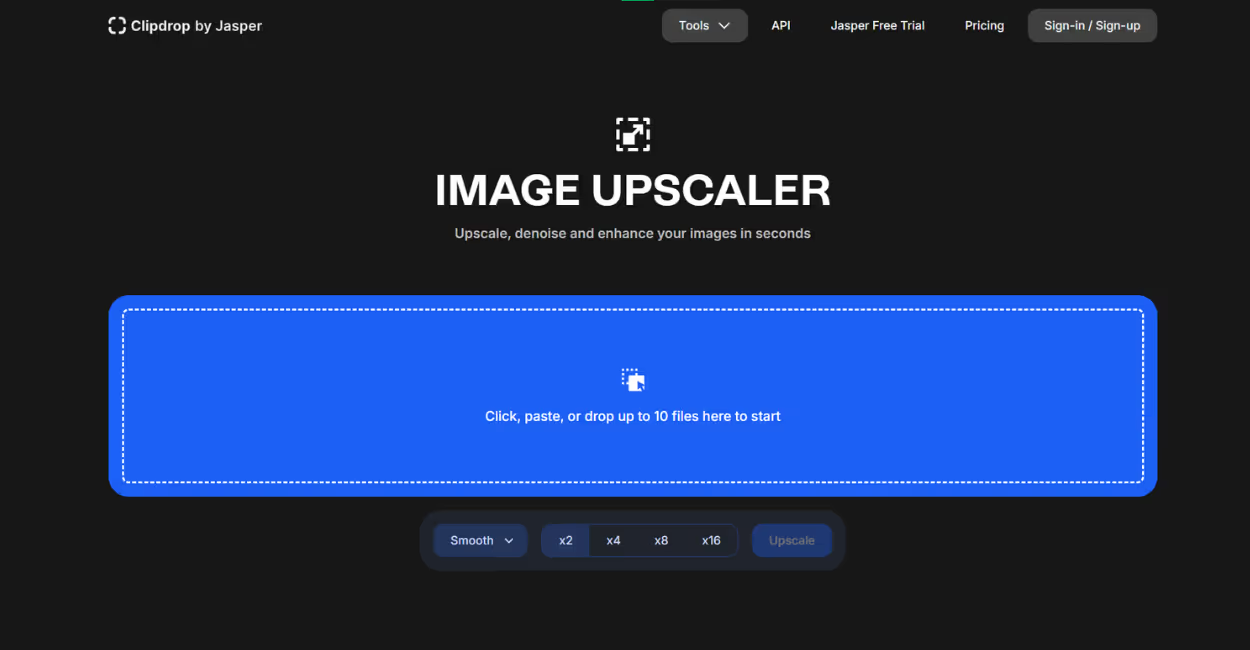
Step 2: Click on the blue box to upload the image or paste the URL. You can add up to 10 files at a time.
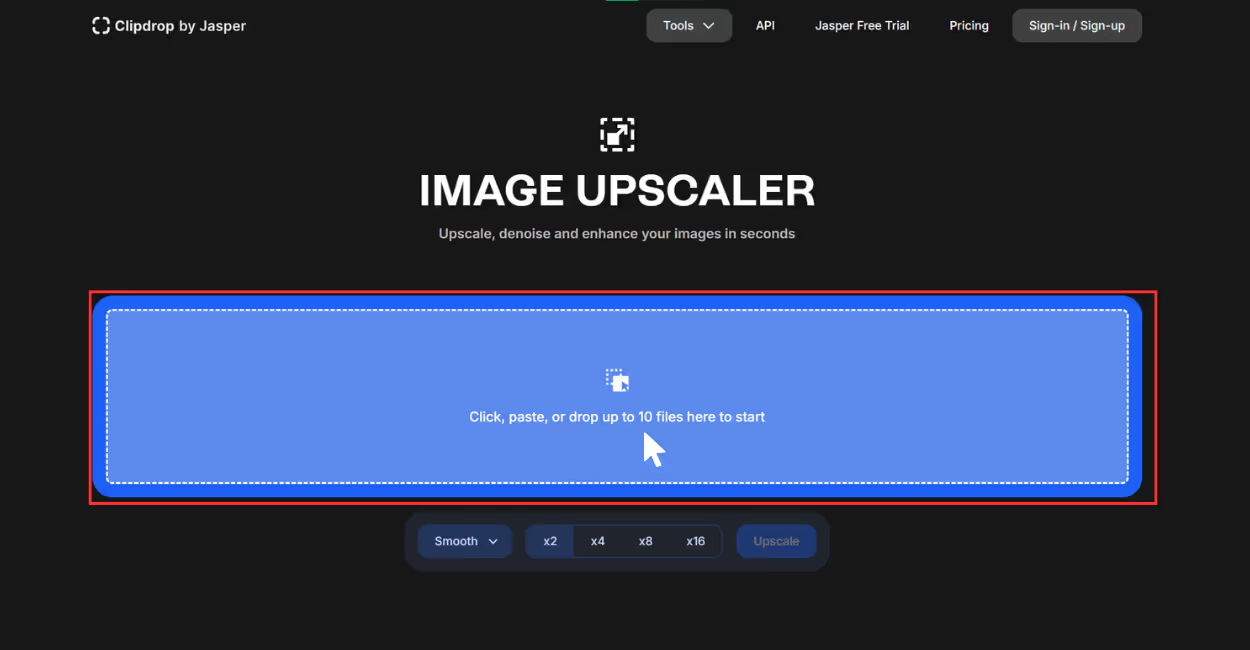
Step 3: You can select adjustments like a smooth or detailed image, and then select the image scale size. You can choose 2x for free, and the others are a feature of the paid version.
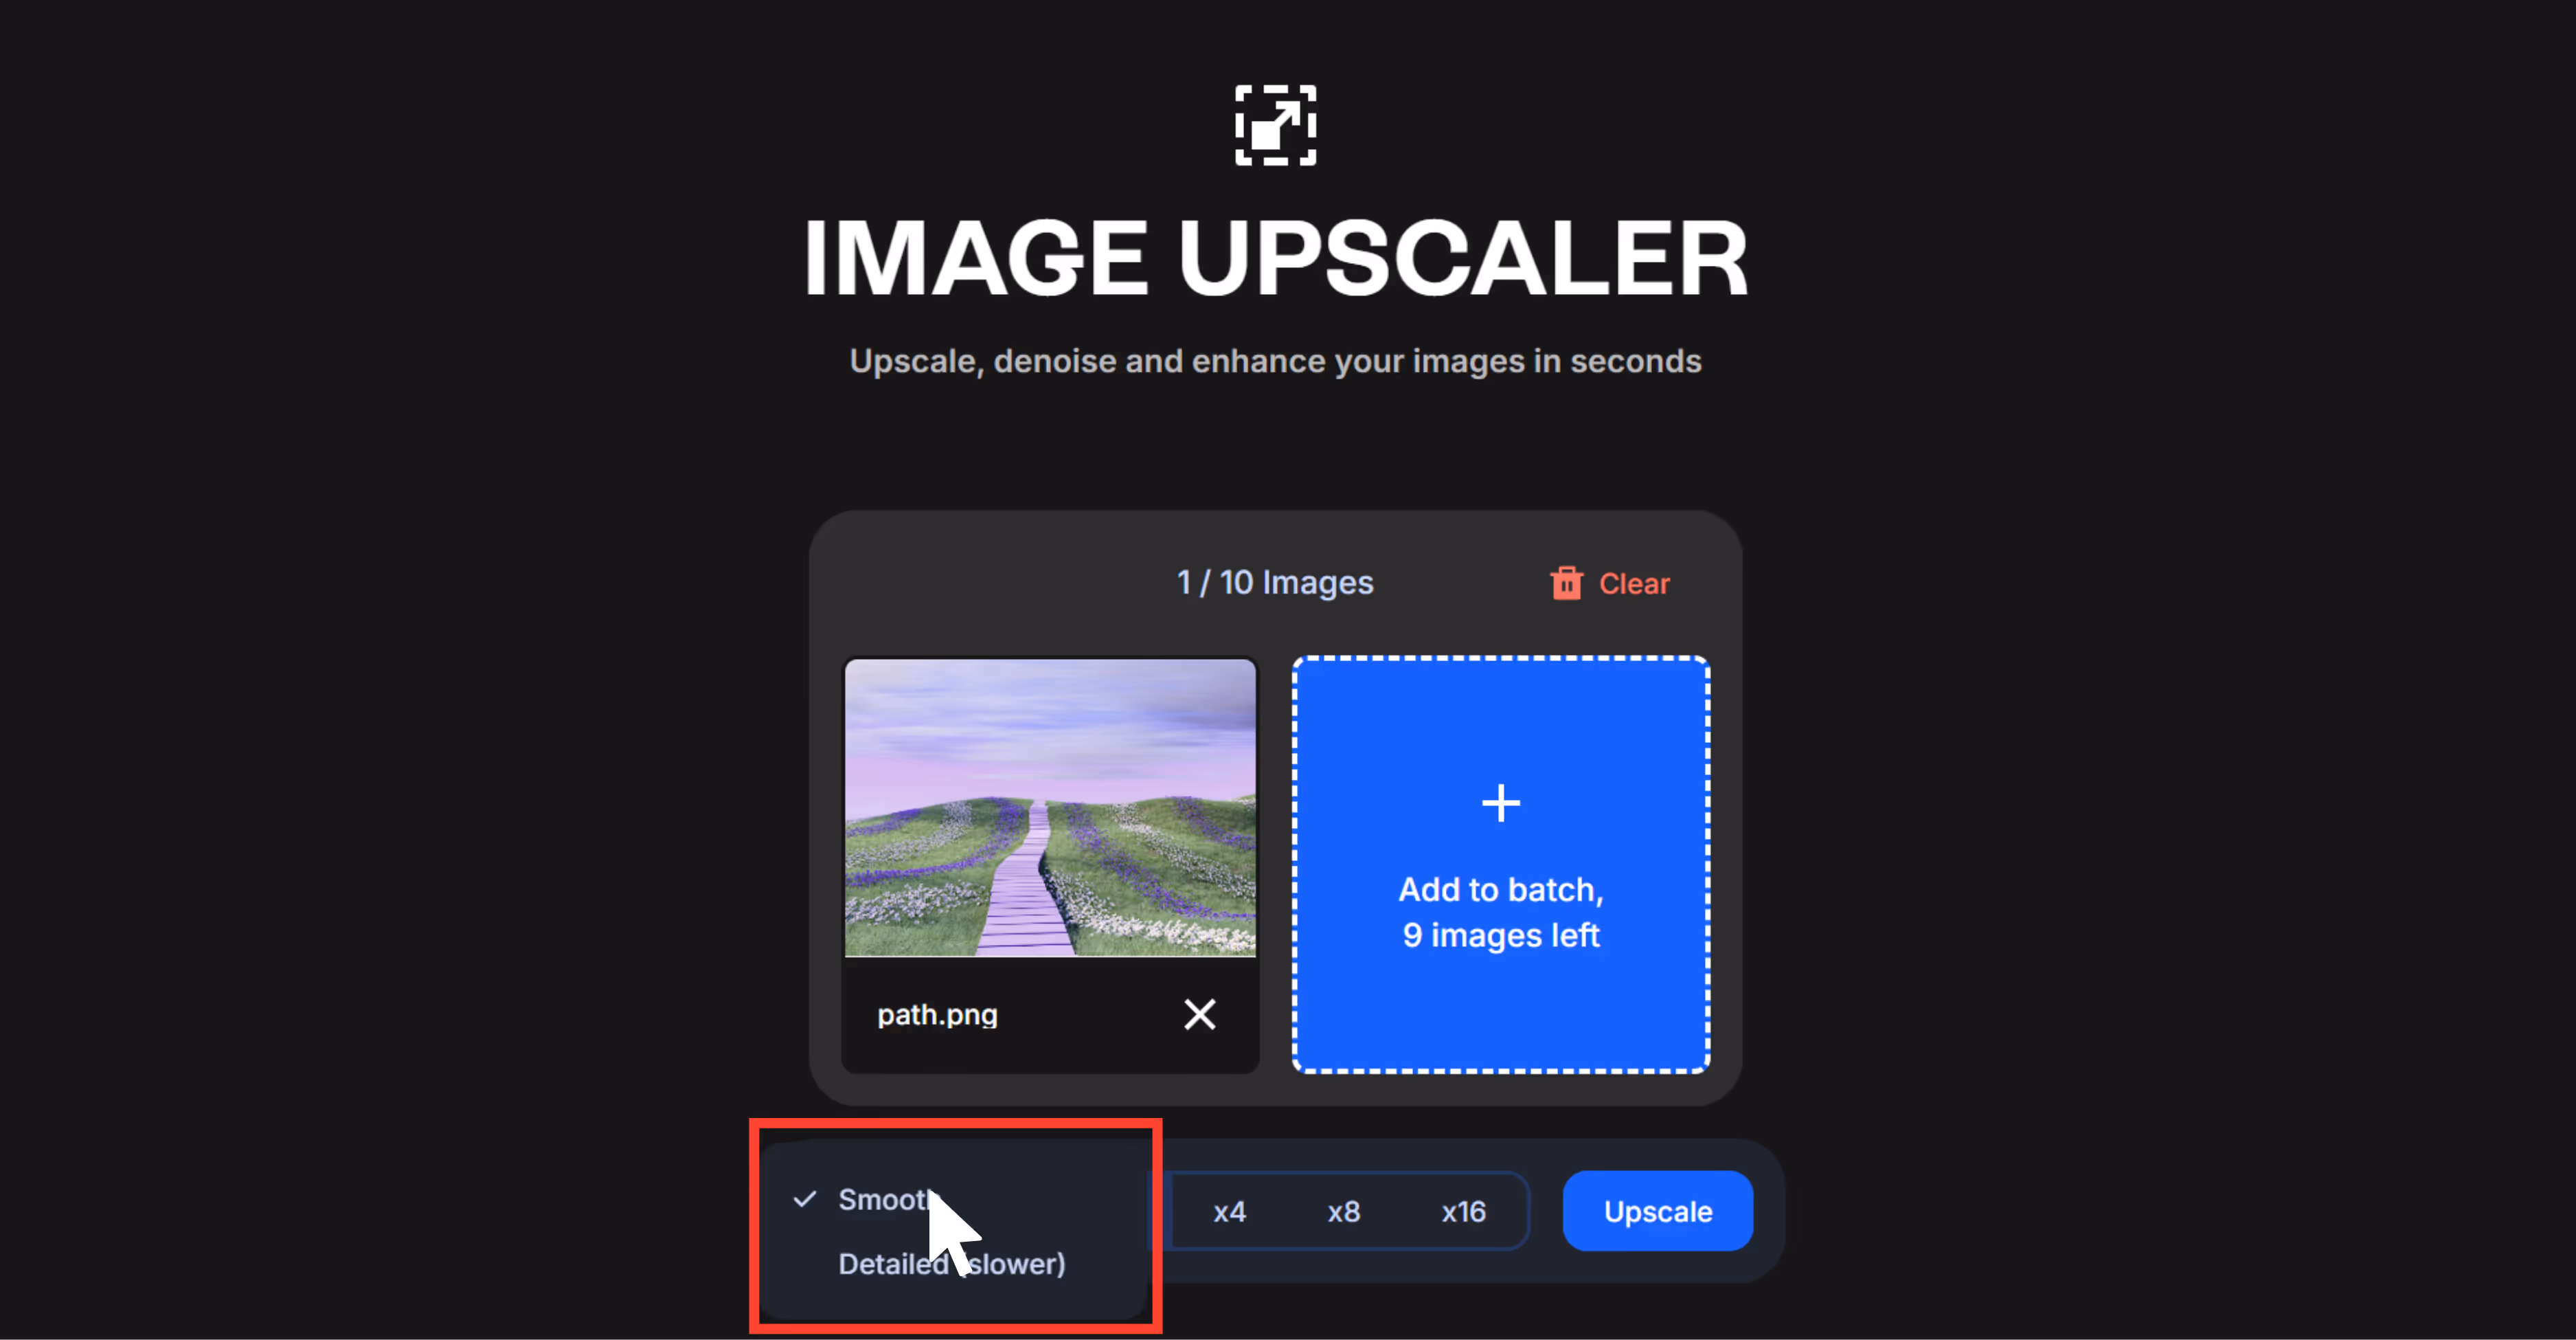
Step 4: Click on Upscale, and you will need to sign up, and the tool will do the rest.

Step 5: Download the image; if you are using the free version, it includes a watermark.
.avif)
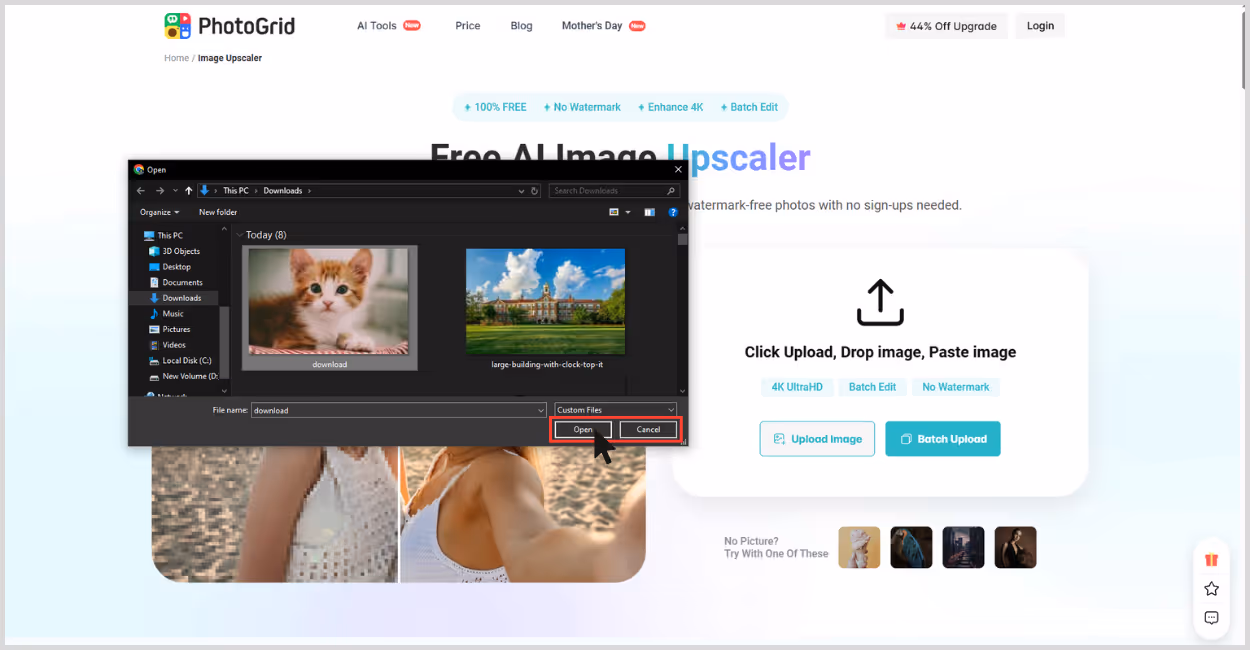
8. PhotoGrid
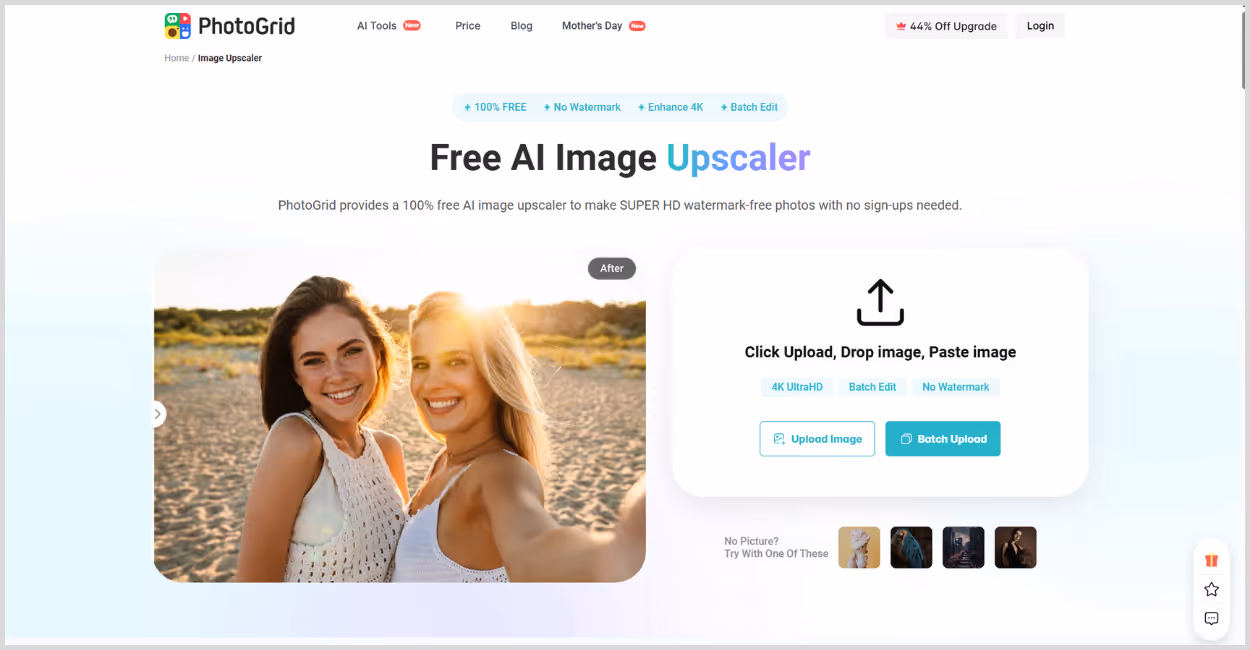
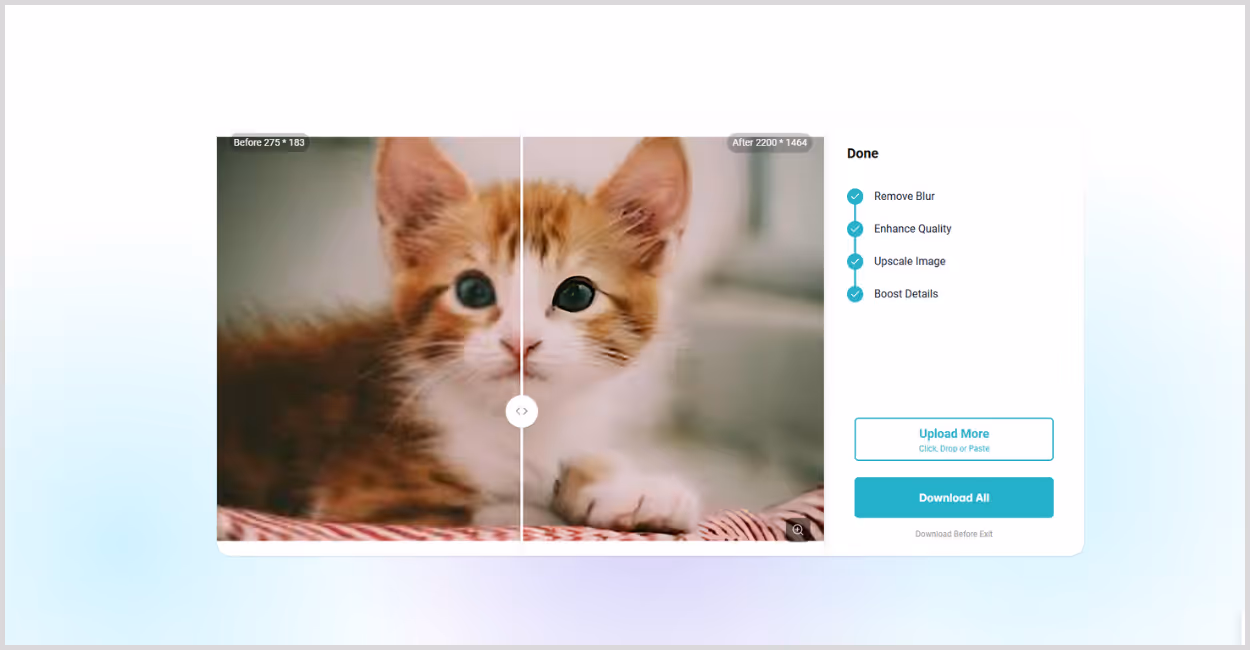
PhotoGrid’s AI Image Upscaler is a simple, web-based tool designed to upscale small-sized or blurry images with very little effort. I tested it on an old picture that was slightly blurred and lacked sharpness, especially around the edges.
This tool automates 4x image upscaling without selecting any image scale size. And the image turned out to be a high-resolution one. The result looked cleaner, especially in the edges, removed the blurry spots, and sharpened the texture as much as required. What I liked about the tool;
- No sign-up is required.
- Simple, easy-to-understand interface with no unnecessary steps.
- No selection of image scale is required.
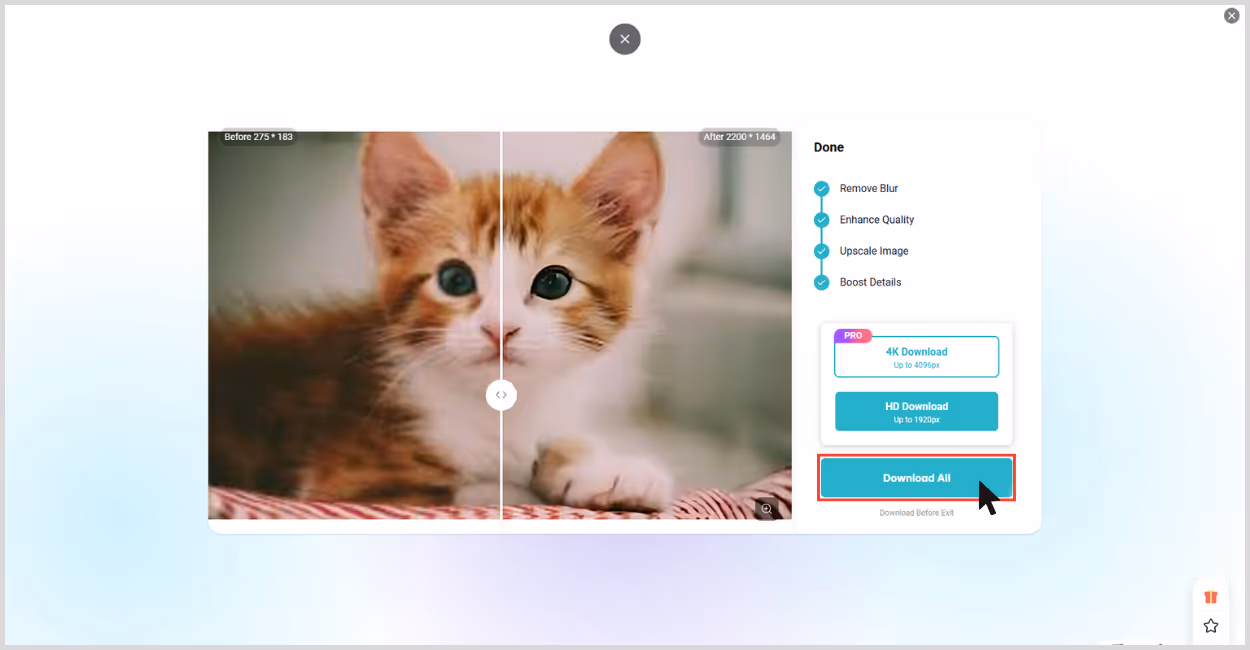
- Free to use, and the image can be downloaded without watermarks.
How to upscale the image resolution in PhotoGrid
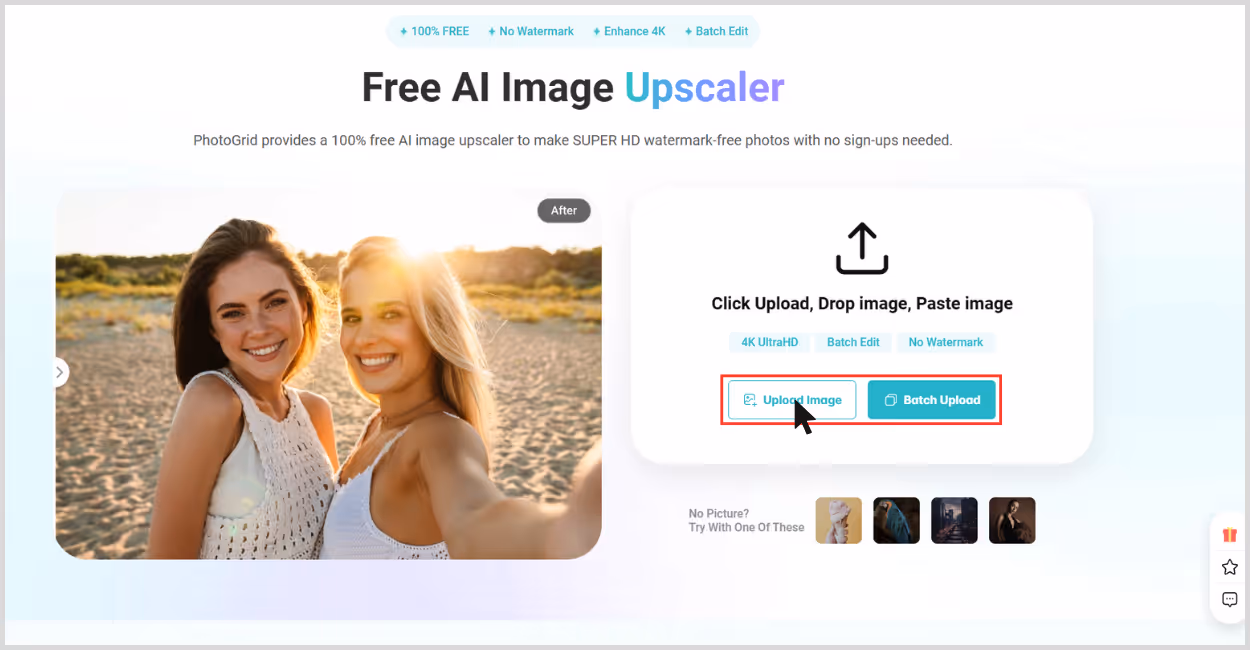
Step 1: Go to https://www.photogrid.app/en/image-upscaler.
Step 2: Click “Upload Image” and choose the file you want to upscale. You don’t have to select any image scale factors, as it automatically upscales the image to high resolution.
Step 3: Wait for processing – it takes just a few seconds.
Step 4: Preview the result – you’ll see the upscaled image directly.
Step 5: Download the image – a free download is available without any watermark.
Final thoughts
If you can manually control and have editing skills, tools like Photo But if you are looking for an easy tool that provides great output quality, AI upscalers are incomparable.
Pixelbin stood out with a perfect blend of speed, quality, and beginner-friendly experience. Other tools like Upscale.media, Pixelcut and others also offer impressive results for free or low-cost plans.
To maintain the image resolution, always save in high-resolution formats like PNG or TIFF and avoid repeated compressions. oshop or GIMP are one of the best choices.
FAQs
Image resolution refers to the number of pixels in an image. More pixels mean more detail and clarity. It’s often measured in pixels per inch (PPI) for screens or dots per inch (DPI) for print.
Pixelbin delivers the best balance of quality, speed, and usability. Other good options include Upscale.media, Pixelcut, and Clipdrop, depending on your needs.
Yes, especially using AI tools like Pixelbin or Upscale.media, which intelligently add missing details and smooth out edges to maintain sharpness by upscaling images without losing quality.
Upscaling can improve visible sharpness and size, but doesn’t “add” real detail. AI tools simulate added quality through pattern recognition and enhancement.
Many AI upscaling tools offer limited free versions like Pixelbin, Upscale.media and few more. For higher resolution output or batch processing, a premium plan may be required.
PNG and TIFF are ideal for saving high-quality images. They preserve details without lossy compression, unlike JPEG, which can degrade over time.